Every time you press the brake pedal, two components you have probably never thought about perform a remarkable feat of physics — converting the modest force of your leg into thousands of newtons of clamping pressure at each wheel. The brake booster and master cylinder sit together on the firewall at the back of the engine compartment, linked directly to your brake pedal and to the disc brakes (or drum brakes) at all four corners of your vehicle. Understanding how they function, how they fail, and what to do about it gives you a significant diagnostic advantage the next time your pedal behaviour changes.
Quick Answer: What Do the Master Cylinder and Brake Booster Do?
The brake booster uses engine vacuum — or hydraulic pressure on diesel and turbocharged engines, or an electric motor on hybrids and EVs — to multiply your pedal force before it reaches the master cylinder. The master cylinder then converts that amplified mechanical force into hydraulic pressure, typically 600–1,200 psi, and distributes it through brake lines to the calipers or wheel cylinders at each wheel. Together they form the hydraulic command centre of every modern braking system: the booster makes braking effortless, the master cylinder makes it hydraulically possible.
What the Master Cylinder and Brake Booster Are
Despite being bolted together as a single assembly, the master cylinder and brake booster are two distinct components with different jobs. They are mounted together on the firewall on the driver’s side of the engine bay, connected to the brake pedal via a push rod that passes through both units.
The Master Cylinder
The master cylinder is the hydraulic heart of your braking system. Its job is to convert mechanical force from the push rod into pressurised brake fluid that travels down brake lines to the calipers and wheel cylinders. Internally, it contains a tandem bore — two pistons arranged in series inside a single cylinder. This dual-piston design is not redundancy for performance; it is a safety requirement. The two pistons pressurise two separate hydraulic circuits simultaneously. Most modern vehicles use a diagonal split (front-left with rear-right, front-right with rear-left), so that if one circuit fails due to a leak, the remaining circuit can still provide meaningful braking force without causing the vehicle to pull violently to one side.
Sitting on top of the master cylinder is a translucent plastic reservoir containing the brake fluid supply. Inside the reservoir, a magnetic float rides the fluid surface and activates a reed switch when fluid drops below the minimum mark — this is what triggers the brake warning light on your dashboard. The fluid level should be checked monthly; if it is consistently dropping, there is a leak somewhere in the system that needs immediate investigation.
The Brake Booster
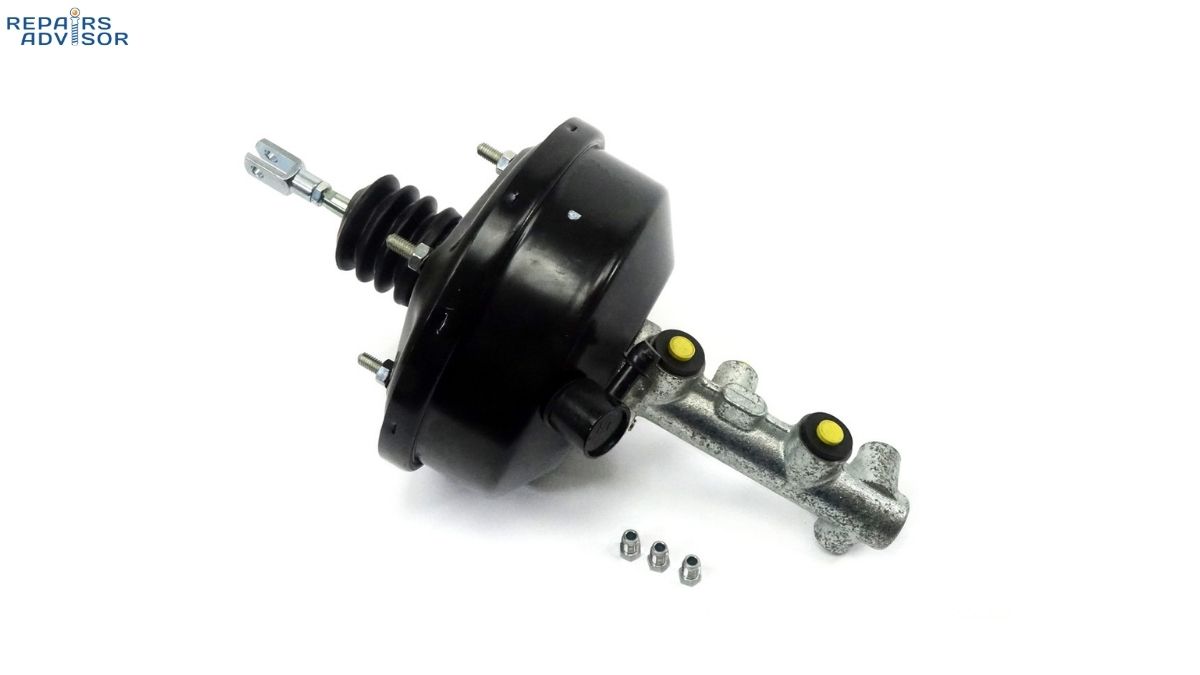
The brake booster bolts between the firewall and the master cylinder. On most petrol-engined passenger cars, it is a round metal canister — typically 8 to 11 inches in diameter — immediately recognisable once you know what you are looking for. Its sole purpose is to multiply the force you apply to the brake pedal before that force reaches the master cylinder pistons. Without a functioning booster, you can still stop the vehicle on hydraulics alone, but the pedal effort required is dramatically higher — fatiguing in city traffic, and dangerously slow to respond in an emergency.
There are three main types of brake booster in use today:
Vacuum booster — By far the most common type on petrol-engined vehicles. It uses the partial vacuum generated by the engine’s intake manifold to create a pressure differential across an internal rubber diaphragm, generating additional push force on the master cylinder push rod. Most vacuum boosters can add 200–300 lbs of force on top of the driver’s pedal input.
Hydro-boost — Used on diesel trucks, heavy vehicles, and some petrol vehicles with turbocharged or supercharged engines that produce insufficient intake vacuum. Instead of engine vacuum, the hydro-boost unit uses high-pressure fluid from the power steering pump — typically 1,500–2,700 psi — to amplify pedal force. It provides considerably more assist force than a vacuum booster and is found on most heavy-duty pickups and commercial vehicles. For more on how this pressure source works, see the guide to brake boosters.
Electric / iBooster — Standard on battery electric vehicles and increasingly common on hybrids, which produce little or no intake vacuum. An electric motor actuates the booster mechanism on demand, with no reliance on engine state. This design also enables the precise, independent brake actuation needed for automatic emergency braking and regenerative braking blending. More detail on this technology is covered in the brake-by-wire systems guide.
How They Work: Step-by-Step Operation
The sequence below describes a standard vacuum booster system, which covers the vast majority of petrol-engined passenger vehicles on the road.
At Rest — Engine Running
When the engine is running and no brake input is applied, the intake manifold generates a steady vacuum of roughly 18–22 inches of mercury (in/Hg). A rubber vacuum hose connects the manifold to the brake booster, and a one-way check valve at the booster inlet traps this vacuum inside the booster canister. Both sides of the internal rubber diaphragm are at equal vacuum — the diaphragm sits in a neutral, balanced position and exerts no force on the push rod. The master cylinder pistons are retracted by return springs, and hydraulic pressure throughout the brake circuit is effectively zero.
Brake Application
The moment you press the brake pedal, several things happen in rapid sequence:
The pedal linkage pushes the input rod into the booster, which cracks open a control valve. This valve seals off the vacuum supply to the rear chamber of the booster while simultaneously opening a port that admits atmospheric air (14.7 psi) into that same rear chamber. The front chamber remains under vacuum. The pressure difference across the diaphragm — atmospheric pressure on one side, vacuum on the other — acts on the diaphragm’s surface area (roughly 50–60 square inches on a typical 9-inch booster) and generates a substantial additional pushing force, commonly 200–300 lbs on top of the driver’s own leg effort.
This combined force travels through the output push rod into the master cylinder. The push rod drives both pistons forward in the tandem bore, pressurising the brake fluid in both hydraulic circuits. Pressure builds rapidly — typical operating pressures run from 600 psi for light braking to 1,200 psi or more during hard stops. This pressurised fluid travels through rigid steel brake lines and flexible rubber hoses to the brake calipers, where it forces the caliper pistons outward against the brake pads and rotors, generating the friction that slows the vehicle.
Modulation and Pedal Feel
A well-designed booster system provides proportional assist — the harder you push, the more vacuum assist you get, in proportion to pedal input. This is achieved through the reaction disc inside the booster, a rubber disc that transmits a fraction of the output force back to the driver’s foot, giving you meaningful pedal feedback rather than an on/off feel. Proper pedal feel is a calibrated result of booster size, master cylinder bore diameter, and reaction disc stiffness — all of which interact to create the characteristic braking feel of a given vehicle.
Brake Release
When you release the pedal, the control valve returns to its rest position: the atmospheric air port closes and the vacuum port reopens. Vacuum equalises across both sides of the diaphragm, and the diaphragm spring returns the diaphragm to neutral. Simultaneously, the master cylinder return springs push the pistons back, dropping hydraulic pressure throughout the circuit. The brake caliper piston seals elastically retract the pistons a few thousandths of an inch, releasing pad-to-rotor contact. The system is ready for the next brake application within milliseconds.
When the Booster Fails: Manual Braking
If the booster fails completely — diaphragm rupture, vacuum hose disconnection, check valve failure — the master cylinder still functions hydraulically. However, without boost assist, the driver must supply all the force needed to build adequate line pressure, which can require 3–4 times the normal pedal effort. The vehicle will stop, but stopping distances increase substantially, particularly in emergency situations. This is why any symptom of booster failure should be treated as urgent.
Symptoms of Failure: What to Watch For
Brake booster and master cylinder failures produce distinct, recognisable symptoms. The key diagnostic distinction is straightforward: a hard pedal that requires excessive effort points to the booster. A soft, spongy, or sinking pedal points to the master cylinder.
Safety Warning: Any change in brake pedal behaviour — stiffness, sponginess, sinking, or pulling — is a safety-critical symptom requiring immediate inspection by a qualified technician. Do not continue driving if you notice unexpected changes in braking performance.
Brake Booster Failure Symptoms
Hard, stiff brake pedal — The most common and immediate symptom. Without vacuum assist, the pedal requires dramatically more force to achieve normal deceleration. Some drivers describe pressing the pedal as pushing against a solid wall.
Increased stopping distance — A failing booster delivers less assist, meaning lower line pressure for a given pedal effort, which translates directly to longer stopping distances. This may be gradual at first and easy to miss until conditions require an emergency stop.
Hissing noise when braking — A audible hiss when pressing or releasing the pedal typically indicates a vacuum leak — either through a cracked or collapsed vacuum hose, a failed check valve, or a ruptured booster diaphragm. On some vehicles, a diaphragm tear allows booster vacuum to feed into the intake manifold, which can cause rough idle or unexpected stalling.
Pedal stays hard after engine start — A simple functional test: with the engine off, pump the brake pedal 5–10 times to exhaust any vacuum stored in the booster. Hold light pedal pressure and start the engine. If the booster is functioning, the pedal will drop noticeably and feel softer as vacuum builds in the booster chamber. If the pedal remains hard and does not drop, the booster is likely not functioning correctly.
Pedal does not return fully — If booster spring force is inadequate due to internal wear, the pedal may return slowly or incompletely after release, contributing to brake drag.
Master Cylinder Failure Symptoms
Soft, spongy, or sinking pedal — The classic master cylinder failure symptom. Internal rubber seals degrade over time, allowing brake fluid to bypass the pistons internally rather than being pressurised and held. This results in a pedal that feels spongy under initial pressure and then slowly sinks toward the floor as fluid bypasses the worn seals. Unlike air in the lines (which also causes sponginess), internal bypass cannot be resolved by bleeding.
Brake pedal slowly sinks under steady pressure — If the pedal sinks when you hold consistent foot pressure at a red light, suspect internal master cylinder seal failure. A healthy master cylinder holds pressure without pedal travel.
External fluid leak — Visible brake fluid on the firewall, around the master cylinder body, or dripping from the booster-to-master-cylinder interface indicates a failed bore seal or reservoir seal. Even small leaks are serious because brake fluid loss directly reduces stopping ability.
Dragging brakes — A master cylinder that fails to fully retract its pistons maintains residual pressure in the brake lines, causing calipers to partially apply continuously. This manifests as the vehicle feeling sluggish, pulling slightly, or as abnormal heat in the wheels and brakes after driving.
Contaminated brake fluid — Brake fluid should appear clear to pale amber. Dark brown or black fluid with particles indicates that the master cylinder’s internal rubber seals are degrading and shedding material into the fluid. Contaminated fluid accelerates wear throughout the entire hydraulic circuit, including ABS modulator valves and caliper seals.
Brake warning light — Activation of the red brake warning light (separate from the ABS light) can indicate fluid level has dropped below the minimum sensor threshold — a possible sign of an external or internal leak in the master cylinder.
Lifespan, Maintenance, and Replacement
Expected Service Life
Both components are designed to last the life of the vehicle under normal conditions, but real-world service lives vary considerably based on driving environment, brake fluid maintenance, and climate.
Master cylinders typically last 60,000–200,000 miles. The primary failure mode is internal seal degradation, which is accelerated by moisture-contaminated brake fluid. Brake fluid is hygroscopic — it absorbs water from the atmosphere over time — and water in the fluid corrodes the cylinder bore and degrades the rubber seals from the inside. Vehicles operated in high-humidity environments or where brake fluid has not been flushed regularly tend to see master cylinder failures at the lower end of this range.
Vacuum brake boosters commonly last 80,000–120,000 miles, though diaphragm life is shortened significantly in dry climates where the rubber dries and cracks prematurely. A brake fluid leak from the master cylinder can also migrate into the booster, contaminating and attacking the booster diaphragm — another reason to address any master cylinder leak immediately rather than delaying.
Maintenance Practices That Extend Life
The most effective maintenance step for both components is regular brake fluid flushing. Most manufacturers recommend flushing the entire hydraulic circuit every two years or 30,000 miles, regardless of fluid colour. Fresh fluid maintains proper lubrication of internal seals and prevents the corrosive effects of moisture accumulation. See the complete guide to how brake fluid works for DOT specifications and flush intervals.
The vacuum hose between the intake manifold and the brake booster should be inspected periodically — particularly on vehicles over 5 years old — for cracking, softness, collapse under vacuum, or disconnection at the fittings. A vacuum hose that leaks partially may cause a gradual, intermittent loss of braking assist that worsens over time before becoming obvious.
Replacement: What the Job Involves
Master cylinder replacement is a job that requires careful technique regardless of who performs it. The critical step is bench bleeding — purging all air from the new master cylinder before it is installed on the vehicle. Air trapped in the cylinder bore cannot be removed once the unit is fitted, resulting in a permanently spongy pedal. Bench bleeding involves securing the master cylinder in a vice, installing bleed tubes that return fluid from the outlet ports back into the reservoir, and repeatedly stroking the piston until no more air bubbles emerge from the return tubes. Skipping this step is the single most common error in master cylinder replacement.
After installation, a full four-corner brake bleed is required to purge any air introduced into the circuit during the changeover. The procedure must be performed in the correct sequence for the vehicle (typically starting at the wheel furthest from the master cylinder) and with the correct brake fluid specification for the system.
Brake booster replacement requires disconnecting the vacuum hose, unbolting the booster from the firewall (typically four nuts accessed from inside the cabin), and disconnecting the pedal linkage — an access challenge on many modern vehicles where the booster is surrounded by other components. On some platforms, the instrument panel must be partially removed for access. Labour time ranges from 1 to 3 hours depending on vehicle design.
Typical replacement costs: master cylinder parts run $80–$350 for most vehicles, plus 1–2 hours of labour. Brake booster parts run $100–$350, plus 1–3 hours of labour. Combined replacement on the same vehicle typically costs $700–$2,000 in total including labour, with luxury and European vehicles at the higher end of that range.
Vehicle-specific torque specifications, bleeding sequences, and pushrod adjustment procedures are documented in the OEM service manuals for each platform. Refer to the repair manual library for your vehicle make — including Toyota, Ford, and Honda — for model-specific procedures.
Professional Service Recommendation: Master cylinder and brake booster replacement are safety-critical procedures. Errors in bench bleeding, brake line torque, or pushrod adjustment can result in brake failure. Intermediate DIY mechanics with hydraulic brake system experience may tackle master cylinder replacement on straightforward platforms. Beginners should have this work performed by a qualified technician. After any replacement, the complete braking system must be tested and confirmed fully functional before the vehicle returns to road use.
How These Components Interact with the Broader Braking System
The master cylinder does not work in isolation. Understanding how it interfaces with the rest of the braking system helps explain several behaviours that can otherwise be confusing to diagnose.
Split hydraulic circuits and the proportioning valve — The two circuits from the master cylinder do not deliver identical pressure to the front and rear brakes. A brake proportioning valve limits maximum pressure to the rear brakes, preventing rear wheel lockup under heavy braking by ensuring the front brakes always apply harder. On vehicles with ABS, the modulator takes over this function electronically.
ABS interaction — The ABS hydraulic modulator sits in the brake circuit between the master cylinder and the individual wheel calipers. Under normal braking, the modulator passes through whatever pressure the master cylinder generates. During an ABS event, the modulator rapidly opens and closes valves to cycle pressure at individual wheels, preventing lockup. Importantly, ABS modulator valve body failures can produce symptoms similar to a failing master cylinder — a soft or spongy pedal — which is why a full system inspection is warranted before condemning the master cylinder on a vehicle with recent ABS activity.
Electronic stability control — Electronic stability control systems use the same hydraulic modulator as ABS to apply individual wheel brakes independently, countering oversteer or understeer. The master cylinder provides the base pressure that the modulator redirects as needed.
Drum brake systems — On vehicles with rear drum brakes, the master cylinder circuit feeds wheel cylinders rather than calipers. Wheel cylinders are hydraulically identical in principle to caliper pistons — pressurised fluid extends the pistons outward to push the brake shoes against the drum. The master cylinder interacts with both systems equally through the same hydraulic principles.
EV and hybrid systems — On vehicles using an iBooster or similar electric booster, the master cylinder remains largely conventional, but the booster is controlled electronically. This allows the braking system to blend regenerative braking (from the drive motor acting as a generator) with hydraulic friction braking at the wheel level, with the iBooster adjusting the hydraulic contribution in real time to maintain consistent pedal feel regardless of how much regenerative retardation is available at any given moment.
Conclusion
The brake booster and master cylinder are the foundation of hydraulic braking. The booster makes your pedal effort manageable; the master cylinder turns that effort into the hydraulic force that ultimately presses pad against rotor and slows your vehicle. When either component begins to fail, the symptoms are usually clear — a hard pedal (booster) or a soft, sinking pedal (master cylinder) — and in both cases the appropriate response is the same: have the system inspected promptly by a qualified technician before the problem progresses.
Regular brake fluid maintenance is the single most effective preventive step you can take for both components. For vehicle-specific service intervals, pushrod adjustment specifications, and complete brake bleeding procedures for your make and model, a factory-equivalent repair manual provides the detail that generic guides cannot. You can also explore the parking brake system guide to understand how the mechanical holding system interacts with the hydraulic circuit you have just learned about.
Master Cylinder and Brake Booster: Frequently Asked Questions
The brake booster and master cylinder are the hydraulic foundation of every modern braking system. These questions cover how they work, how they fail, and when professional service is required — drawing from the complete guide to how the master cylinder and brake booster work.
Function and Operation
What is the difference between the master cylinder and the brake booster?
They are two separate components with different jobs, mounted together as one assembly on the firewall. The brake booster amplifies the force you apply to the pedal — using engine vacuum, power steering pressure, or an electric motor depending on the vehicle — before that force reaches the master cylinder. The master cylinder then converts the amplified mechanical force into hydraulic pressure and distributes it through brake lines to the calipers or wheel cylinders at each wheel. Simply put: the booster makes braking effortless, the master cylinder makes it hydraulically possible.
How does a vacuum brake booster work?
A vacuum booster uses the partial vacuum generated by the engine’s intake manifold — typically 18–22 inches of mercury — to create a pressure differential across a rubber diaphragm inside the canister. When you press the pedal, a control valve admits atmospheric air (14.7 psi) into one side of the diaphragm while the other side remains under vacuum. This pressure difference acts across the diaphragm’s surface area and generates an additional 200–300 lbs of push force on the master cylinder push rod, on top of your own leg effort. When you release the pedal, the valve seals off the air port and vacuum equalises across both chambers, returning the diaphragm to neutral. The full step-by-step operation is covered in the guide to how brake boosters work.
What happens if the brake booster fails while driving?
If the booster fails completely, the master cylinder still functions and the vehicle can be stopped using hydraulic pressure alone. However, without boost assist the pedal requires approximately 3–4 times more effort than normal to generate sufficient line pressure. Stopping distances increase significantly, particularly during emergency braking. You can still stop the vehicle safely at low speeds with sufficient effort, but high-speed or emergency stops become substantially harder to execute. Any loss of power brake assist should be treated as an urgent fault requiring immediate repair.
Can you drive without a brake booster?
Technically yes, but it is not safe to do so in normal traffic conditions. The brakes will still work hydraulically — older vehicles and some race cars operate without boosters — but the pedal effort required is dramatically higher than drivers are accustomed to, and stopping distances increase accordingly. If you suspect your booster has failed, have the vehicle inspected promptly rather than continuing to drive it in regular conditions.
Why does my brake pedal feel hard when I start the car?
Before the engine starts, there is no vacuum supply to the booster. Pumping the pedal with the engine off depletes whatever vacuum reserve was stored in the booster canister, leaving the pedal feeling stiff and mechanical. Once the engine starts and vacuum rebuilds in the booster (within a few seconds), the pedal should drop noticeably and feel softer. This pedal-drop on engine start is actually a useful functional test: if the pedal stays hard after the engine starts and does not soften, the booster is likely not functioning correctly.
What is hydro-boost and when is it used?
Hydro-boost replaces the vacuum canister with a hydraulic unit that uses high-pressure fluid from the power steering pump — typically 1,500–2,700 psi — to provide braking assist. It is used on diesel engines, turbocharged and supercharged petrol engines, and heavy-duty vehicles that do not produce sufficient intake manifold vacuum for a conventional vacuum booster. Hydro-boost provides more assist force than a vacuum booster and is standard on most heavy-duty trucks and many larger commercial vehicles.
How does an electric brake booster work on EVs and hybrids?
Electric brake boosters (commonly called iBooster or e-Booster depending on the manufacturer) use an electric motor to actuate the booster mechanism directly, with no dependence on engine vacuum or power steering pressure. This suits EVs and plug-in hybrids that produce little or no intake vacuum. The electric booster also enables precise, electronically controlled brake actuation for automatic emergency braking and regenerative braking blending — the system can adjust hydraulic contribution in real time as the drive motor’s regenerative retardation varies. The brake-by-wire systems guide covers this technology in detail.
Why does the master cylinder have two pistons?
The tandem (dual-piston) design pressurises two completely separate hydraulic circuits simultaneously. Most modern vehicles use a diagonal split: one circuit serves the front-left and rear-right brakes, the other serves the front-right and rear-left. If one circuit loses pressure due to a leak or seal failure, the remaining circuit can still apply one front and one rear brake, providing enough stopping force to bring the vehicle to a halt without causing it to pull severely to one side. This redundancy is a fundamental safety requirement for road vehicles.
Symptoms and Diagnosis
How do I know if my brake booster is bad?
The primary symptom of a failing brake booster is a hard, stiff brake pedal that requires noticeably more effort than usual. You may also notice increased stopping distances, a hissing noise when pressing or releasing the pedal (indicating a vacuum leak), rough engine idle or unexpected stalling (vacuum leak feeding into the intake manifold), or a pedal that does not return fully after release. Perform the engine-start test: pump the pedal 5–10 times with the engine off to exhaust the vacuum reserve, then hold light pedal pressure and start the engine. A functioning booster will cause the pedal to drop noticeably as vacuum builds. If the pedal stays hard, the booster is likely faulty.
How do I know if my master cylinder is bad?
Master cylinder failure typically produces a soft, spongy, or sinking pedal rather than a hard one. Specific signs include: a pedal that slowly sinks toward the floor under steady pressure (internal seal bypass), a mushy pedal feel from the initial press, visible brake fluid leaking at the firewall or reservoir seals, dark brown or black brake fluid caused by degrading internal rubber seals, brake warning light activation due to low fluid level, or dragging brakes caused by the cylinder failing to fully retract. If you notice any of these symptoms, have the system inspected immediately — do not wait for the condition to worsen.
What is the difference between a hard pedal and a soft pedal?
This distinction is the key diagnostic shortcut for the master cylinder and booster assembly. A hard pedal that requires excessive force to depress points to the booster — it is not multiplying your pedal effort as it should. A soft, spongy, or sinking pedal that lacks resistance or gradually drops under held pressure points to the master cylinder — it is not holding hydraulic pressure as it should. Air in the brake lines can also cause a spongy pedal, but unlike air (which can be resolved by bleeding), internal master cylinder seal failure cannot be fixed by bleeding the system.
Can a bad brake booster cause the pedal to go to the floor?
Yes, in some cases. A severely failed booster combined with vacuum loss may prevent adequate braking force from building, making the pedal feel as though it goes to the floor without engaging the brakes firmly. However, a pedal that sinks completely to the floor under pressure more commonly indicates a master cylinder failure with significant internal bypass, or a major brake fluid leak elsewhere in the system. Either way, a pedal that reaches the floor without providing normal braking is a serious safety condition requiring immediate inspection — do not drive the vehicle.
Why does my brake pedal hiss when I press it?
A hissing or whooshing sound when pressing or releasing the brake pedal typically indicates a vacuum leak in the brake booster circuit. The leak may be in the rubber vacuum hose connecting the booster to the intake manifold, at the check valve on the booster inlet, or through a torn or cracked internal diaphragm inside the booster canister itself. A diaphragm tear can draw outside air into the booster and then into the intake manifold, which may also cause rough idle or a lean running condition. Have the vacuum circuit inspected as soon as this symptom is noticed.
Can a brake booster leak brake fluid?
Vacuum-type brake boosters do not contain brake fluid internally, so they do not leak it directly. However, if the master cylinder develops a rear seal failure, brake fluid can migrate backward through the push rod bore into the booster canister. Brake fluid contamination attacks the booster’s internal rubber diaphragm and seals, eventually causing the booster to fail as well. This is one reason why a master cylinder leak should be addressed promptly rather than simply topping up the reservoir and monitoring — the secondary damage to the booster can significantly increase the total repair cost.
Does ABS affect the master cylinder?
The master cylinder generates the base hydraulic pressure that the ABS hydraulic modulator redistributes during an ABS event. Under normal braking, the modulator is transparent — it simply passes through whatever pressure the master cylinder generates. During wheel lockup, the modulator rapidly cycles valves to reduce and restore pressure at individual wheels. Importantly, ABS modulator valve body failures can produce symptoms very similar to a failing master cylinder — a spongy or soft pedal — which is why a full system inspection is warranted before diagnosing the master cylinder on a vehicle with an illuminated ABS warning light.
Maintenance and Replacement
How long does a master cylinder last?
Most master cylinders last between 60,000 and 200,000 miles, with the wide range driven primarily by brake fluid maintenance history and operating environment. The main failure mode is internal seal degradation caused by moisture-contaminated brake fluid. Brake fluid is hygroscopic — it absorbs water from the atmosphere over time — and water accelerates corrosion of the cylinder bore and attacks the rubber seals from the inside. Vehicles where brake fluid has been flushed regularly every two years typically see master cylinders lasting toward the higher end of this range. See the guide to how brake fluid works for full DOT specifications and flush intervals.
How long does a brake booster last?
Vacuum brake boosters typically last 80,000–120,000 miles under normal conditions. The primary failure modes are diaphragm degradation (rubber hardens and cracks over time, particularly in dry climates) and check valve failure. Hydro-boost units tend to last longer due to their more robust hydraulic construction. Brake fluid contamination from a leaking master cylinder can shorten booster life significantly. Inspecting the vacuum hose for cracking or collapse annually on older vehicles is a simple preventive measure.
How often should brake fluid be flushed?
Most manufacturers recommend flushing the complete brake hydraulic circuit every two years or 30,000 miles, regardless of fluid appearance. Fresh fluid maintains proper lubrication of all internal seals throughout the system — including the master cylinder, calipers, and wheel cylinders — and prevents the corrosive effects of moisture accumulation. This is the single most effective maintenance step for extending the service life of both the master cylinder and the brake booster. Check your vehicle’s owner’s manual for the specific recommendation for your model.
What is bench bleeding a master cylinder?
Bench bleeding is the process of purging all air from a new master cylinder before it is installed on the vehicle. It is performed with the master cylinder secured in a vice on a workbench: bleed tubes are attached to the outlet ports and routed back into the reservoir, then the piston is stroked repeatedly until no more air bubbles emerge from the return tubes and the reservoir. Skipping bench bleeding is the most common error in master cylinder replacement — air trapped in the cylinder bore cannot be fully removed once the unit is fitted, resulting in a persistently spongy pedal that cannot be resolved by conventional brake bleeding at the wheels.
Do I need to bleed the brakes after replacing the master cylinder?
Yes. Even after thorough bench bleeding of the new master cylinder, a full four-corner brake bleed is required after installation to purge any air introduced into the lines during the changeover. The bleed sequence should follow the manufacturer’s specified order for your vehicle — typically starting at the wheel furthest from the master cylinder. Use only the brake fluid specification listed in your owner’s manual. Vehicle-specific bleeding procedures and torque specifications are documented in the factory service manual for each platform, available through the repair manual library for brands including Ford, Toyota, and Honda.
How much does it cost to replace the master cylinder and brake booster?
Master cylinder parts typically run $80–$350 for most passenger vehicles, plus 1–2 hours of labour. Brake booster parts run $100–$350, plus 1–3 hours of labour depending on access difficulty. Combined replacement on the same vehicle typically falls in the $700–$2,000 range including parts and labour, with European and luxury vehicles at the higher end. If the master cylinder has leaked fluid into the booster, both components usually require replacement together, and the total brake fluid and bleed costs add to the overall bill.
Can I replace the master cylinder myself?
Master cylinder replacement is within reach for intermediate DIY mechanics with hydraulic brake system experience, but it is not a beginner job. The critical mandatory step — bench bleeding — requires specific technique and cannot be skipped. A full four-corner brake bleed is required after installation, and pushrod adjustment (where applicable) must be correct to avoid dragging brakes or insufficient pedal travel. Errors in any of these steps can result in degraded or absent braking performance. Beginners should have this work performed by a qualified technician. The braking system is safety-critical, and any work on it must be verified fully functional before the vehicle returns to road use.
How do the master cylinder and brake booster relate to disc and drum brakes?
The master cylinder generates hydraulic pressure that the braking system at each wheel translates into friction. On vehicles with disc brakes, this pressure acts on caliper pistons that squeeze brake pads against the rotor. On vehicles with drum brakes, the same hydraulic pressure acts on wheel cylinders that push brake shoes against the drum. The master cylinder interacts with both systems through identical hydraulic principles — the difference is only in how pressure is applied at the wheel end. The brake proportioning valve in the circuit limits rear brake pressure relative to front, preventing rear wheel lockup under hard braking.