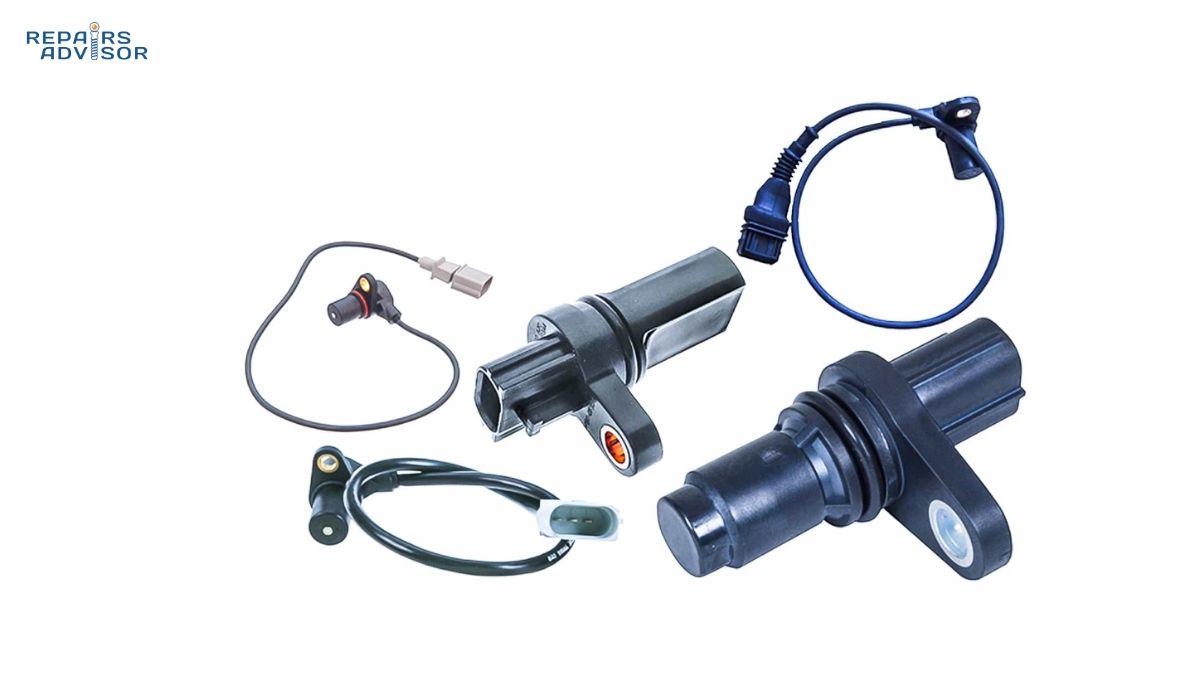
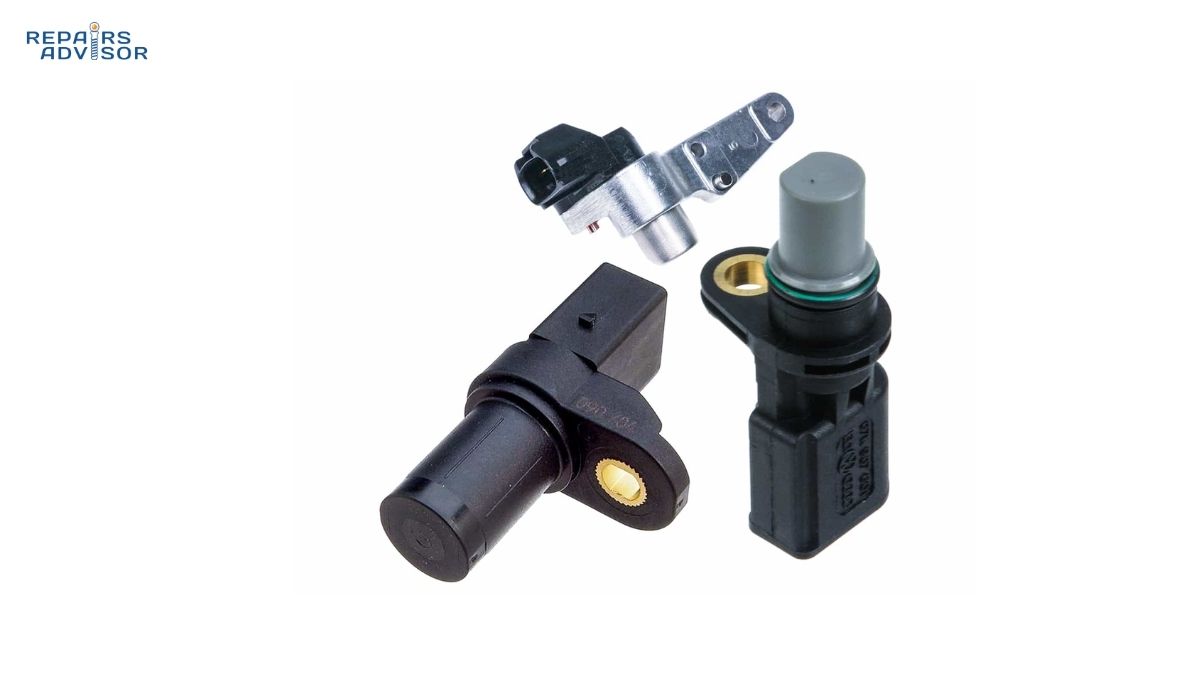
About the size of your thumb and costing less than $50 in parts, the camshaft position sensor is easy to overlook — right up until it fails. This small sensor feeds the engine control unit (ECU) real-time data on camshaft position, which the ECU uses to time fuel injection and spark delivery for every cylinder. When it starts to go, the consequences range from a check engine light and rough idle through to misfires, stalling at speed, and a hard no-start. This guide covers what the camshaft position sensor does, how to recognise when it’s failing, how to test it, and how to replace it yourself.
Quick Answer
A failing camshaft position sensor typically triggers a check engine light (codes P0340–P0344), along with symptoms such as engine misfires, rough idle, hard starting, and stalling. Most sensors can be tested with a multimeter and replaced in under an hour with basic hand tools. Replacement parts cost $20–$150, with professional service totalling $127–$400 depending on vehicle make and sensor location.
What Is a Camshaft Position Sensor?
The camshaft position sensor — commonly abbreviated as CMP sensor — monitors the rotational position of the camshaft and reports that information to the ECU in real time. The ECU uses this data to identify which cylinder is approaching its compression stroke, allowing it to sequence fuel injection and ignition timing correctly across all cylinders.
The CMP sensor works alongside — but does something different from — its close sibling, the crankshaft position sensor. The crankshaft position sensor tracks crankshaft speed and piston position, while the camshaft position sensor tracks valve timing and cylinder phase. The ECU cross-references both signals to build an accurate picture of exactly where each piston sits in its four-stroke cycle at any given moment. Lose one, and the ECU is working blind on half the equation.
Modern engines typically have one CMP sensor per camshaft. That means a four-cylinder engine with a single camshaft has one sensor, while a V6 or V8 with dual overhead cams (DOHC) per bank may have three or four sensors in total. Understanding the camshaft and valve system it’s attached to helps make sense of why this sensor is so important for engine timing and performance.
How the Camshaft Position Sensor Works
There are two main types of camshaft position sensors, and they generate their signals quite differently. Knowing which type your vehicle uses matters when it comes to testing.
Hall Effect Sensors (3-Wire)
Hall effect sensors are the most common type on modern vehicles. They use three wires: a power supply (typically 5–12V), a ground, and a signal wire back to the ECU. Inside the sensor, a Hall effect IC sits between a permanent magnet and a rotating trigger wheel attached to the camshaft. As the trigger wheel rotates, its teeth and gaps alternately disrupt and restore the magnetic field passing through the IC, causing the sensor to switch its output between 0V and 5V — a clean digital square wave the ECU can read precisely. Hall effect sensors can detect static magnetic fields, which makes them particularly well suited to VVT systems where the ECU needs accurate cam position data even at very low rpm.
Inductive (Magnetic/2-Wire) Sensors
Older and some current applications use inductive sensors — passive, two-wire devices. A copper coil wound around a permanent magnet generates a sine wave AC voltage as the reluctor wheel teeth pass by. Unlike the Hall effect’s fixed square wave, the inductive sensor’s output amplitude increases with camshaft speed, which can cause problems at very low cranking rpm. Inductive sensors are also more sensitive to the air gap between sensor tip and reluctor teeth, making installation precision more critical.
What the ECU Does with the Signal
The CMP signal does more than just identify cylinder position. The engine management system uses it for several interconnected functions:
Sequential fuel injection: Without camshaft position data, the ECU cannot determine which cylinder is actually ready to receive fuel. It falls back to group injection or simultaneous injection, which is less efficient and causes rougher running.
Ignition timing: Knowing which cylinder is on its compression stroke allows the ECU to fire that cylinder’s ignition coil at precisely the right moment, rather than guessing based on crankshaft position alone.
Variable valve timing feedback: On engines equipped with VVT, the CMP sensor monitors the actual position of the cam phaser against the commanded position from the variable valve timing system. If the phaser is not advancing or retarding as commanded, the ECU can detect the discrepancy and log a fault.
Rapid start: Engines with unique trigger wheel patterns for each cylinder use the CMP signal to begin fuelling within 180 degrees of crankshaft rotation — essential for stop-start systems and fast idle recovery.
Where Is the Camshaft Position Sensor Located?
Sensor location varies considerably between makes and models. Common locations include the rear of the cylinder head (near the camshaft end), the timing cover area at the front of the engine, the lifter valley on V-type engines, and alongside the cam sprocket. On DOHC engines, there will be a separate sensor for the intake and exhaust camshafts on each bank — these often look identical, so it is worth labelling them before removal to avoid reinstalling them in the wrong positions.
The most reliable way to locate your specific sensor is to consult the factory service manual for your vehicle. Brand-specific manuals for Ford, Toyota, and Honda will show exact sensor locations, connector pin-outs, and torque specifications — details that make the difference between a clean replacement and a frustrating comedown.
Symptoms of a Bad Camshaft Position Sensor
Camshaft position sensor symptoms vary depending on whether the sensor is intermittently failing or has failed completely. Recognising the pattern helps you decide how urgently to act.
Check Engine Light
A check engine light is usually the first sign that something is wrong with the CMP circuit. The ECU continuously monitors the sensor signal, and when the reading falls outside expected parameters, it stores a diagnostic trouble code and illuminates the warning lamp. The check engine light alone does not confirm a faulty sensor — you need to read the stored OBD codes with a scan tool to identify whether a P0340-series code is present and to rule out wiring faults and VVT system issues.
Engine Misfires and Rough Running
Without accurate camshaft position data, the ECU cannot sequence fuel injection precisely. The result is poorly timed fuel delivery across one or more cylinders — manifesting as misfires, hesitation under acceleration, and a rough or lumpy idle. In some cases, this also triggers a misfire code. A P0300 random misfire code alongside a P034X cam sensor code is a common combination that points directly at the CMP circuit as the root cause.
Hard Start or No-Start Condition
As the sensor deteriorates, its signal weakens. At some point, the signal becomes so degraded that the ECU loses the ability to identify which cylinder is on compression, at which point it shuts off fuel and spark delivery entirely. This produces a crank-but-no-start condition. If this happens while driving, the engine can stall without warning — a significant safety hazard, particularly at highway speed. Do not ignore intermittent stalling symptoms; they often precede a complete failure.
Poor Performance, Stalling, and Limp Mode
A partially failing sensor sends inconsistent data, causing the ECU to make incorrect injection and timing decisions. Drivers typically notice sluggish throttle response, a drop in power, and poor fuel economy. On some vehicles, the ECU will trigger limp mode — deliberately limiting engine output to protect internal components — when it detects a cam sensor fault. This produces a characteristic flat-footed driving feel even when the accelerator is pressed fully.
Intermittent, Heat-Related Failures
One of the more frustrating failure patterns with CMP sensors is heat-related intermittency. The sensor works correctly when cold, but as the engine reaches operating temperature, internal components expand and the sensor begins to fail. The engine runs rough or stalls, the driver pulls over and waits — by which time the sensor has cooled and appears to be working again. If your symptoms come and go depending on how warm the engine is, the camshaft position sensor should be near the top of your suspect list.
Camshaft Position Sensor Diagnostic Trouble Codes
The P03XX code range covers ignition system and misfire faults, and the camshaft position sensor family sits within it. The most commonly encountered codes are:
P0340 — CMP Sensor “A” Circuit Malfunction (Bank 1). The most common CMP code; the ECU is not detecting a valid signal from the sensor circuit.
P0341 — CMP Sensor “A” Circuit Range/Performance. Signal present but outside expected parameters — often indicates a reluctor wheel issue, incorrect cam timing, or a VVT fault rather than a failed sensor.
P0342 / P0343 — Circuit Low / High. Signal stuck at 0V or supply voltage — typically a wiring fault (short to ground or open circuit) rather than a dead sensor body.
P0344 — CMP Sensor “A” Circuit Intermittent. Consistent with heat-related failure or a loose connector.
P0345–P0349 — Bank 2 equivalents for V-type engines.
An important diagnostic note: a P034X code does not automatically mean the sensor has failed. Before replacing the sensor, check the wiring harness for chafing or corrosion, inspect the reluctor wheel for missing or damaged teeth, and verify that the VVT system is not the underlying cause. On many vehicles, a blocked oil control valve in the VVT system generates cam sensor codes because the phaser position does not match the commanded position — replacing the sensor will not resolve this. The ignition system interaction with cam timing is also worth considering when diagnosing persistent misfires alongside cam codes.
How to Test a Camshaft Position Sensor
Testing before replacing saves money and avoids the frustration of a code returning because the sensor was not the actual problem. Work through these steps in order.
Step 1: Visual Inspection
Start with the easiest checks. Disconnect the sensor connector and inspect the terminals for corrosion, bent pins, or moisture. Check the wiring harness from the connector back to the ECU for any signs of chafing against engine components, heat damage, or rodent interference. Also inspect the sensor body for cracks, oil contamination around the base, or physical damage. A corroded connector can produce the same DTCs as a failed sensor and costs nothing to clean.
Step 2: Live Data with a Scan Tool
With the connector plugged back in, connect an OBD-II scanner and read live data while cranking or running the engine. Look for a CMP signal that switches or produces a waveform. If the scanner shows no CMP signal while the crankshaft position sensor is active and the engine is cranking, that strongly implicates the CMP sensor or its wiring. Compare the CMP and CKP signals — on a healthy engine, both should be active and in a consistent relationship to each other.
Step 3: Multimeter Testing
The testing procedure differs depending on sensor type.
Hall effect (3-wire) sensor: With the connector plugged in and the ignition on (engine off), use a multimeter set to DC voltage. Probe the power supply wire — you should read approximately 5V or 12V depending on the application. Probe the ground wire — it should read 0V. Now crank the engine and probe the signal wire. The multimeter will register the average of the rapidly switching 0–5V square wave, which typically reads approximately 2.5V DC during cranking. A reading stuck at 0V or at the full reference voltage means the sensor is not switching — replace it.
Inductive (2-wire) sensor: Disconnect the connector and set the multimeter to AC voltage (2V range). Probe across both terminals and crank the engine — a healthy inductive sensor should produce 0.2–1.5V AC. You can also check resistance with the multimeter in ohm mode: typical values range from 200–1,200 ohms depending on manufacturer specification. Infinite resistance indicates an open winding and means the sensor must be replaced.
Step 4: Oscilloscope Testing (Professional)
The most accurate diagnostic method is connecting an oscilloscope to the signal wire while the engine runs. A healthy Hall effect sensor produces a clean, consistent square wave; a healthy inductive sensor produces a smooth sine wave that increases in amplitude with engine speed. Irregular or missing pulses point to a failing sensor or damaged reluctor wheel. This is particularly useful for intermittent failures that won’t reproduce during multimeter testing.
How to Replace a Camshaft Position Sensor
Skill level: Beginner to Intermediate | Estimated time: 30–90 minutes depending on sensor accessibility
Safety note: Always disconnect the negative battery terminal before disconnecting any sensor connector. On engines equipped with variable valve timing, allow at least 30 minutes after shutdown before working near the timing cover — residual oil pressure in the VVT system can cause oil to spray when the sensor is removed from its bore.
Tools and Parts Required
A socket set covers most of the job — a 10mm socket handles the majority of CMP sensor retaining bolts — along with an extension bar for sensors in recessed locations. For the sensor itself, choose OEM or a reputable aftermarket brand. Inexpensive no-name sensors frequently cause repeat failures or generate false codes due to signal quality issues, so it’s worth spending slightly more here. Also have an OBD-II scanner on hand to clear codes and verify the repair, plus clean rags and nitrile gloves.
Replacement Procedure
Locate the sensor using your factory service manual before beginning — the exact position varies significantly between vehicles. Once you have found it, disconnect the negative battery terminal. Unplug the electrical connector by squeezing the release tab rather than pulling on the wiring harness. Remove the retaining bolt and withdraw the sensor from its bore. The O-ring may stay in the bore rather than coming out with the sensor — retrieve it before installing the new part.
Lightly coat the new sensor’s O-ring with clean engine oil to help it seat correctly and avoid tearing during installation. Push the new sensor into the bore until it is fully seated, then install and torque the retaining bolt to specification — typically 6–12 Nm, though this varies by manufacturer. Reconnect the electrical connector until you hear it click, then reconnect the battery terminal.
Start the engine and use your scanner to clear the check engine light and any stored codes. Take the vehicle for a test drive and rescan for codes — if the P034X codes do not return, the repair is complete. Some vehicles, particularly those with variable valve timing or sequential injection relearn procedures, require a specific relearn cycle after CMP sensor replacement. Refer to the factory service manual for your application to determine whether this step is needed.
Camshaft Position Sensor Replacement Cost
Parts are the cheaper half of this repair. Standard CMP sensors for common vehicles cost $20–$150, with OEM parts in the $40–$100 range. Quality aftermarket sensors are a reasonable alternative; very cheap no-name parts carry a real risk of early failure or signal quality problems that generate misleading fault codes.
If you take the vehicle to a workshop, labour adds 0.5–1.5 hours depending on accessibility. Professional service typically runs $127–$400 all-in for most cars and light trucks — more for European luxury models where parts cost and access time drive the total higher. For most vehicles this is a straightforward DIY repair completable in under an hour, making it good value to tackle yourself.
If P034X codes return after sensor replacement, don’t simply install another sensor. At that point, the fault likely lies in the wiring harness (shorts, opens, corrosion), a damaged reluctor wheel, or the VVT system. On VVT-equipped engines, verify oil level and condition first — the cam phaser relies on oil pressure, and degraded oil commonly triggers cam position codes that have nothing to do with the sensor itself.
When to Consult a Professional Mechanic
CMP sensor replacement is within reach for most intermediate DIYers, but there are situations where professional diagnosis is the smarter call. If fault codes return after sensor replacement, a professional with an oscilloscope and factory scan tool can test the circuit more comprehensively and read VVT system data that basic OBD scanners do not display. Some DOHC engines position the sensor in locations that require removing ancillary components — power steering pumps, intake manifolds, or accessory brackets — which significantly raises the complexity of the job.
Vehicles with variable valve timing systems that require factory-level relearn procedures after cam sensor replacement are also best handled by a technician with the correct tooling, as an incomplete relearn can produce persistent codes or drivability issues. The relationship between the CMP sensor and the variable valve timing system is complex enough that diagnosing VVT-related cam codes often requires more than basic multimeter testing. And if stalling at speed is occurring, do not delay — that is a safety concern that warrants prompt professional attention.
Camshaft Position Sensor: Frequently Asked Questions
The camshaft position sensor generates more questions than almost any other engine sensor — partly because its symptoms overlap with so many other problems, and partly because a P034X code doesn’t always mean the sensor itself has failed. These answers cover the most common questions, from what the sensor actually does to why codes sometimes return after replacement.
Quick Answer
The camshaft position sensor tells the ECU where the camshaft is in its rotation so the engine can sequence fuel injection and ignition timing correctly. When it fails, typical symptoms include a check engine light, misfires, rough idle, hard starting, and stalling. Most sensors last 100,000 miles or more, and replacement is a beginner-to-intermediate DIY job taking under an hour on most vehicles.
What does a camshaft position sensor do?
The camshaft position sensor (CMP sensor) monitors the rotational position of the camshaft and sends that data to the engine control unit (ECU). The ECU uses this information to determine which cylinder is approaching its compression stroke — which tells it exactly when to fire each fuel injector and each ignition coil in sequence. Without this data, the ECU cannot deliver fuel and spark in the precise order required for smooth, efficient combustion.
On engines with variable valve timing, the CMP sensor has an additional role: it provides feedback on the actual cam phaser position, allowing the ECU to verify that the camshaft is advancing or retarding as commanded. The sensor works in conjunction with the crankshaft position sensor — together, these two sensors give the ECU a complete picture of piston and valve position at any point in the engine cycle. Understanding the broader camshaft and valve system helps explain why accurate position data matters so much.
What are the most common symptoms of a failing camshaft position sensor?
The most common symptoms are a check engine light, engine misfires, rough idle, difficulty starting, and stalling — especially at idle or low speed. In some cases, the vehicle enters limp mode, which limits engine output significantly. Fuel economy tends to drop as well, since the ECU can no longer optimise injection timing precisely.
One pattern worth knowing: heat-related intermittent failure. The sensor works fine when cold but begins to fail as the engine warms up, producing symptoms that come and go. If your check engine light appears and disappears depending on engine temperature, or the engine runs rough only after reaching operating temperature, suspect the camshaft position sensor. Read the stored OBD fault codes with a scanner first — the symptom pattern alone cannot confirm which sensor or circuit has failed.
What OBD codes does a bad camshaft position sensor trigger?
The P0340–P0349 code family covers camshaft position sensor circuit faults. The most frequently encountered codes are:
P0340 — CMP Sensor “A” Circuit Malfunction (Bank 1): No valid signal detected by the ECU.
P0341 — CMP Sensor “A” Circuit Range/Performance: Signal present but outside expected parameters.
P0342 / P0343 — Circuit Low / High: Signal stuck at 0V or full supply voltage — usually a wiring fault rather than a dead sensor.
P0344 — Circuit Intermittent: Signal dropping in and out, consistent with a heat-related failure or loose connector.
P0345–P0349 — Bank 2 equivalents for V-type engines with multiple camshafts.
These codes may appear alongside a P0300 random misfire code when the timing disruption is severe enough to cause misfires. All of these fall within the broader P03XX ignition system and misfire code range.
Can I still drive with a bad camshaft position sensor?
Only to reach a workshop, and only if the vehicle is still running. A fully failed camshaft position sensor typically produces a no-start condition — the ECU shuts off fuel and spark delivery entirely. If the sensor is intermittently failing, the vehicle may still drive but can stall without warning, including at highway speed. That is a genuine safety risk.
Beyond the stalling risk, continuing to drive with a partially failing sensor puts real stress on the engine. Mistimed injection can hold injectors open too long, pushing excess liquid fuel into the combustion chamber — fuel doesn’t compress, and enough of it causes engine knock and internal damage over time. Fuel economy drops and emissions rise in the meantime. The sensor is inexpensive and the replacement is typically straightforward; prompt repair is the right call.
How do I test a camshaft position sensor?
Start with a visual inspection — check the connector for corrosion, bent pins, or moisture, and trace the wiring harness for chafing or heat damage. Many apparent sensor failures are actually connector or wiring faults.
With a multimeter, testing differs by sensor type. For a Hall effect (3-wire) sensor: with the ignition on, check the power supply wire for 5–12V and the ground wire for 0V. Then crank the engine and check the signal wire — it should read approximately 2.5V DC as the multimeter averages the rapidly switching 0–5V square wave. A reading stuck at 0V or at full reference voltage means the sensor is not switching and should be replaced. For an inductive (2-wire) sensor: crank the engine and check for 0.2–1.5V AC on the signal terminals. Also check resistance between terminals — a typical range is 200–1,200 ohms. Infinite resistance indicates an open winding.
For the most accurate diagnosis, an oscilloscope connected to the signal wire reveals the waveform in real time — a healthy Hall effect sensor produces a clean square wave, while a failing one shows missing pulses or a noisy, irregular signal. The engine management system relies on this signal quality, not just signal presence, which is why oscilloscope testing catches intermittent failures that a multimeter may miss.
How long does a camshaft position sensor last?
Most camshaft position sensors last 100,000–150,000 miles, and on some vehicles they go the life of the engine without ever needing replacement. On others — particularly certain European models and some high-mileage applications — they are a known failure point. There is no scheduled replacement interval for this sensor; it is replaced on condition when symptoms or fault codes appear.
Longevity depends significantly on operating environment. Engines that run hot, suffer from oil leaks near the sensor bore, or generate persistent electrical noise tend to wear sensors faster. Regular oil changes and maintaining a healthy cooling system indirectly protect the sensor by reducing the thermal and chemical stress on its internal components.
What causes a camshaft position sensor to fail?
The three main causes are heat, oil contamination, and electrical faults.
Heat: Constant thermal cycling gradually degrades the sensor’s internal components — this is why intermittent, temperature-dependent failure is so common. The sensor works fine cold, then produces erratic signals once the engine reaches operating temperature.
Oil contamination: A leaking valve cover gasket or camshaft seal allows oil to migrate into the sensor bore and connector, shorting out the internal circuitry. Once oil gets inside a sensor, failure is typically inevitable. Always address any oil leaks in the area when replacing the sensor — otherwise the new part may fail for exactly the same reason.
Electrical faults: Wiring harness chafing against hot engine components, corroded connector pins, voltage spikes from a failing alternator, and poor grounds are all common causes. These faults produce P034X codes even with a perfectly healthy sensor — which is why visual inspection of the wiring should always precede sensor replacement.
Why do camshaft sensor codes come back after I replace the sensor?
This is one of the most common frustrations with P034X codes, and it has a clear explanation: the fault code identifies the circuit, not necessarily the sensor itself. If codes return after a new sensor is installed, check the wiring harness for damage between the sensor connector and the ECU — chafed insulation, corroded pins, or a poor ground connection can mimic a dead sensor perfectly.
On VVT-equipped engines, cam sensor codes frequently originate in the variable valve timing system rather than the sensor itself. A blocked oil control valve, degraded engine oil, or low oil level can prevent the cam phaser from reaching its commanded position, triggering a P0341 range/performance code even though the sensor is working correctly. Check oil level and quality first, then inspect the VVT solenoid and its filter screen before condemning the sensor. Also inspect the reluctor wheel for missing or damaged teeth — a tooth knocked off the trigger wheel produces an erratic signal that no new sensor can fix. For a deeper understanding of how this system interacts, see how variable valve timing works.
How much does camshaft position sensor replacement cost?
Parts alone typically run $20–$150, with OEM sensors in the $40–$100 range and quality aftermarket sensors available at the lower end. Avoid very cheap no-name sensors — poor signal quality from a low-grade sensor can generate false codes or cause early repeat failures.
Professional service adds 0.5–1.5 hours of labour, bringing the total to roughly $127–$400 for most vehicles. Luxury European models can run higher due to parts cost and sensor accessibility. DIY replacement saves most of the cost — for accessible sensors, the job takes 30–60 minutes and requires only basic hand tools. Your vehicle’s factory service manual will confirm exact sensor location, torque specification, and whether a relearn procedure is needed after replacement. Brand-specific manuals for Toyota, Ford, and Honda include this information in full.
Is camshaft position sensor replacement a DIY job?
On most vehicles, yes — it is one of the more accessible sensor replacements on the engine. The typical procedure involves disconnecting the battery, unplugging the electrical connector, removing a single retaining bolt, pulling out the old sensor, and fitting the new one with a fresh O-ring lightly coated in clean engine oil. An OBD-II scanner is needed to clear the check engine light and verify the repair after the job.
That said, some vehicles make the job significantly harder. On certain DOHC engines, the sensor is buried behind other components — power steering pumps, intake manifolds, or accessory brackets — that need to be removed first. Some vehicles also require a cam/crank relearn procedure via a factory-level scan tool after replacement. If codes return after a straightforward replacement, or if the sensor location on your vehicle requires major disassembly, professional diagnosis is the better path. The ignition system interaction and VVT relearn requirements on some modern engines genuinely do call for more sophisticated tooling than a basic OBD reader provides.