You turn the key in your ignition or press the start button, and your engine roars to life. This seemingly simple act depends entirely on a sophisticated electrochemical device under your hood: your car battery. Without a functioning battery, even the most powerful engine becomes nothing more than several hundred pounds of immobile metal. The battery serves as your vehicle’s electrical heart, providing the initial surge of power needed to crank the starter motor, energize the ignition system, and bring your entire vehicle to life.
Modern vehicles demand more from their batteries than ever before. Touchscreen infotainment systems, advanced driver assistance features, heated and ventilated seats, multiple computer modules, and sophisticated safety systems all draw electrical power continuously. Understanding how your car battery works, recognizing the different types available, maintaining it properly, and knowing when to replace it can save you from unexpected breakdowns and extend your battery’s lifespan significantly.
This comprehensive guide will walk you through everything you need to know about car batteries. You’ll learn the fundamental chemistry that makes batteries work, understand the critical differences between flooded lead-acid and AGM technologies, decode important specifications like cold cranking amps and reserve capacity, master essential maintenance procedures, recognize warning signs of impending failure, and gain confidence in knowing when DIY maintenance is appropriate versus when professional service is necessary. We’ll also explore how your battery integrates with your vehicle’s charging system through the alternator, ensuring you understand the complete electrical ecosystem that keeps your vehicle running reliably.
Safety comes first: Working with car batteries involves handling heavy components (30-60 pounds), managing sulfuric acid (a corrosive chemical), and working with electrical systems that can produce dangerous sparks. Throughout this guide, we’ll clearly mark safety boundaries and indicate when professional consultation is the wisest choice for your safety and your vehicle’s integrity.
How Car Batteries Work – Chemistry and Electrical Principles
Lead-Acid Battery Fundamentals
The standard automotive battery operates on a 12-volt system, but this voltage actually comes from six individual cells connected in series, with each cell producing approximately 2.1 volts. When you add these together (2.1V × 6 cells), you get the familiar 12.6 volts of a fully charged battery. This modular cell design has remained fundamentally unchanged for over a century because it provides an excellent balance of power delivery, rechargeability, and cost-effectiveness.
Inside each cell, you’ll find alternating plates of two different materials: pure lead (Pb) and lead dioxide (PbO2). These plates are submerged in an electrolyte solution of sulfuric acid and water, typically in a ratio of about one-third acid to two-thirds water. The plates are separated by thin insulators that prevent them from touching while still allowing ions to flow freely through the electrolyte. This seemingly simple arrangement creates a powerful electrochemical system capable of storing and releasing electrical energy on demand.
The battery’s primary function goes beyond just starting your engine. It serves three critical roles in your vehicle’s electrical system, commonly referred to as SLI (Starting, Lighting, and Ignition). First, it provides the massive current surge needed to turn the starter motor—often 150 to 300 amps for just a few seconds. Second, it powers your vehicle’s lighting systems when the engine is off or running at low speeds. Third, it energizes the ignition system that creates the spark needed to ignite fuel in your engine’s cylinders. For a detailed explanation of these internal chemical processes, see our article on how car batteries work.
The Electrochemical Reaction Explained
When your battery discharges—such as when you start your vehicle—a fascinating chemical reaction occurs between the lead plates and the sulfuric acid electrolyte. The sulfuric acid (H₂SO₄) splits into positive hydrogen ions (H⁺) and negative sulfate ions (SO₄²⁻). These sulfate ions react with both the lead plate (negative electrode) and the lead dioxide plate (positive electrode), converting both surfaces into lead sulfate (PbSO₄). This chemical transformation releases electrons that flow from the negative terminal through your vehicle’s electrical systems and return to the positive terminal, creating the electrical current that powers everything from your starter motor to your headlights.
The voltage output of your battery tells you a great deal about its state of charge. A fully charged battery should measure approximately 12.6 volts when the engine is off and the battery has been at rest for at least an hour. At 12.4 volts, your battery is about 75% charged—still functional but could use recharging. When voltage drops to 12.0 volts, you’re at roughly 25% capacity and should recharge soon to prevent damage. Any reading below 11.8 volts indicates a critically discharged battery that may have already suffered internal damage from deep discharge. These voltage measurements are taken with the engine off; once the engine runs, you should see 13.8 to 14.4 volts as the alternator takes over charging duties.
Understanding these voltage levels helps you monitor battery health. For intermediate DIY enthusiasts, a simple digital multimeter becomes an invaluable diagnostic tool—just set it to DC voltage, touch the red probe to the positive terminal and the black probe to the negative terminal, and read the display. For professional mechanics, more sophisticated load testing equipment provides deeper insights into battery capacity under simulated cranking conditions. For beginners, many auto parts stores offer free battery testing services that can tell you definitively whether your battery needs charging or replacement.
Recharging Cycle
The beauty of lead-acid batteries lies in their rechargeability—a characteristic that alkaline household batteries don’t share. When your engine runs, the alternator generates electrical current that reverses the discharge chemical reaction. The alternator forces electrons back into the battery at a higher voltage (typically 13.8 to 14.4 volts) than the battery’s resting voltage, overcoming the battery’s internal resistance and driving the chemical reactions backward.
During charging, the lead sulfate on both plates breaks down, converting the negative plate back to pure lead and the positive plate back to lead dioxide. The sulfate ions return to the electrolyte solution, restoring the sulfuric acid concentration. This process requires careful voltage regulation to prevent overcharging, which can boil the electrolyte, warp the plates, or cause excessive gassing. Your vehicle’s voltage regulator monitors battery voltage continuously and modulates the alternator’s output to maintain optimal charging without damage.
Modern smart charging systems take this a step further by varying the target voltage based on battery temperature, state of charge, and electrical load. For example, immediately after starting when the battery is somewhat depleted, the system might allow slightly higher voltage (14.4V) for faster recharging. During highway cruising when the battery is fully charged and electrical loads are minimal, the voltage might drop to 13.8V for maintenance charging and improved fuel economy. Some vehicles even reduce alternator output during acceleration to minimize parasitic power loss, then increase charging during deceleration to capture energy that would otherwise be wasted.
Why Batteries Are Rechargeable (Unlike Household Alkaline)
The fundamental difference between your car battery and a household alkaline battery lies in the reversibility of their chemical reactions. In alkaline batteries, zinc and manganese dioxide undergo a one-way chemical transformation that cannot be efficiently reversed. Once the reactants are consumed, the battery is dead and must be discarded. Car batteries use lead-acid chemistry specifically because the sulfation reaction is highly reversible—you can convert lead and lead dioxide to lead sulfate thousands of times and back again with minimal degradation.
This reversibility comes with some important limitations. Each charge-discharge cycle creates a tiny amount of non-reversible lead sulfate that hardens and no longer participates in the reaction—a process called sulfation. Over time, these hardened crystals accumulate, reducing the battery’s capacity. Additionally, the repeated expansion and contraction of the lead plates during cycling can cause small amounts of active material to shed from the plates and settle at the bottom of the battery case. These physical and chemical degradation processes explain why car batteries typically last three to five years rather than indefinitely.
For beginners: Think of your car battery like a rechargeable phone battery, but using chemical reactions with lead and acid instead of lithium. Just as your phone battery eventually holds less charge after years of use, your car battery gradually loses capacity over time. For intermediate DIYers: Understanding this cycle degradation helps you recognize why batteries fail and why proper maintenance—keeping the battery fully charged and avoiding deep discharges—extends lifespan. For professionals: The sulfation process explains why float charging during storage and proper charge voltage regulation are critical for maximizing battery service life and minimizing warranty claims.
Car Battery Types – Choosing the Right Technology
Selecting the right battery type for your vehicle involves more than just matching physical size and terminal configuration. Different battery technologies offer distinct advantages in performance, maintenance requirements, cost, and suitability for specific applications. Modern vehicles present you with several choices, each optimized for different driving conditions and electrical demands.
Flooded Lead-Acid Batteries (Conventional/Wet Cell)
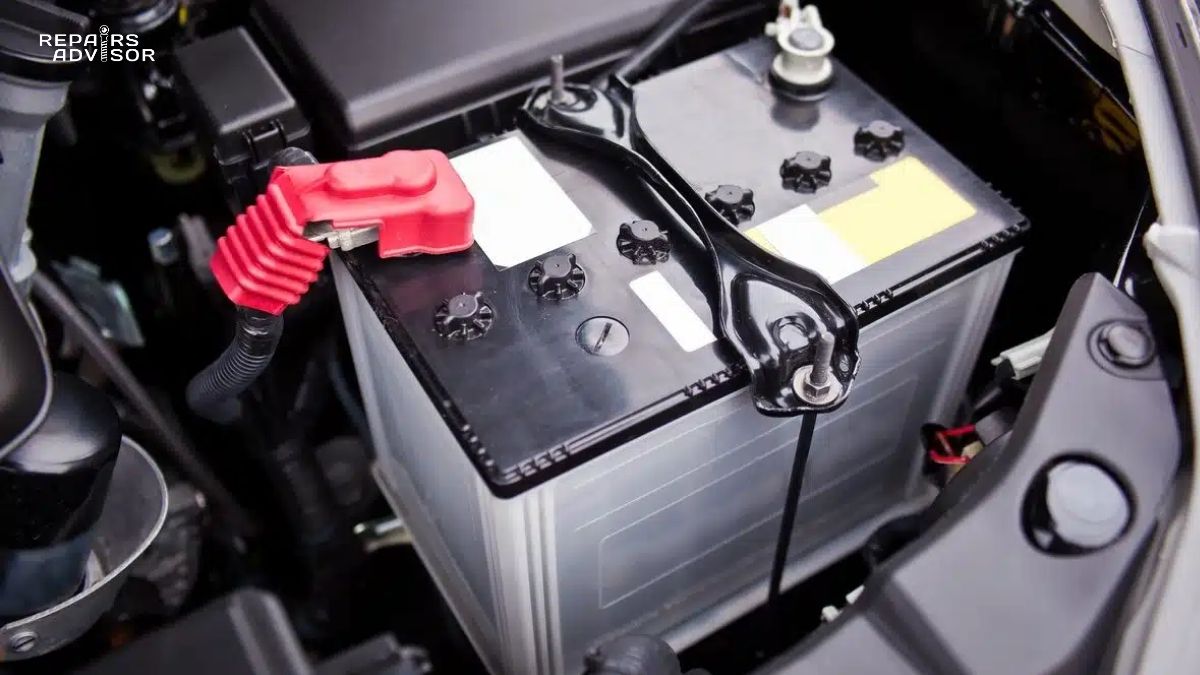
The conventional flooded lead-acid battery represents the original automotive battery technology, refined over 150 years of continuous development. These batteries contain liquid electrolyte that flows freely around the lead plates inside each cell. When you look at a flooded battery, you’ll typically see either translucent plastic construction allowing you to see the liquid level, or opaque construction with removable caps on top for adding water. This accessible design allows you to maintain the electrolyte level—a critical maintenance task that extends battery life.
The primary advantage of flooded batteries is their cost-effectiveness. You can typically purchase a quality flooded battery for $80 to $150, significantly less than more advanced technologies. This pricing makes them ideal for budget-conscious drivers whose vehicles don’t demand cutting-edge battery performance. Additionally, flooded batteries benefit from widespread availability—virtually every auto parts store and service station stocks them in multiple sizes. Their 100% recyclability rate means that when they eventually fail, nearly every component gets recovered and reused in manufacturing new batteries. For vehicle-specific recommendations on conventional batteries, check our Ford battery manuals resource.
However, flooded batteries come with notable disadvantages. They must remain upright to prevent electrolyte spillage, which can damage vehicle components and corrode metal surfaces. During charging, they vent hydrogen gas—a flammable substance that requires adequate ventilation. The removable caps that allow maintenance also allow this venting, leading to gradual water loss that requires periodic checking and distilled water top-ups. Flooded batteries are more susceptible to sulfation if left in a discharged state, and their internal construction makes them somewhat vulnerable to vibration damage.
Flooded batteries work best for standard vehicles with minimal electrical accessories, driven regularly by owners willing to perform basic maintenance checks. If you’re primarily concerned with upfront cost and your vehicle doesn’t have start-stop technology or extensive electronics, a quality flooded battery serves you well. With proper maintenance—keeping the electrolyte level correct, maintaining terminals clean, and avoiding deep discharges—flooded batteries reliably deliver three to five years of service.
AGM (Absorbed Glass Mat) Batteries
AGM technology represents a significant evolution in lead-acid battery design, addressing many of the limitations of flooded batteries while maintaining the fundamental chemistry that makes lead-acid batteries cost-effective. The key innovation lies in the fiberglass mat separators placed between the lead plates. These mats absorb and suspend the electrolyte like a sponge, holding it in direct contact with the plates rather than allowing it to flow freely. This seemingly simple change yields dramatic performance improvements.
The absorbed electrolyte design creates multiple advantages. First, AGM batteries are completely maintenance-free and sealed—you never need to check water levels or add distilled water. The sealed construction makes them spill-proof and leak-resistant; you can even install them on their side (though not upside down) without fear of acid leakage. This safety feature makes them ideal for vehicles with batteries mounted in the trunk or under seats. Second, AGM batteries exhibit superior vibration resistance compared to flooded batteries. The tightly compressed plates and absorbed electrolyte create a more rigid internal structure that withstands the jolting and bouncing that vehicles experience, making them popular choices for off-road vehicles and performance applications.
Third, AGM batteries deliver better performance in temperature extremes. In hot climates where temperatures consistently exceed 80°F, flooded batteries suffer from increased electrolyte evaporation and accelerated internal corrosion. AGM batteries minimize these heat-related issues because the electrolyte is absorbed in the mat rather than exposed as free liquid. The sealed design also prevents water loss regardless of temperature. Fourth, AGM batteries have significantly lower internal resistance than flooded batteries, enabling faster charging and better performance during high-current demands. This lower resistance translates to more available power for starting, better performance when powering multiple electrical accessories, and superior deep-cycle capabilities.
Perhaps most impressively, AGM batteries can typically handle about 60,000 engine starts—roughly three times more than conventional flooded batteries. This extended cycle life makes them essential for vehicles with start-stop technology, where the engine shuts off at traffic lights and restarts when you release the brake. Modern luxury vehicles with advanced driver assistance systems (ADAS), multiple high-resolution displays, heated and ventilated seats, premium sound systems, and sophisticated climate control benefit enormously from AGM’s stable power delivery.
The primary disadvantage of AGM batteries is cost. Expect to pay 40% to 100% more than flooded batteries—typically $150 to $300 or more depending on specifications. However, when properly maintained, AGM batteries often last four to seven years, with some high-quality units reaching ten years in favorable conditions. This extended lifespan can offset the higher initial cost. For vehicles originally equipped with AGM batteries, you cannot downgrade to flooded batteries without potentially causing electrical system issues—the vehicle’s charging system is programmed for AGM’s different charging profile. For hybrid vehicle electrical systems, see our Toyota battery manuals for specialized information.
AGM is required for: Vehicles with start-stop technology, vehicles with high electrical demands (multiple screens, advanced safety features), luxury vehicles with sophisticated electronics, and any vehicle that originally came equipped with an AGM battery from the factory. AGM is recommended for: Hot climates with sustained temperatures above 80°F, vehicles that experience significant vibration or off-road use, drivers who want maintenance-free operation, and vehicles that sit unused for extended periods (AGM has lower self-discharge rates).
Enhanced Flooded Battery (EFB)
Enhanced Flooded Batteries represent a middle ground between conventional flooded and full AGM technology. Popular in European vehicles with start-stop systems, EFB batteries use thicker plates and modified chemistry to improve cycle stability compared to standard flooded batteries. They cost more than conventional flooded batteries (typically $100 to $200) but less than full AGM batteries, making them an economical choice for vehicles that need better performance than standard flooded batteries but don’t require AGM’s full capabilities.
EFB batteries still require periodic maintenance—checking water levels and adding distilled water when needed—but they tolerate the frequent cycling of start-stop systems better than conventional flooded batteries. They’re not sealed like AGM, so they can still vent gas and potentially spill if tipped over. However, their improved plate construction and electrolyte formulation provide better charge acceptance and longer cycle life than standard flooded batteries. If your vehicle came equipped with an EFB battery from the factory, replacing it with a conventional flooded battery will likely result in premature failure due to the harsh cycling demands of start-stop operation.
Lithium-Ion Auxiliary Batteries
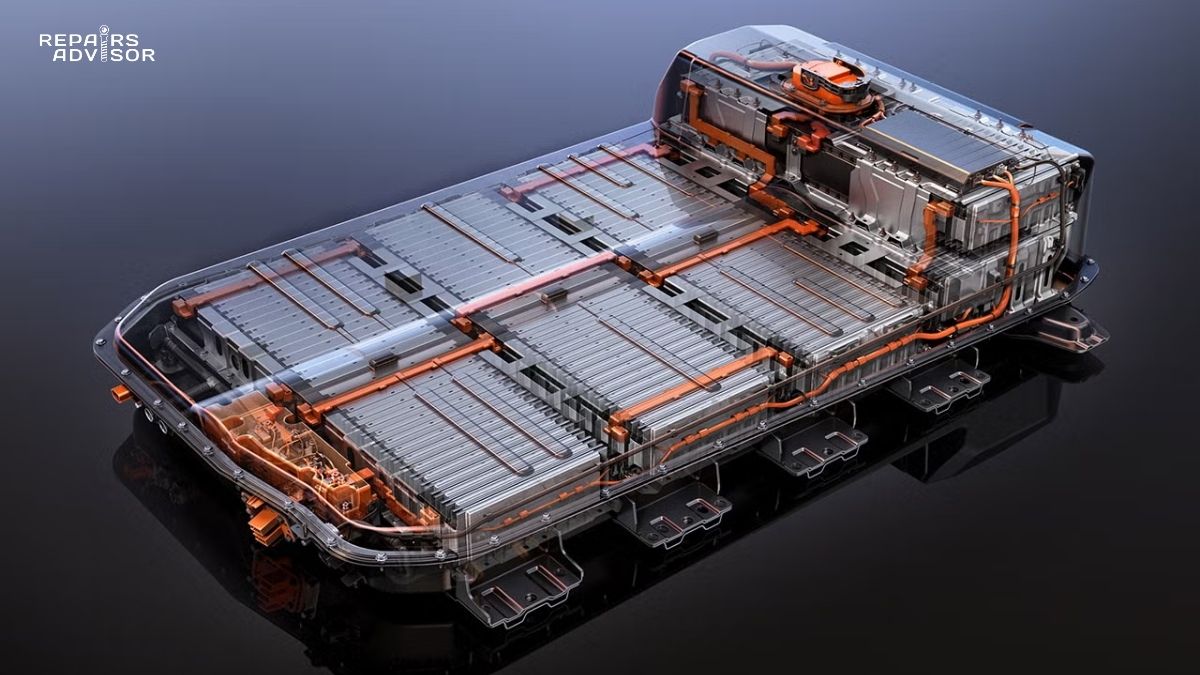
Electric vehicles (EVs) and some hybrid vehicles use lithium-ion chemistry for their auxiliary 12-volt batteries—the same basic technology found in laptop computers and cordless power tools, but engineered for automotive applications. Tesla pioneered this approach in 2021 with a 99-watt-hour lithium-ion 12V battery that weighs significantly less than traditional lead-acid batteries and takes up less space. This compact size allows manufacturers to locate the battery in more convenient positions and frees up valuable space for other components.
Lithium-ion auxiliary batteries offer superior energy density (more power per pound) and longer service life than lead-acid batteries in these specialized applications. However, they’re not drop-in replacements for conventional vehicles—they require specific charging profiles and battery management systems. The chemistry differs entirely from the high-voltage lithium traction batteries that propel electric vehicles. For more technical details on these systems, see our article on how 12V batteries work.
Choosing the Right Battery Type
Making the correct battery choice requires evaluating several factors about your vehicle, driving habits, budget, and climate. For standard vehicles with budget priority: A quality flooded lead-acid battery from a reputable manufacturer provides reliable service at the lowest cost. Choose this option if your vehicle lacks start-stop technology, you drive regularly (preventing deep discharge), you’re comfortable performing basic maintenance, and upfront cost is a primary concern. For hot climate operation (consistent temperatures above 80°F): AGM batteries significantly outperform flooded batteries in high heat. The sealed construction prevents electrolyte evaporation, and the absorbed design reduces heat-related degradation. In Arizona, Texas, and other extreme heat environments, AGM’s higher cost is often justified by extended service life.
For vehicles with start-stop technology: Use only AGM or EFB batteries as specified by your vehicle manufacturer. Start-stop systems cycle the battery hundreds of times more frequently than conventional vehicles—a conventional flooded battery will fail within months under this service. Check your owner’s manual or the original battery label to determine which technology your vehicle requires. For high electrical load vehicles: Luxury cars with multiple screens, advanced safety systems, heated/cooled seats, premium audio systems, and other power-hungry accessories benefit from AGM’s lower internal resistance and better deep-cycle tolerance. The stable voltage delivery ensures electronics perform optimally even with multiple systems operating simultaneously.
For infrequent drivers and long-term storage: AGM batteries have significantly lower self-discharge rates than flooded batteries—typically 1-3% per month versus 4-6% per month for flooded batteries. If your vehicle sits unused for weeks or months between drives, AGM maintains its charge much better. Combined with a battery tender (smart trickle charger), AGM batteries can sit for months without degradation. For comprehensive vehicle specifications across different manufacturers, consult our Chevrolet battery manuals, Honda battery manuals, and Nissan battery manuals resources.
Critical compatibility note: If your vehicle originally came equipped with an AGM battery, you typically cannot downgrade to a flooded battery. The vehicle’s charging system programming, electrical load management, and start-stop algorithms are calibrated for AGM’s different characteristics. Installing a flooded battery in an AGM-specified vehicle usually results in premature battery failure, electrical system issues, and potential damage to sensitive electronics. Always match or upgrade the battery technology—never downgrade.
Battery Specifications – Understanding CCA, RC, and Performance Ratings
Beyond choosing the right battery technology, you need to select a battery with appropriate performance specifications for your vehicle and climate. Three key ratings determine a battery’s suitability: Cold Cranking Amps (CCA), Reserve Capacity (RC), and Group Size. Understanding these specifications helps you make informed decisions rather than simply accepting whatever battery happens to be in stock.
Cold Cranking Amps (CCA)
Cold Cranking Amps represents the amount of current (measured in amps) that a battery can deliver at 0°F (-18°C) for 30 seconds while maintaining a minimum voltage of 7.2 volts. This specification matters because cold temperatures dramatically reduce battery capacity—chemical reactions slow down significantly as temperature drops. At 32°F, a battery loses about 30% of its capacity. At 0°F, capacity drops by 50%. Meanwhile, cold engine oil becomes thicker and harder to turn, requiring more power from the starter motor. This perfect storm of reduced battery capacity and increased starting load explains why so many battery failures occur on the first cold morning of winter.
Typical CCA ratings vary by vehicle size and engine displacement. Compact cars with four-cylinder engines typically require 400 to 600 CCA. Mid-size cars and smaller SUVs with V6 engines usually specify 600 to 750 CCA. Full-size trucks, large SUVs, and vehicles with V8 or diesel engines often need 700 to 1,000+ CCA. Your vehicle’s owner’s manual specifies the recommended minimum CCA for your specific make, model, and engine configuration.
It’s important to understand what higher CCA ratings do and don’t accomplish. Higher CCA than recommended will NOT make your engine start faster. Modern vehicles use gear reduction starters that multiply torque efficiently, fuel injection systems that eliminate the need for extended cranking, and low-viscosity oils that flow easily. Most engines require only three seconds or less of cranking to start, and the limiting factor is fuel delivery and ignition timing—not battery power. Once cranking begins, the difference between a 600 CCA battery and an 800 CCA battery is negligible for starting purposes.
However, having adequate CCA for your climate is crucial. If you live in northern climates where winter temperatures regularly drop below freezing, choosing a battery with CCA ratings at the high end of your vehicle’s acceptable range provides a safety margin. That extra capacity ensures reliable starting even when temperatures plunge to -10°F or lower. Conversely, if you live in Miami or Phoenix where temperatures rarely drop below 40°F, the minimum recommended CCA is perfectly adequate—paying extra for excessive CCA provides no real benefit.
Don’t confuse CCA with related ratings: CA (Cranking Amps) measures current delivery at 32°F rather than 0°F—the rating will always be higher than CCA for the same battery. MCA (Marine Cranking Amps) uses the same 32°F test temperature as CA and is functionally equivalent. Some manufacturers use these higher numbers in marketing, but CCA remains the standard automotive specification. When comparing batteries, always use CCA ratings for accurate comparisons.
Reserve Capacity (RC)
Reserve Capacity measures how many minutes a fully charged battery can deliver 25 amps of current before voltage drops below 10.5 volts. This specification addresses a different question than CCA: not “can my battery start my engine in cold weather” but rather “how long can my battery run essential systems if my alternator fails?” In modern vehicles packed with electronic control modules, safety systems, fuel pumps, and computer networks, RC has become increasingly important.
Typical Reserve Capacity ranges from 60 to 120 minutes. Higher RC means more electrical reserve for emergencies and better performance when the alternator can’t keep up with electrical loads. Consider a real-world scenario: you’re driving at night with headlights on, heater blowing, rear window defogger operating, and wipers running. If your alternator fails, a battery with 90 minutes of RC gives you enough time to drive to a safe location and call for assistance. A battery with only 60 minutes RC cuts that safety margin significantly shorter.
For modern vehicles, Reserve Capacity often matters more than excessive CCA. A battery with 650 CCA and 110 minutes RC typically outperforms one with 800 CCA and 70 minutes RC in overall usefulness. The higher RC provides better buffering for electrical loads, more stable voltage under heavy accessory use, and greater emergency reserve if charging system problems occur. Professional mechanics increasingly recommend prioritizing RC when selecting replacement batteries, especially for vehicles with sophisticated electronics, multiple computer modules, and extensive accessory loads.
When shopping for batteries, pay attention to both specifications. Many manufacturers prominently display CCA (because it’s often higher and looks more impressive) while downplaying RC. Ask specifically about Reserve Capacity and compare it across brands. For a given battery size and technology (flooded vs. AGM), RC values should be relatively similar across quality brands—significant differences may indicate variations in internal plate design or manufacturing quality.
Group Size
Group Size designates the physical dimensions and terminal configuration of the battery. This standardized system ensures that batteries fit properly in the vehicle’s battery tray, that cables reach the terminals, and that hold-down clamps secure the battery correctly. Group sizes include numbers (24, 35, 65, 75, etc.) and sometimes letters (24F, 35-R, etc.) that indicate specific length, width, height, and terminal positions.
The group size must match your vehicle’s battery tray. A battery that’s too large won’t fit in the available space. A battery that’s too small may not be secured properly by the hold-down clamp, leading to vibration damage. Terminal positions matter too—some vehicles have limited cable length and require terminals on specific sides of the battery case. Common group sizes include:
- Group 24/24F: Common in many Honda, Toyota, and Nissan vehicles
- Group 35: Popular in Japanese vehicles, more compact than Group 24
- Group 65: Common in larger cars and trucks, Ford applications
- Group 75: General Motors applications, side terminals
- Group 48 (H6): European vehicles, Mercedes, BMW, Audi
- Group 51R: Toyota, Honda, Nissan with specific terminal positioning
Your owner’s manual specifies the correct group size, or you can check the label on your current battery. Most auto parts stores also maintain databases that match vehicle year/make/model to correct battery group sizes. Never assume that a battery will fit just because it’s “close enough”—proper fitment ensures safe, reliable operation and prevents damage to battery and vehicle.
Battery Age and Date Codes
Unlike many automotive components, batteries begin aging the moment they’re manufactured. Even sitting on a store shelf, internal chemical reactions slowly degrade capacity. This degradation accelerates if batteries are stored in hot conditions or allowed to self-discharge below 12.4 volts. Consequently, battery age at purchase matters as much as brand or specifications.
When shopping for a battery, look for the manufacturing date code—typically stamped on the case or printed on a label. The code format varies by manufacturer but often uses a letter for month (A=January, B=February, etc.) and a number for year. A code of “D4” would indicate April 2024. Some manufacturers use numeric month codes (01 through 12) followed by the year’s last digit.
Never purchase a battery more than six months old from its manufacture date. A battery that’s been sitting for six months has already lost 5-10% of its capacity and may have suffered from sulfation if not properly maintained. High-volume retailers like Costco, Walmart, and major auto parts chains typically have faster inventory turnover and fresher batteries than small shops. Don’t hesitate to ask for the newest battery in stock or to check date codes on multiple batteries before choosing.
Professional shops that sell large quantities of batteries often rotate stock carefully and can provide very fresh batteries. Be especially cautious with deeply discounted batteries—they may be old stock being cleared out. A $120 battery that’s two months old represents better value than a $90 battery that’s ten months old. Fresh batteries typically last the full rated lifespan, while old batteries may fail prematurely, negating any initial savings.
Car Battery Maintenance – Extending Life and Preventing Failure
Proper maintenance can extend your battery’s lifespan by 50% or more, potentially turning a three-year battery into a four- or five-year battery. Regular attention to a few key areas prevents the most common causes of premature battery failure: sulfation from chronic undercharge, terminal corrosion reducing conductivity, physical damage from loose mounting, and electrolyte loss in flooded batteries. The time invested in maintenance is minimal compared to the cost and inconvenience of unexpected battery failure.
Regular Inspection Schedule
Establishing a consistent inspection routine helps you identify developing problems before they leave you stranded. Monthly visual inspections take only a few minutes and catch most issues early. Open your hood and examine the battery for:
- Cracks in the plastic case (even hairline cracks can leak acid and indicate impending failure)
- Bulging or swelling of the case (indicates overcharging or excessive heat—replace immediately)
- Leaks or acid residue around terminals or case seams (safety hazard requiring professional service)
- Terminal corrosion—white, green, or blue crusty deposits that impede electrical connection
- Loose hold-down clamps or brackets (battery must be secured firmly against vibration)
- Case cleanliness—dirt and moisture on the case surface can create parasitic electrical paths that slowly discharge the battery
Additionally, check the battery terminals themselves. They should be tight—you shouldn’t be able to twist them by hand. Loose terminals create resistance that reduces available power for starting and can cause arcing that damages the terminal and cable. The cables should be intact with no fraying, corrosion, or damage to the insulation. If you notice any of these issues, address them immediately—they worsen rapidly if neglected.
Quarterly electrical testing provides objective data about battery condition. Even if the battery looks fine externally, internal degradation may be occurring. Using a digital multimeter (available for $20-40 at any hardware store), measure battery voltage with the engine off and all accessories off. Wait at least an hour after driving to allow surface charge to dissipate, then test:
- 12.6V or higher = Fully charged, excellent condition
- 12.4V to 12.6V = 75% charged, acceptable but should be driven more or charged
- 12.2V to 12.4V = 50% charged, recharge soon to prevent sulfation
- 12.0V to 12.2V = 25% charged, significant sulfation risk, charge immediately
- Below 12.0V = Critically discharged, likely damage, test and possibly replace
Most auto parts stores offer free battery testing with more sophisticated equipment. These load tests simulate actual cranking conditions and measure how well the battery maintains voltage under heavy current draw. Plan to have your battery load tested twice yearly—typically in spring and fall as seasons change and temperature extremes stress batteries most. For more information on electrical system care, see our guide on maintaining your vehicle’s lighting system.
Annual professional inspection should include a complete charging system test, not just the battery. This comprehensive evaluation checks alternator output at various RPMs and loads, tests voltage drop in charging system wiring (indicating corroded connections), evaluates belt condition and tension, and verifies voltage regulator function. Many electrical problems that appear to be battery failures actually originate in the charging system, and replacing a good battery won’t solve an alternator problem.
Terminal Cleaning and Corrosion Prevention
Battery terminal corrosion appears as a white, green, or blue crusty deposit around the terminals and cable clamps. This corrosion forms when battery acid vapor (hydrogen sulfate) escapes through the terminal seal and reacts with the lead or copper in the terminals and cables. Even a small amount of corrosion significantly increases electrical resistance, reducing the effective current available for starting. Severe corrosion can prevent the vehicle from starting entirely, even with a fully charged battery.
For intermediate DIY mechanics, terminal cleaning is a straightforward 15-minute task requiring basic tools and supplies. Begin by wearing safety glasses and chemical-resistant gloves—battery acid can cause chemical burns and eye damage. Turn off all electrical accessories and remove the key from the ignition. Always disconnect the negative (black, marked -) terminal first. This prevents accidental short circuits if your wrench touches the chassis while removing the positive terminal. Loosen the negative cable clamp bolt and twist the clamp slightly while pulling it straight up off the terminal post. If it’s stuck, use a battery terminal puller tool rather than prying (which can damage the battery). Repeat for the positive (red, marked +) terminal.
Mix a solution of baking soda and water (approximately one tablespoon baking soda per cup of water) in a small container. This alkaline solution neutralizes the acidic corrosion. Dip an old toothbrush or wire brush into the solution and thoroughly scrub both battery terminals and the inside of the cable clamps. You’ll see the mixture fizz and bubble as it neutralizes the acid—this is normal and indicates the cleaning is working. For heavy corrosion, you may need to use a battery terminal cleaning brush—a specialized tool with a wire brush for the terminal post and a circular brush for the inside of the cable clamps.
After scrubbing away all visible corrosion, rinse the terminals and clamps with clean water (distilled water is ideal but tap water works). Dry everything thoroughly with a clean cloth or paper towels. Inspect the cable clamps for damage—if the metal is severely corroded or the clamp is cracked, replace the cable. Now apply a thin layer of petroleum jelly, dielectric grease, or purpose-made battery terminal protector to the terminals. This coating prevents moisture from reaching the metal and dramatically reduces future corrosion formation.
Reconnect the terminals in reverse order: positive first, then negative. This sequence prevents sparks if your wrench accidentally touches the chassis. Tighten the clamp bolts firmly but don’t over-tighten—excessive force can crack the battery terminal or strip the bolt threads. As a final step, apply more protector compound to the outside of the connections for additional corrosion protection.
For professional mechanics, terminal maintenance includes additional steps. Use a battery terminal voltage drop test to verify connection quality—connect your multimeter leads on either side of the connection (one on the battery terminal, one on the cable clamp) and crank the engine. Voltage drop should be less than 0.1V for a good connection; anything higher indicates resistance requiring further cleaning or cable replacement. Some professionals use anti-corrosion washers (felt washers impregnated with oil) that fit between the terminal and cable clamp to absorb any acid vapors before they cause corrosion. Dedicated battery terminal spray coatings provide longer-lasting protection than petroleum jelly.
For beginners, terminal cleaning represents an excellent introduction to automotive maintenance, but safety is paramount. Battery acid is corrosive—it will burn skin, damage clothing, and cause serious eye injury if splashed. Always wear safety glasses that fully protect your eyes and chemical-resistant gloves (nitrile or latex work gloves). Work in a well-ventilated area because batteries can vent flammable hydrogen gas. Never smoke or create sparks near a battery. If you’re uncomfortable with any aspect of the procedure, auto parts stores and service centers will typically clean terminals for $10-20, or even free if you’re a regular customer. Watching a professional perform the task once or twice builds confidence for DIY attempts.
Understanding how electrical grounds work helps you appreciate why clean terminals matter so much. For detailed information, see our article on how ground systems work.
Fluid Level Maintenance (Flooded Batteries Only)
Modern flooded batteries fall into two categories: maintenance-free (sealed) and serviceable (with removable caps). Sealed maintenance-free batteries have a translucent case allowing you to see the electrolyte level, and many feature a green indicator dot (magic eye) showing battery condition—green indicates good, dark indicates needs charging, and yellow or clear indicates replace. These batteries are truly maintenance-free; you cannot and should not attempt to add water.
Serviceable flooded batteries have removable caps on top of each cell, allowing you to inspect electrolyte level and add distilled water when necessary. Monthly checks are recommended, more frequently in hot climates or if the battery is being charged frequently. To check fluid level, carefully pry off or unscrew the caps (there are typically six caps, one per cell). Look inside each cell—the electrolyte should cover the lead plates by approximately ½ inch. You should see the top of the plates just beneath the liquid surface. If the plates are exposed above the fluid level, add distilled water immediately.
Use only distilled water—never tap water, spring water, or any other type of water. Tap water contains minerals (calcium, magnesium, iron, chlorine) that contaminate the electrolyte and cause premature battery failure. Distilled water, available at grocery stores and auto parts stores for under $2 per gallon, has had all minerals removed through distillation. Pour carefully to avoid overfilling—fill each cell to approximately ½ inch above the plates, but not all the way to the bottom of the fill tube. Overfilling can cause electrolyte to overflow during charging, creating a corrosive mess and weakening the electrolyte concentration inside the battery.
After adding water, replace the caps securely and wipe away any water that spilled on the battery case. The electrolyte needs time to mix with the added water—wait at least a few hours (overnight is better) before testing battery condition or attempting to recharge. Checking and recharging immediately after adding water can give false readings because the fresh water hasn’t mixed with the acid yet.
Persistent low fluid levels indicate a problem. Normal water loss occurs gradually over months through the normal gassing that happens during charging. If you find yourself adding water frequently (more than every month or two), investigate the cause:
- Overcharging: Voltage regulator failure causing excessive charging voltage boils electrolyte
- High underhood temperatures: Extreme heat accelerates water evaporation
- Excessive driving: Long-distance highway drivers’ batteries spend more time being charged, causing more gassing
- Old battery: Near end of life, internal breakdown increases gas generation
Overcharging is the most serious cause—voltage regulator testing is essential. Charging voltage should be 13.8V to 14.4V with the engine running at 2000 RPM. Higher voltage indicates regulator problems that will destroy your battery and potentially damage vehicle electronics. Have a professional test your charging system if your battery consistently runs low on fluid.
Driving Habits That Extend Battery Life
Your driving patterns dramatically affect battery lifespan. Short trips are battery killers. When you start your engine, the starter motor draws 150-300 amps for a few seconds—a significant discharge. The alternator needs 20-30 minutes of running time to fully recharge the battery after a normal start. If you drive only five to ten minutes, stop and shut off the engine, the battery never fully recharges. Each short trip leaves the battery slightly more discharged than the previous trip, progressively lowering the state of charge until eventually the battery can’t provide enough power to start the engine.
Weekly highway driving provides the ideal charging environment. Highway speeds (55+ mph) allow the alternator to operate at higher RPMs where it produces maximum output. With minimal electrical loads (you don’t need headlights in daytime, heater/air conditioning load is steady rather than rapidly cycling), the alternator can dedicate most of its output to battery charging. A 30-minute highway drive once or twice weekly ensures your battery remains fully charged and healthy. For comprehensive maintenance scheduling, see our guide on how to change oil.
Minimize electrical loads when the engine is off. Modern vehicles allow you to operate accessories like the radio, power windows, and climate controls in “accessory mode” without the engine running. While convenient, this draws power exclusively from the battery with no recharging occurring. Limit accessory mode use to a few minutes—extended use discharges the battery. Before starting the engine, turn off high-draw accessories like air conditioning, rear window defogger, heated seats, and high-beam headlights. This reduces the initial electrical load on the battery and starter, making starting easier and reducing battery stress.
Temperature management strategies vary by climate. In hot climates (sustained temperatures above 85°F), park in shade whenever possible to reduce battery compartment temperatures. Some drivers install battery insulation blankets designed for heat rather than cold—these reflect radiant heat from the engine and help maintain stable battery temperatures. However, ensure any insulation allows adequate ventilation because batteries vent hydrogen gas that must escape safely.
In cold climates, battery blankets or heating pads maintain warmer battery temperatures for improved cold-weather performance. These plug into standard household outlets and provide gentle heating overnight. Block heaters warm the engine, reducing the cranking load on the battery by making the oil less viscous. Garage parking whenever possible protects batteries from extreme cold—even an unheated garage maintains temperatures 10-20°F warmer than outdoor parking.
Storage and Infrequent Use Protection
Vehicles driven infrequently or stored seasonally require special battery care. Modern vehicles draw 25-50 milliamps even when “off” to maintain computer memory, security systems, clocks, and keyless entry systems. This parasitic drain slowly discharges the battery. A fully charged battery can sit for several weeks before discharging below the threshold for reliable starting, but climate affects this timeline—hot temperatures accelerate self-discharge while cold temperatures slow it.
For seasonal storage (vehicles stored several months), the best protection is a battery tender or smart trickle charger. These devices maintain optimal battery charge without overcharging. Unlike old-fashioned trickle chargers that continuously charge and can overcharge batteries, modern smart chargers monitor battery voltage and switch between charging mode and maintenance mode automatically. A 1.5-2 amp smart charger costs $30-80 and can maintain multiple batteries if you move it between vehicles periodically.
Connect the tender’s positive clamp to the battery positive terminal and negative clamp to the negative terminal. Plug the tender into a standard household outlet. The indicator lights show charging status—typically red while charging, green when fully charged and in maintenance mode. Leave the tender connected for the entire storage period. This maintenance charging prevents sulfation, maintains full charge, and extends battery life dramatically. Many classic car owners report battery life of 7-10 years using this technique.
If you cannot use a tender, disconnect the negative battery cable before storage. This eliminates all parasitic drain from vehicle electronics, allowing the battery to sit for months without significant discharge. Remove and store the battery in a cool, dry location if possible—basements work well because temperatures remain relatively stable. Extremely cold temperatures (below 0°F) can freeze a discharged battery and crack the case; fully charged batteries resist freezing down to about -75°F.
Every two months during storage, check battery voltage. If it drops below 12.4V, recharge it to prevent sulfation damage. When bringing a stored vehicle back into service, inspect the battery thoroughly, charge it to full capacity, test it under load, and verify the charging system works correctly. For vehicles driven infrequently but not stored (perhaps once or twice weekly), try to drive for 30+ minutes each trip to allow full battery recharge. If this isn’t practical, install a battery disconnect switch for easy negative cable disconnection between drives.
Safety Warnings for DIY Maintenance
Working with batteries requires awareness of multiple hazards. Always disconnect the negative terminal first when removing cables—this prevents accidental short circuits if your wrench touches the vehicle chassis while you’re working on the positive terminal. When reconnecting, connect positive first, then negative. Reversing this sequence could create a dangerous arc if tools contact the chassis.
Wear appropriate personal protective equipment: Safety glasses or goggles protect against acid splashes that can cause blindness. Chemical-resistant gloves (nitrile, neoprene, or heavy rubber) protect your hands from sulfuric acid burns. Long sleeves and pants protect your arms and legs. Remove jewelry—rings and bracelets can contact battery terminals and create dangerous short circuits that weld jewelry to your skin or the battery.
Work in well-ventilated areas. Batteries produce hydrogen gas during charging—a highly flammable and explosive gas. Adequate ventilation prevents hydrogen accumulation. Never smoke, create sparks, or use open flames near batteries. When jump-starting or using a charger, make the final ground connection away from the battery (to bare metal chassis) to prevent sparks near the battery’s hydrogen vent.
Batteries are heavy—30 to 60 pounds depending on size. Use proper lifting technique: bend at the knees, keep your back straight, lift with your legs, and carry the battery close to your body. Many batteries have carry handles molded into the case, but these handles can break if the battery is old. Support the battery from underneath with your other hand. Secure the battery before removing hold-down clamps to prevent it from tipping or falling when you remove the last bolt.
Cracked or leaking batteries are hazardous. If you see cracks in the case or notice acid leakage, do not attempt to move or use the battery. Sulfuric acid is highly corrosive and can cause severe chemical burns. Contact a professional service provider who has proper equipment for handling damaged batteries. Never lay batteries on their side—even if the case appears intact, tipping can cause internal damage and leakage.
If you’re uncomfortable working with electrical systems, lack proper tools or protective equipment, or have physical limitations that make battery handling difficult, professional service is the wise choice. Service centers and auto parts stores typically charge $10-30 for battery installation, which includes proper disposal of your old battery and ensures correct installation. The small fee provides peace of mind and eliminates risk—a worthwhile investment in your safety. Understanding electrical protection systems helps ensure safe work practices; see our article on how automotive fuses work.
Battery Replacement – When and How to Replace Your Car Battery
Even with perfect maintenance, batteries eventually wear out. Recognizing when replacement is necessary prevents the inconvenience and potential danger of unexpected failure. Understanding the replacement process helps you decide whether to tackle the job yourself or seek professional service, and knowledge of modern vehicle requirements ensures you get the right battery properly installed.
Warning Signs Battery Needs Replacement
Slow engine cranking is often the first noticeable symptom. If your engine turns over sluggishly, taking longer than usual to start, or requires multiple attempts to start, battery capacity has likely degraded. You might hear a labored, slow “rr-rr-rr-rr” sound rather than the quick, energetic cranking of a healthy battery. This symptom worsens in cold weather when battery capacity naturally decreases. If slow cranking persists even after cleaning terminals and fully charging the battery, replacement is imminent.
Dim headlights at idle that brighten when you rev the engine indicate insufficient battery voltage. At idle, the alternator produces less power, so the electrical system draws more heavily from the battery. If battery voltage is low, headlights appear dim. When you increase engine RPM, the alternator output increases and voltage rises, brightening the headlights. This symptom suggests either a weak battery or alternator problems—professional testing determines which component needs replacement.
Battery age exceeding three years warrants proactive attention. Check the manufacturing date code on your battery. If it’s approaching three years old, schedule professional load testing even if it seems to work fine. Most batteries begin showing capacity loss after three years, and failure risk increases dramatically after five years. Budget for replacement around the three-year mark to avoid unexpected failures. Waiting for complete failure often means being stranded at the worst possible time—on a freezing morning before an important meeting or on a sweltering afternoon in a shopping center parking lot.
Swollen or bloated battery case indicates overcharging or excessive heat exposure and represents a safety hazard. The case should maintain its rectangular shape with flat sides. If you notice bulging or swelling, replace the battery immediately and have your charging system tested—overcharging suggests voltage regulator failure that will destroy your new battery too. Never ignore case swelling; it can progress to case rupture and acid leakage.
Illuminated battery warning light on your dashboard signals charging system problems. While this could indicate alternator failure rather than battery failure, the system requires immediate professional diagnosis. Continuing to drive with the warning light on risks complete battery discharge and being stranded. Modern vehicles can develop multiple fault codes related to charging system issues; proper diagnostic scanning identifies the root cause.
Electrical system malfunctions like power windows operating slowly, radio resetting presets, erratic electronics, or warning lights flickering may indicate voltage instability from a failing battery. Modern vehicles are sensitive to voltage fluctuations—weak batteries create inconsistent voltage that confuses computer modules and causes strange electrical behavior.
Sulfuric or rotten egg smell indicates battery venting hydrogen sulfide gas, typically from overcharging or internal short circuits. This smell should never be ignored—it indicates potential safety hazards. Have the battery and charging system tested immediately.
For flooded batteries, persistent low fluid level despite regular additions suggests internal problems—either overcharging causing excessive water decomposition, or internal shorts generating heat and gas. After ruling out charging system overcharging, plan for battery replacement.
Heavy corrosion that returns quickly after cleaning often indicates excessive gassing from internal battery degradation. Normal batteries vent small amounts of gas during charging, but failing batteries vent excessively, creating persistent corrosion problems.
Failed load testing provides definitive evidence. Professional load testers simulate actual cranking conditions and measure whether the battery can maintain adequate voltage under high current draw. When capacity drops below 50% of rated capacity, replacement is recommended even if the battery can still start the engine—it’s failing and will leave you stranded soon. For related diagnostic procedures, see our guide on how to reset check engine light.
Professional Testing vs. DIY Assessment
Free testing is available at most auto parts retailers—AutoZone, O’Reilly Auto Parts, Advance Auto Parts, and NAPA all offer complimentary battery and charging system testing. These tests take 5-10 minutes and use sophisticated equipment that measures:
- Battery load test: Applies heavy current draw simulating engine cranking while monitoring voltage
- Cranking voltage: Measures voltage during actual engine cranking
- Charging voltage: Measures alternator output at various RPMs
- Starter current draw: Measures how much current the starter motor requires
The computerized tester prints a report showing battery condition (good, marginal, replace), charging system function (good, weak, failed), and starter performance (good, high draw). This comprehensive evaluation helps distinguish between battery failure, alternator problems, and starter issues. Retailers provide this service hoping you’ll purchase a replacement battery from them if needed, but you’re under no obligation—the testing is genuinely free even if you buy nothing.
Professional shop testing includes everything free retail testing offers plus additional diagnostics:
- Voltage drop testing throughout the charging circuit identifies corroded connections, damaged cables, or poor grounds
- AC ripple testing detects failed alternator diodes that reduce charging effectiveness
- Parasitic draw testing measures current drain when the vehicle is “off” to identify modules or accessories draining the battery
- Charging system performance curves at various loads and speeds verify alternator and regulator function across all operating conditions
These advanced tests cost $50-150 but provide comprehensive diagnosis when electrical problems are complex or intermittent. Professional diagnosis is particularly valuable when you’ve replaced a battery or alternator but problems persist, suggesting wiring or ground problems causing the component failures.
DIY voltage testing with a digital multimeter provides basic condition assessment. Set the multimeter to DC voltage (20V range), connect the red probe to the positive terminal and black probe to negative terminal, and read the display:
- Engine off test: 12.6V+ = fully charged, 12.4-12.6V = 75% charge, 12.2-12.4V = 50% charge, below 12.2V = weak or failing
- Cranking test: Voltage should stay above 9.6V during cranking; if it drops to 8V or lower, the battery cannot provide adequate power
- Charging test: With engine running at 2000 RPM, voltage should read 13.8-14.4V; lower suggests alternator problems, higher suggests voltage regulator failure
While these simple tests don’t replace professional load testing, they help you monitor battery health and identify obvious problems. A $25 multimeter is a worthwhile investment for any car owner interested in basic diagnostics.
Replacement Procedure (Skill-Level Appropriate)
For intermediate DIY mechanics (60% audience), battery replacement is a straightforward 30-minute task requiring basic tools and safety awareness. Gather your supplies before beginning:
- Tools: Socket set or combination wrenches (typically 10mm, sometimes 8mm or 13mm for terminal bolts, various sizes for hold-down brackets)
- Safety equipment: Safety glasses or goggles, chemical-resistant gloves, long sleeves
- Supplies: Battery terminal cleaner, petroleum jelly or dielectric grease, baking soda and water solution for cleaning
- Optional: Battery terminal puller, battery carrier handle
Begin by ensuring the ignition is off and all accessories are off. Some vehicles require special procedures before disconnecting the battery to prevent computer module issues—check your owner’s manual. If your vehicle has a complex electrical system or keyless entry, you may need a memory saver device (available at auto parts stores for $15-30) that plugs into the 12V accessory outlet and maintains power to computers during battery replacement.
Locate the battery—typically in the engine compartment, though some vehicles mount batteries in the trunk, under rear seats, or in fender wells. If the battery is not readily visible in the engine compartment, consult your owner’s manual. Once located, identify the terminals: positive is marked with a + symbol and typically has a red cover or red cable; negative is marked – and typically has a black cable.
Disconnect the negative cable first—this is critical for safety. Loosen the negative terminal clamp bolt counterclockwise until the clamp can be removed. You may need to wiggle and twist the clamp while pulling upward. Never pry against the battery terminal or use excessive force—this can crack the terminal. If the clamp is severely corroded and stuck, use a battery terminal puller tool that applies upward pressure without damaging the terminal. Once the negative cable is free, position it away from the battery where it cannot accidentally contact the terminal.
Now disconnect the positive cable using the same procedure. With both cables disconnected, locate the battery hold-down mechanism. Common designs include:
- Bar across the top secured by bolts at the base
- J-bolt in the floor of the battery tray with a clamp that hooks over the top
- Side brackets with bolts
- Strap around the battery secured at the bottom
Remove the hold-down hardware and set it aside. Now carefully lift the old battery straight up out of the tray. Batteries weigh 30-60 pounds depending on size and type—use proper lifting technique with your legs, not your back. Many batteries have built-in handles, but these can break on old batteries, so support from underneath is wise. Set the old battery aside on a flat, stable surface away from your work area.
Clean the battery tray, hold-down hardware, and cable terminals using the baking soda and water solution. Remove all corrosion, dirt, and acid residue. Dry everything thoroughly—you want a clean foundation for the new battery. Inspect the cables for damage. If you see fraying, cracks in insulation, or severe corrosion, plan to replace the cables (battery cables typically cost $15-30 each).
Position the new battery in the tray, ensuring it’s oriented correctly—positive and negative terminals must be on the correct sides for the cables to reach. The battery should sit flat and stable in the tray. Reinstall the hold-down hardware and tighten it securely. The battery shouldn’t move if you try to shift it—excessive vibration damages batteries.
Clean the cable clamps and new battery terminals, then apply a thin coat of petroleum jelly or dielectric grease to the terminals. Connect the positive cable first, sliding the clamp fully onto the terminal post and tightening the bolt securely. Don’t over-tighten to the point of stripping threads—just firm and snug. Repeat for the negative cable. Apply more protector compound to the outside of the connections.
Verify that both connections are tight by attempting to twist the clamps by hand—they shouldn’t rotate on the terminals. Ensure no tools, hardware, or debris remain on or near the battery. Close the hood and attempt to start the vehicle. The engine should start normally—if it doesn’t, verify cable connections and terminal tightness.
Some vehicles require additional steps after battery replacement to reset computer memory. Common procedures include:
- Relearning idle: Start the engine, let it idle for 3 minutes, then drive normally for 10-15 minutes
- Power window recalibration: Roll each window fully down, then fully up and hold the switch in the up position for 2 seconds
- Radio code entry: Some vehicles require entering a security code after battery disconnect
- Clock and preset reset: You’ll need to reset your clock and radio presets
Dispose of your old battery properly by returning it to the retailer (most offer $10-20 core charge refunds) or taking it to a recycling center. Never place batteries in regular trash—it’s illegal in most states and harmful to the environment.
For professional mechanics (25% audience), battery replacement includes additional considerations. Vehicles with start-stop systems, intelligent battery monitoring, or complex power management require battery registration or programming after replacement. German vehicles (BMW, Mercedes-Benz, Audi, Volkswagen) typically require dealer scan tools or professional-grade diagnostic equipment to register the new battery with the vehicle’s power management system. The computer must learn the new battery’s specifications (CCA, RC, type) and reset its charging algorithms accordingly.
Failure to properly register a new battery on vehicles requiring this procedure can result in:
- Overcharging or undercharging (shortening battery life)
- Reduced fuel economy (charging system not optimized)
- Electrical system fault codes and warning lights
- Premature battery failure
- Degraded stop-start system performance
Check manufacturer service information before replacing batteries on European vehicles, luxury vehicles, and any vehicle with intelligent battery monitoring. Factor registration costs ($50-150 at dealerships or independent shops with proper equipment) into your replacement budget.
Additionally, some vehicles store batteries in difficult locations requiring significant disassembly. Batteries under rear seats may require removing seats. Batteries in trunk floor compartments may require removing interior panels and spare tire. Batteries in fender wells require wheel removal and possibly fender liner removal. These installations can take 1-3 hours and may require specialized tools. For vehicles with difficult battery access, professional installation often makes sense even for mechanically capable owners.
For beginners (15% audience), battery replacement represents a reasonable DIY goal after building confidence with simpler maintenance tasks. Start by watching professional technicians perform the job or viewing detailed video tutorials specific to your vehicle make and model. The critical safety concerns—protective equipment, proper disconnection sequence, lifting technique, and terminal cleaning—can all be learned through observation and practice.
Consider having a knowledgeable friend or family member supervise your first battery replacement. They can verify you’re following proper procedures, ensure safety protocols are observed, and provide confidence during the installation. Many automotive enthusiast communities and car clubs offer mentorship for DIY beginners. Your first battery replacement will likely take an hour; future replacements will be quicker as you gain familiarity.
If you’re uncomfortable with any aspect—heavy lifting, working with corrosive chemicals, electrical connections, or vehicle electronics—professional installation is the wise choice. Most retailers charge $10-30 for installation when you purchase the battery from them—a small price for peace of mind and correct installation. Watching the technician perform the work builds knowledge for future DIY attempts. For basic electrical system understanding, review our article on what wires does it take to start a car.
Battery Registration and Programming
Modern vehicles with sophisticated electrical management systems require battery registration or programming after replacement. This process informs the vehicle’s computer about the new battery’s specifications and resets the battery monitoring algorithms. Vehicles most likely to require registration include:
- German manufacturers: BMW, Mercedes-Benz, Audi, Volkswagen, Porsche (nearly all models from 2005+)
- GM vehicles with battery monitoring: Many Cadillac, Buick, and higher-end Chevrolet models
- Vehicles with start-stop systems: Most manufacturers require registration when replacing batteries on start-stop equipped vehicles
- Hybrid and electric vehicles: Battery management systems require recalibration
The registration process requires professional diagnostic scan tools capable of writing data to vehicle control modules—typical consumer-grade code readers cannot perform this function. Dealerships always have the necessary equipment, and many independent shops have invested in professional diagnostic systems capable of battery registration. The procedure typically involves:
- Connecting the scan tool to the vehicle’s OBD-II diagnostic port
- Navigating to the battery management or power management module
- Entering the new battery’s specifications (part number, CCA, RC, technology type)
- Commanding the module to reset battery monitoring parameters
- Clearing any battery-related fault codes
- Performing a test drive to verify proper system function
Registration costs vary from $50 at independent shops to $150+ at dealerships. Some shops include registration free with battery purchase and installation. Others charge separately. Always ask about registration requirements and costs when shopping for batteries for vehicles likely to need this service.
What happens if you don’t register? The vehicle’s power management system continues using the old battery’s profile, potentially causing:
- Incorrect charging voltage: The system doesn’t know the new battery’s needs
- Premature battery failure: Improper charging cycles degrade the new battery
- Reduced fuel economy: Charging algorithm not optimized for actual battery condition
- Degraded start-stop function: System may disable start-stop thinking battery can’t handle cycling
- Warning lights: Battery monitoring system may set fault codes for inconsistent battery performance
Some vehicles with less sophisticated monitoring may work acceptably without registration, but you’re sacrificing optimal performance and battery life. For a few extra dollars during installation, proper registration is worthwhile insurance for your battery investment.
Warranty Considerations
Battery warranties vary significantly by manufacturer, retailer, and battery type, but typically include two components: a free replacement period and a prorated warranty period.
Free replacement periods:
- Flooded batteries: Typically 24-36 months free replacement if battery fails testing
- AGM batteries: Typically 36-48 months free replacement
- Premium batteries: Some offer up to 60 months free replacement
During the free replacement period, if your battery fails a load test at the retailer where you purchased it, they’ll replace it at no charge. You simply bring in the failed battery and purchase receipt, they test it, and if it fails their criteria, you walk out with a new battery free.
Prorated warranty periods:
- Flooded batteries: Total warranty often 60-84 months (including free replacement period)
- AGM batteries: Total warranty often 84-100 months
- Premium batteries: Some offer 100+ month total warranties
During the prorated period after the free replacement period ends, you receive a credit toward a new battery based on how much warranty time remains. For example, if you have a battery with a 36-month free replacement and 84-month total warranty, and it fails in month 50:
- Free replacement period is over (ended at month 36)
- You’re in the prorated period (months 37-84)
- Remaining warranty: 34 months (84 – 50 = 34)
- Prorated credit: (34/84) × battery purchase price = approximately 40% credit toward new battery
Warranty coverage and exclusions:
- Covered: Manufacturing defects, premature capacity loss under normal use, internal shorts or plate failure
- Not covered: Physical damage from accidents, freezing damage from deep discharge in cold weather, overcharging damage from faulty voltage regulators, sulfation from chronic undercharge or long-term storage without maintenance
- May be covered: Depends on retailer policy and circumstances—corrosion damage, cracking from vibration, premature wear from vehicle electrical issues
Tips for maximizing warranty benefits:
- Keep your receipt: You must prove purchase date and location for warranty claims
- Register your purchase: Some manufacturers offer online warranty registration for easier claims
- Maintain documentation: If you claim a warranty replacement, keep those receipts too—the replacement battery typically carries the remainder of the original warranty
- Know the testing criteria: Different retailers use different failure thresholds; a battery that fails at one store might pass at another
- Bring the vehicle: Some retailers require testing the battery while installed in the vehicle to verify there isn’t a charging system problem causing premature failure
Core charges and deposits:
- When purchasing a new battery, most retailers add a $10-20 core charge to your bill
- You receive this charge back when you return your old battery for recycling
- This deposit system ensures nearly 100% of old batteries get recycled rather than ending up in landfills
- If you don’t have an old battery to return, you pay the core charge permanently unless you bring one in later
Lead-acid batteries have the highest recycling rate of any consumer product—approximately 99% in the United States. The lead, plastic, and sulfuric acid are all recovered and reused. Lead from old batteries becomes the lead in new batteries, creating a closed-loop recycling system. This environmental success story depends on proper disposal through retailers, recycling centers, or automotive service providers. Never dispose of batteries in regular trash—it’s illegal in most jurisdictions and harmful to the environment. For more information on battery fundamentals, see our article on what is a battery charge.
Troubleshooting Common Battery Problems
Understanding common battery issues helps you distinguish between problems requiring battery replacement, charging system repairs, or simple maintenance. Accurate diagnosis saves money by ensuring you fix the actual problem rather than replacing components unnecessarily.
Dead Battery vs. Failing Battery
A completely dead battery shows no signs of life—when you turn the key or press the start button, you hear no clicking, no starter engagement, no lights on the dashboard, nothing. Complete power loss typically results from:
- Lights left on: Headlights, interior lights, or accessory lights draining the battery over hours
- Door ajar: Door not fully closed, keeping interior lights and computer systems active
- Parasitic drain: Faulty module or accessory drawing excessive current when vehicle is “off”
- Alternator failure: Battery discharged during driving and not recharged
- Extended storage: Vehicle sitting unused for weeks or months
The solution for a simple discharge is jump-starting (described below) followed by driving for 30+ minutes to allow the alternator to recharge the battery. If the battery accepts a charge and the vehicle starts normally after recharging, the battery itself may be fine—the problem was the discharge source. However, if jump-starting becomes necessary repeatedly, the battery is failing or the charging system isn’t maintaining charge.
A failing battery exhibits different symptoms—it may still crank the engine, but does so slowly and laboriously. You hear the starter engaging (“rr-rr-rr-rr” sound) but it turns slowly. Sometimes the vehicle starts after extended cranking; other times, it doesn’t start at all. Failing batteries may work fine when warm but fail when cold. These symptoms indicate internal battery degradation:
- Sulfation: Hardened lead sulfate crystals coating the plates reduce active surface area
- Plate shedding: Active material falling off the plates and accumulating at the bottom of the case
- Internal shorts: Breakdown of plate separators allowing current to leak between plates
- Grid corrosion: The lead alloy support structure deteriorating
Failing batteries cannot be revived by charging—the internal damage is permanent. Replacement is required. Don’t waste time and money on chronic jump-starting or multiple charging attempts when the battery has failed.
Jump-Starting Safely
Jump-starting provides emergency power from a good battery (either from another vehicle or a portable jump starter) to start a vehicle with a dead battery. Safety is paramount—improper jump-starting can damage vehicle electronics, cause battery explosions, or create electrical arcs that burn people or damage vehicles.
Proper jump-starting procedure:
- Position vehicles: Park the vehicle with the good battery close enough to the dead vehicle that jumper cables reach both batteries, but ensure vehicles are not touching each other (prevents electrical grounding issues)
- Both vehicles off: Turn off both ignitions and all accessories
- Identify terminals: Locate positive (+, typically red cover or cable) and negative (-, typically black) on both batteries
- First connection: Clamp one end of the RED positive jumper cable to the POSITIVE terminal of the dead battery
- Second connection: Clamp the other end of the RED positive cable to the POSITIVE terminal of the good battery
- Third connection: Clamp one end of the BLACK negative cable to the NEGATIVE terminal of the good battery
- Fourth connection – CRITICAL: Clamp the other end of the BLACK negative cable to a bare metal ground point on the dead vehicle—NOT to the negative battery terminal. Choose an unpainted metal surface on the engine block, frame, or chassis away from the battery, fuel lines, and moving parts (good choices include engine mounting brackets, alternator mounting brackets, or chassis ground points)
Why ground away from the battery? When you make the final connection, a small spark often occurs. Batteries vent hydrogen gas during charging—a flammable and explosive gas. Making the final connection directly to the battery terminal could ignite hydrogen and cause an explosion. Grounding to the chassis instead creates the spark away from any hydrogen concentration.
- Start the good vehicle: Let it run for 2-3 minutes at fast idle (around 2000 RPM) to partially charge the dead battery
- Start the dead vehicle: Attempt to start it—if it doesn’t start after 3-4 seconds of cranking, stop and wait another 2-3 minutes for more charging
- Remove cables in reverse order: Once the dead vehicle is running, remove cables: (a) Black cable from ground point on dead vehicle, (b) Black cable from good battery, (c) Red cable from good battery, (d) Red cable from dead battery
- Drive the previously dead vehicle: Drive for at least 30 minutes, preferably on the highway, to allow the alternator to recharge the battery
Common jump-starting mistakes to avoid:
- Connecting positive to negative or negative to positive (reverses polarity and damages electronics)
- Allowing cable clamps to touch each other while connected
- Making final connection at the battery (hydrogen explosion risk)
- Attempting to jump-start a frozen battery (can cause case rupture)
- Attempting to jump-start a battery with a cracked case (acid leakage)
- Using damaged cables with exposed wiring (shock and short circuit risk)
For more information about the starting system, see our detailed guide on how starter motors work.
Battery Won’t Hold Charge – Root Causes
If your battery repeatedly goes dead even after jump-starting or charging, investigate these common root causes:
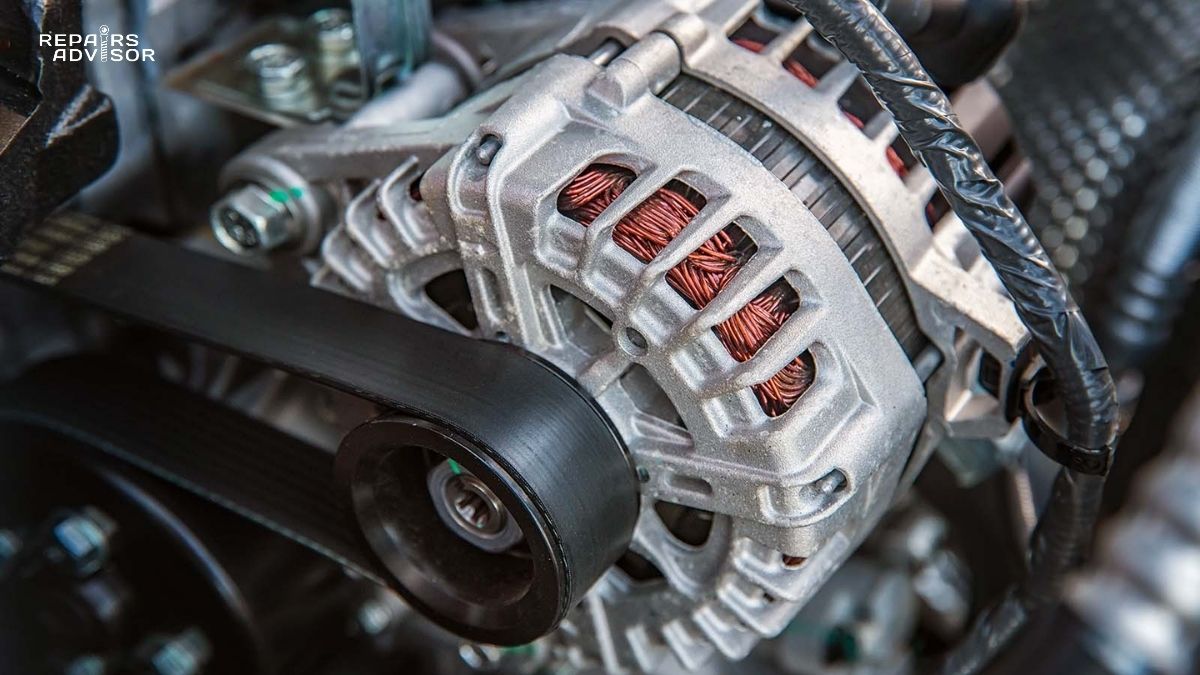
Alternator failure is the most common reason batteries won’t hold charge. The alternator recharges the battery while driving—if it fails or operates at reduced capacity, the battery gradually discharges during vehicle operation. Test alternator output with a voltmeter: with the engine running at 2000 RPM and a moderate electrical load (headlights, heater blower on medium), voltage measured at the battery terminals should be 13.8-14.4 volts. Lower voltage indicates alternator problems. Higher voltage suggests voltage regulator failure.
For comprehensive information on charging system operation, see our article on how alternators work. Alternator failure requires professional diagnosis and repair or replacement—costs typically range from $300-800 depending on vehicle.
Parasitic drain refers to excessive electrical current draw when the vehicle is “off.” Normal parasitic draw for modern vehicles is 25-50 milliamps (0.025-0.050 amps) to maintain computer memory, security systems, and clocks. Abnormal draw above 100 milliamps can discharge a battery in days. Common parasitic drain culprits include:
- Faulty control modules that don’t enter sleep mode
- Interior lights that don’t turn off (due to faulty door switches)
- Trunk lights staying on (same cause)
- Glove box lights
- Aftermarket accessories poorly installed (amplifiers, alarms, remote starters)
- Stuck relays keeping circuits energized
- Corroded or damaged wiring creating current leaks
Diagnosing parasitic draw requires professional equipment—a digital multimeter capable of measuring DC current up to 10-20 amps, connected in series between the battery negative terminal and the negative cable. With the vehicle “off” and all doors closed (use a paper clip or tape to hold door switches closed while testing), wait 20-30 minutes for all modules to enter sleep mode, then measure current draw. If draw exceeds 50-75 milliamps, begin systematically removing fuses one at a time until the draw drops, identifying which circuit is causing the problem. This testing requires professional expertise and proper equipment—attempting it without knowledge can blow fuses, damage the multimeter, or reset vehicle computers.
Sulfation buildup occurs when lead sulfate crystals harden on the battery plates, reducing the active surface area available for chemical reactions. Sulfation is the primary cause of battery capacity loss over time. It’s accelerated by:
- Long periods sitting in a discharged state
- Chronic undercharging (short trips, low alternator output)
- High temperatures (accelerate chemical reactions)
- Deep discharges (converting large amounts of lead to sulfate at once)
- Age (sulfation accumulates with each charge-discharge cycle)
Prevention is the best defense against sulfation: maintain batteries fully charged, drive regularly for adequate charging time, use battery tenders during storage, and avoid deep discharges. Some specialized battery chargers claim to reverse sulfation using high-frequency pulses that break down hardened crystals. These “desulfation” or “recondition” chargers show mixed results—they may help batteries with minor sulfation but cannot reverse severe degradation or restore capacity to batteries that have shed significant active material. Typically, by the time sulfation is severe enough to cause noticeable capacity loss, the battery is near end of life and replacement is more cost-effective than extended charging attempts.
Corrosion Keeps Returning
If you clean battery terminals thoroughly but corrosion returns within weeks, investigate these root causes:
Overcharging causes excessive gassing, venting acid vapor that condenses on terminals as white, green, or blue corrosion. Test charging system voltage—it should be 13.8-14.4 volts with engine running at 2000 RPM. Voltage consistently above 14.5 volts indicates voltage regulator failure. The regulator must be replaced; installing a new battery without fixing the voltage regulator simply destroys the new battery through overcharging.
Battery venting excessively may indicate internal damage—short circuits, plate degradation, or electrolyte contamination cause abnormal gas generation. Combined with other symptoms (low capacity, slow cranking, age over 3 years), excessive venting suggests battery replacement is necessary.
Loose connections create electrical resistance and arcing. As current flows through a loose connection, resistance generates heat. This heating can vaporize small amounts of acid or cause corrosion through electrolysis. Ensure terminal connections are tight—you shouldn’t be able to twist cable clamps by hand.
Environmental contamination from road spray, spilled fluids, or nearby corrosive materials accelerates corrosion. Keep the battery and surrounding area clean and dry. After cleaning terminals, apply terminal protection spray, petroleum jelly, or dielectric grease liberally to all exposed metal. Some professionals install felt terminal washers saturated with corrosion inhibitor—these sit between the terminal post and cable clamp, absorbing acid vapor before it causes corrosion.
If you’ve addressed all these factors but corrosion persists, the battery itself may be failing. Internal degradation can cause excessive venting that defeats all corrosion prevention efforts. Load test the battery and plan for replacement if capacity has dropped significantly.
Conclusion
Your car battery represents far more than just a heavy box under your hood—it’s a sophisticated electrochemical energy storage system that transforms chemical reactions into the electrical power your vehicle demands. The six cells working in concert to deliver 12.6 volts, the reversible lead-acid chemistry allowing thousands of charge-discharge cycles, and the integration with your vehicle’s charging system all combine to create reliable, cost-effective power for starting and electrical support.
Choosing the right battery technology—flooded lead-acid for budget-conscious owners with standard vehicles, AGM for start-stop systems and high electrical demands, or specialized lithium-ion for electric vehicles—ensures optimal performance for your specific needs. Understanding specifications like Cold Cranking Amps for reliable winter starting and Reserve Capacity for electrical buffer during alternator failure helps you select batteries that match your climate and driving conditions rather than blindly accepting whatever’s in stock.
Preventive maintenance dramatically extends battery life beyond the typical three-year baseline. Monthly terminal cleaning, quarterly voltage testing, proper fluid level maintenance for flooded batteries, driving habits that ensure full recharge cycles, and appropriate storage care for infrequent use can transform a three-year battery into a five- or even seven-year battery. These simple maintenance tasks require minimal time investment yet prevent the inconvenience and potential danger of unexpected failures.
Recognizing warning signs—slow cranking, dim lights at idle, battery age exceeding three years, case swelling, persistent corrosion—allows proactive replacement before being stranded. Understanding when DIY maintenance and replacement is appropriate versus when professional service is necessary ensures your safety while building valuable automotive knowledge. The comprehensive warranty protection offered by quality batteries, combined with the near-perfect recycling infrastructure for lead-acid batteries, demonstrates both the value and environmental responsibility of proper battery management.
When professional service is the right choice: Batteries in difficult locations (under seats, in trunk, in fender wells), vehicles requiring battery registration or programming after replacement, any electrical system diagnosis beyond basic voltage testing, parasitic draw testing and circuit troubleshooting, charging system failures involving alternators or voltage regulators, and any situation where you feel uncomfortable working with electrical systems or heavy components. Professional service centers have the diagnostic equipment, technical knowledge, and safety equipment to ensure correct diagnosis and proper repairs. The cost of professional service is modest compared to the value of your time, the risk of incorrect diagnosis, and the potential for damage from improper procedures.
Your empowerment through knowledge: With the information in this comprehensive guide, you can make informed decisions about battery selection based on technology, specifications, and your specific needs. You can perform maintenance that extends battery life and prevents premature failure. You can recognize warning signs before being stranded at the worst possible time. You understand when DIY work is appropriate and when professional expertise is necessary. You know how to properly dispose of old batteries, contributing to the remarkable 99% recycling rate that makes lead-acid batteries an environmental success story.
The battery remains one of the most important components in your vehicle—the electrical heart that brings everything to life. Treat it with care, maintain it diligently, replace it proactively, and it will reward you with reliable service for years. For comprehensive repair resources across all vehicle systems, explore our automotive manual collection to deepen your automotive knowledge and build confidence in maintaining your vehicle.
Your vehicle depends on its battery—now you understand how to keep that battery healthy, recognize when replacement is necessary, and make informed decisions that prevent failures before they leave you stranded. This knowledge empowers you to take control of your vehicle’s electrical health and avoid the frustration of unexpected battery problems.