Bad battery cables are among the most common yet overlooked causes of electrical problems in vehicles and equipment. Whether you’re dealing with slow cranking, intermittent electrical issues, or complete starting failure, faulty battery cables could be the culprit. This comprehensive guide covers everything from early symptom recognition to complete replacement procedures, empowering you to confidently diagnose and repair battery cable issues while maintaining safety throughout the process.
Key Safety Considerations: Always disconnect the battery before inspection (negative terminal first), wear safety glasses and gloves when handling corroded cables, and never work on electrical systems with the engine running.
Professional Consultation Note: While battery cable replacement is achievable for intermediate DIYers with proper preparation, complex electrical troubleshooting or signs of alternator/starter damage should be evaluated by a qualified technician.
Confidence Marker: This repair is within reach for intermediate DIYers who can safely work with basic electrical systems and have experience with hand tools.

Understanding Battery Cable Basics
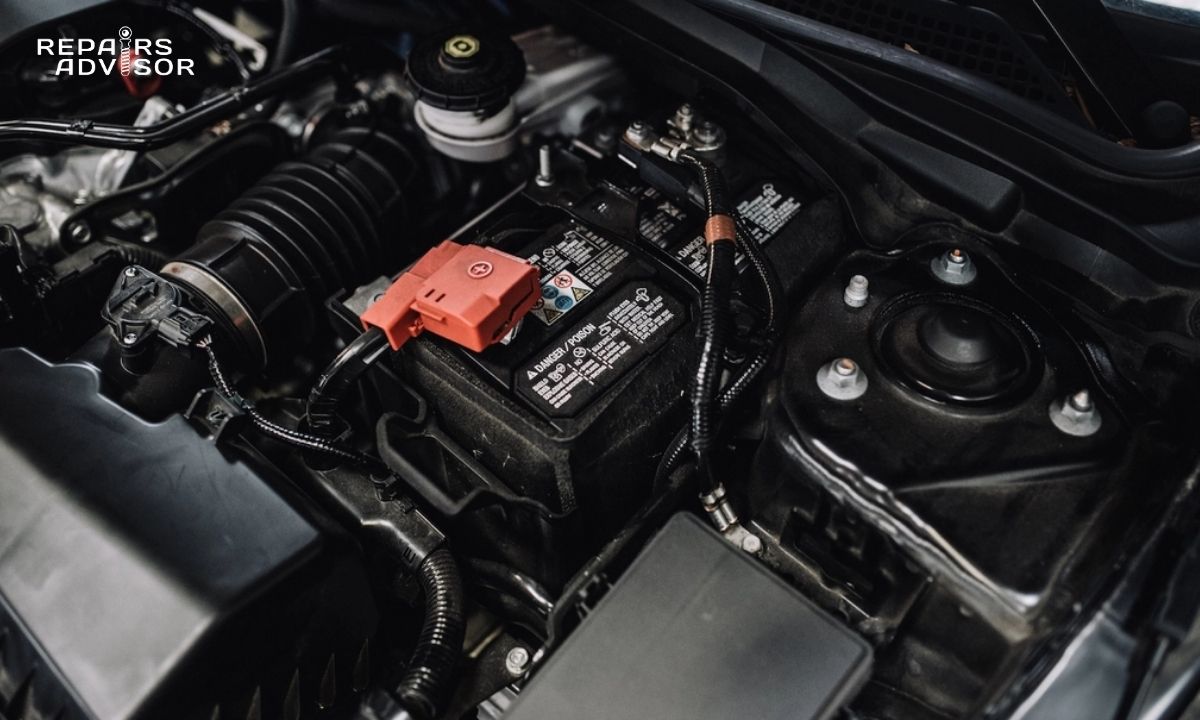
Battery cables serve as the primary electrical highway between your battery and the rest of your vehicle’s electrical system. The positive cable carries current from the battery to the starter, alternator, and main fuse box, while the negative cable provides the crucial ground connection that completes the electrical circuit.
Common Causes of Battery Cable Failure
Understanding why battery cables fail helps you recognize problems early and prevent roadside breakdowns:
Corrosion Buildup: Salt, moisture, and hydrogen gas from the battery create white or green powdery deposits that increase electrical resistance. This is especially common in coastal areas or regions that use road salt.
Physical Damage: Vibration, heat cycling, and age cause internal wire breakage that may not be visible from the outside. The copper strands inside the cable insulation gradually break, reducing the cable’s current-carrying capacity.
Loose Connections: Thermal expansion and contraction from temperature changes gradually loosen terminal clamps over time, creating high-resistance connections that generate heat and further damage.
Overheating: Excessive current draw from a failing starter or alternator can damage cables by generating heat that degrades the insulation and copper conductors.
When Professional Help is Needed
While battery cable replacement is a manageable DIY project for most people, certain situations require professional expertise:
- Intermittent electrical issues affecting multiple systems simultaneously
- Signs of alternator or starter motor failure requiring comprehensive diagnosis
- Hybrid or electric vehicle battery systems with high-voltage components
- Complex wiring harness damage requiring circuit tracing and specialized tools
For detailed troubleshooting guidance, consult our comprehensive diagnostic codes section or visit our help center for electrical issues.

Skill Assessment: Are You Ready for This Repair?
Before beginning, honestly assess your comfort level with electrical work. You’re ready for this repair if you can:
- Safely disconnect and reconnect a car battery following proper procedures
- Use a basic multimeter for voltage testing and understand the readings
- Identify different wrench and socket sizes and select appropriate tools
- Follow electrical safety protocols consistently without shortcuts
Tool Requirements and Familiarity Check
Essential Tools for All Skill Levels:
- Socket set (typically 8mm, 10mm, and 13mm for most battery terminals)
- Wire brush or specialized battery terminal cleaner
- Digital multimeter with DC voltage capability
- Safety glasses and insulated work gloves
- Battery terminal protectant spray
Professional-Grade Tool Upgrades:
- Battery load tester for comprehensive electrical system analysis
- Wire crimping tool for custom cable lengths
- Torque wrench for precise terminal tightening (typically 10-15 ft-lbs)
- Oscilloscope for advanced electrical diagnosis
Risk Assessment and Recovery Planning
Common Intermediate Mistakes to Avoid:
- Over-tightening terminals, which can strip threads or crack the battery case
- Working on a hot engine, risking burns from heated components
- Forgetting to photograph complex wiring configurations before removal
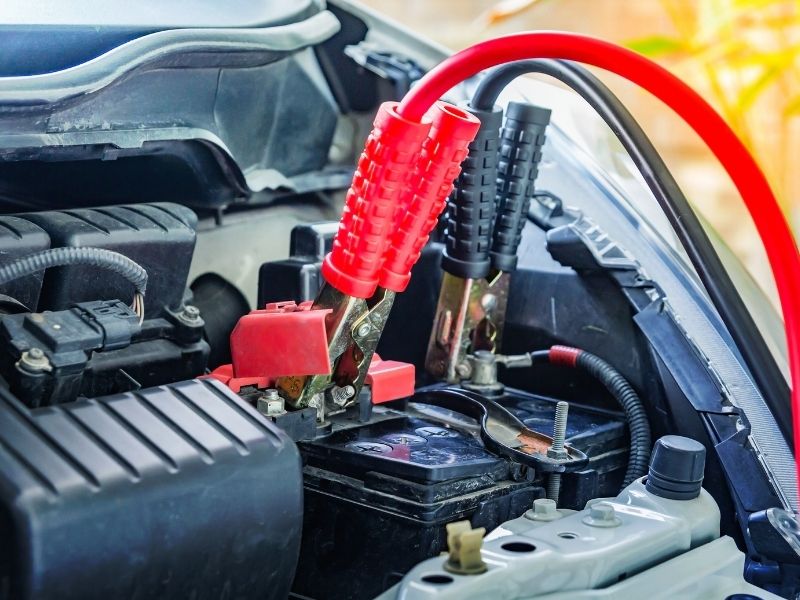
Recovery Plan: If a cable breaks during removal or you encounter unexpected complications, you’ll need emergency roadside assistance or temporary jumper cables to reach a repair facility. Always have a backup plan before starting electrical work.
Success Indicators: After completion, you should have firm electrical connections with no visible corrosion, and the engine should show improved starting performance with strong, consistent cranking.
Comprehensive Diagnostic Procedure
Phase 1: Safety Preparation and Initial Assessment
Start every battery cable project with proper safety preparation:
- Vehicle Positioning: Park on level ground, engage the parking brake, and turn off all electrical accessories including lights, radio, and climate control.
- Engine Cooling: Allow the engine to cool completely (minimum 30 minutes after driving) to prevent burns from hot components.
- Workspace Assessment: Locate the battery and assess accessibility. If the battery is in a difficult location such as under a seat or in a wheel well, consider professional service for safety reasons.
- Initial Visual Survey: Before touching anything, look for obvious signs of damage, corrosion, or previous repair attempts that might complicate the work.
Phase 2: Visual Inspection and Electrical Testing
With safety preparations complete, begin your systematic inspection:
- Remove Protective Components: Carefully remove battery covers, terminal protectors, or plastic housing that might obstruct your view of the cables and connections.
- Visual Cable Assessment: Inspect cable ends for white or green corrosion, cracks in the insulation, fraying of the outer covering, or any signs of overheating such as melted insulation.
- Battery Voltage Testing: Using your multimeter, test the battery voltage with the engine off. A healthy battery should read between 12.4 and 12.7 volts. If voltage is below 12 volts, address battery condition before proceeding with cable replacement.
- Connection Security Check: Gently attempt to wiggle the cable clamps. They should be firmly attached without movement. Loose connections often indicate worn clamps or corroded surfaces.
Decision Point: If your initial testing reveals battery voltage below 12 volts, the issue may be battery-related rather than cable-related. Consider having the battery tested before investing in new cables.
For additional guidance on electrical testing procedures, reference our electrical system troubleshooting articles and battery-related support documentation.
Phase 3: Advanced Diagnostic Testing
For intermediate DIYers ready to go deeper, voltage drop testing provides the most accurate assessment of cable condition:
Voltage Drop Test Procedure:
- Connect your multimeter’s positive lead to the positive battery terminal
- Connect the negative lead to the positive terminal at the starter
- Have an assistant crank the engine while you observe the voltage reading
- Repeat the process for the negative cable (battery negative to engine ground)
Interpretation: Voltage drop should not exceed 0.2 volts on either the positive or negative side. Higher readings indicate cable resistance requiring replacement.
Step-by-Step Cable Replacement Process
Removal Procedure: Safety First Approach
Critical Safety Rule: Always disconnect the negative cable first, then the positive cable. This prevents accidental short circuits if your wrench contacts the vehicle body.
- Negative Cable Removal: Using the appropriate socket or wrench, loosen the negative cable clamp. Twist and lift the cable end off the terminal. If corrosion makes removal difficult, use a battery terminal puller rather than forcing it.
- Positive Cable Removal: Repeat the process for the positive cable. Be extra careful not to allow the positive cable to contact any metal parts of the vehicle.
- Cable Routing Documentation: Before removing cables completely, take photos of their routing path, especially if they pass through complex areas or have multiple connection points.
- Complete Cable Removal: Follow each cable to its endpoint (starter, alternator, or ground points) and disconnect all connections. Remove any cable routing clips or protective covers along the way.
Decision Point: If cables are part of a complex wiring harness or have multiple branches, consider having the work done professionally to avoid incorrect reconnection.
Installation Process: Reverse Order with Improvements
Installation follows the reverse order with attention to long-term reliability:
- Cable Routing: Route new cables following the original path, ensuring they don’t contact sharp edges or heat sources. Use new cable ties and protective covers where needed.
- Terminal Preparation: Clean battery terminals with a wire brush and baking soda solution if necessary. Ensure terminal surfaces are bright and clean for optimal electrical contact.
- Positive Cable First: Connect the positive cable first, tightening the clamp securely but not excessively. Apply a thin coat of battery terminal protectant to prevent future corrosion.
- Negative Cable Last: Connect the negative cable last, again ensuring a secure connection. This order minimizes the risk of accidental short circuits during installation.
- System Testing: Before closing the hood, test all electrical systems including lights, horn, and starter function to verify proper installation.
Alternative Approaches for Different Skill Levels
Conservative Approach for Beginners:
- Clean existing cables thoroughly first to verify they actually need replacement
- Replace one cable at a time to maintain an electrical reference point
- Use exact OEM replacement cables to guarantee proper fit and function
Efficient Approach for Experienced DIYers:
- Replace both cables simultaneously for time savings and matched performance
- Consider upgrading to larger gauge cables for improved electrical capacity
- Combine cable replacement with alternator, starter, or battery maintenance for comprehensive service
For specific vehicle guidance, check our extensive automotive repair manual collection or explore professional maintenance procedures.
Advanced Techniques and Professional Insights
Time-Saving Diagnostic Methods
Professional technicians use several advanced techniques that intermediate DIYers can learn:
Voltage Drop Testing Under Load: Rather than relying solely on visual inspection, voltage drop testing while the starter is engaged provides definitive evidence of cable condition. This approach identifies problems that might not be visible externally.
Integrated System Testing: Combining battery, cable, and charging system testing in a single procedure saves time and provides a comprehensive view of electrical system health.
Pattern Recognition: Experienced technicians know that battery cable failures often indicate underlying charging system problems. If cables fail prematurely, investigate the alternator and voltage regulator for overcharging conditions.
Professional Equipment Recommendations
For those ready to invest in professional-grade tools:
Fluke 87V Multimeter: Industry standard for automotive electrical troubleshooting, offering superior accuracy and durability compared to basic meters.
Midtronics Battery and Electrical System Tester: Provides comprehensive analysis of battery, cables, alternator, and starter in a single test procedure.
Lisle Battery Terminal Service Kit: Professional-quality tools for terminal cleaning, cable removal, and installation that make the job safer and more efficient.
Cross-Equipment Application
Battery cable issues follow similar patterns across different types of equipment:
- Marine Applications: Salt water accelerates corrosion, requiring more frequent cable inspection and replacement
- Heavy Equipment: Vibration causes internal wire breakage before external damage becomes visible
- Agricultural Equipment: Dust and moisture create gradual resistance buildup throughout the cable length
The diagnostic approach and repair procedures remain consistent regardless of the specific application. For equipment-specific guidance, explore our construction equipment section or agricultural equipment resources.
Troubleshooting Common Problems
Systematic Problem-Solving Approach
Problem: Engine cranks slowly or intermittently fails to start
Diagnostic Process:
- Measure battery voltage at terminals (should be 12.4V or higher with engine off)
- Measure voltage at the starter during cranking (should be within 0.5V of battery voltage)
- Check voltage drop across positive and negative cables (should be less than 0.2V each)
- If voltage drop exceeds 0.2V, cable replacement is needed
Problem: Electrical accessories work intermittently
Progressive Troubleshooting:
- Wiggle battery cables while testing electrical functions to identify loose connections
- Inspect for loose or corroded connections throughout the cable length
- Test ground connections at engine block and vehicle body
- If problems persist after cable service, investigate charging system components
Advanced Diagnostic Techniques
Oscilloscope Analysis: Professional shops use oscilloscopes to detect intermittent electrical faults that are invisible to standard multimeters. These tools can reveal momentary voltage drops or connection failures that occur too quickly for conventional testing.
Load Bank Testing: This procedure verifies cable capacity under maximum electrical demand, simulating real-world operating conditions that might not be apparent during standard testing.
Thermal Imaging: Infrared cameras can identify hot spots indicating high-resistance connections before they cause complete failure.
Failure Pattern Recognition
Different types of equipment show characteristic cable failure patterns:
Automotive: Terminal corrosion is most common, often caused by battery gassing and environmental exposure.
Marine: Salt water exposure accelerates deterioration throughout the cable length, not just at terminals.
Heavy Equipment: Constant vibration causes internal wire breakage that may not be visible externally until failure is complete.
Agricultural: Dust and moisture create gradual resistance buildup, often combined with chemical exposure from fertilizers and pesticides.
For detailed diagnostic procedures specific to your equipment type, consult our troubleshooting guide collection or download comprehensive repair manuals.
Preventive Maintenance Strategy
Routine Inspection Schedule
Monthly Checks (Recommended for All Users):
- Visual inspection of battery terminals for any signs of corrosion buildup
- Ensure cable clamps are tight and secure without over-tightening
- Clean any visible corrosion immediately with baking soda solution and water
Quarterly Maintenance (Intermediate Level):
- Perform voltage drop testing across cable connections to identify developing problems
- Apply battery terminal protectant to prevent corrosion
- Document electrical system performance trends to identify gradual degradation
Annual Professional Service (Highly Recommended):
- Comprehensive electrical system load testing including battery, cables, alternator, and starter
- Preventive cable replacement based on condition assessment rather than waiting for failure
- Integration with other scheduled maintenance such as alternator service or battery replacement
Environmental Protection Strategies
Corrosion Prevention: Regular application of battery terminal protectant creates a barrier against moisture and chemical attack. This simple step can double cable life in harsh environments.
Moisture Control: Ensure battery tray drainage is clear and battery ventilation is adequate. Trapped moisture accelerates corrosion and cable degradation.
Vibration Isolation: Secure cable routing with appropriate clips and supports prevents stress damage from engine vibration and vehicle movement.
Temperature Management: Route cables away from excessive heat sources such as exhaust manifolds, turbochargers, or hydraulic systems that can degrade insulation.
Fleet and Commercial Applications
For businesses operating multiple vehicles or equipment:
Preventive Replacement Scheduling: Replace cables based on service hours or calendar intervals rather than waiting for failure, reducing downtime and emergency repair costs.
Standardization: Use consistent cable specifications across similar equipment types to simplify inventory management and technician training.
Documentation Systems: Maintain detailed records of cable replacement and electrical system performance to identify patterns and optimize maintenance schedules.
Training Programs: Ensure all operators can recognize early warning signs of electrical problems and follow proper reporting procedures.
When to Call a Professional
Clear Escalation Criteria
Immediate Professional Consultation Required:
- Multiple electrical systems failing simultaneously, indicating possible charging system or wiring harness problems
- Burning smell from electrical components, suggesting overheating or short circuits
- Battery repeatedly failing despite proper installation, pointing to charging system issues
- Hybrid or high-voltage electrical systems requiring specialized safety equipment and training
Intermediate Skill Boundary Situations:
- Custom cable fabrication required for specialty equipment or modified applications
- Electrical problems that persist after cable replacement, indicating more complex system issues
- Complex wiring harness damage requiring circuit tracing and specialized diagnostic equipment
- Signs of alternator or starter motor failure requiring comprehensive electrical system analysis
Professional Service Value Proposition
Professional technicians add the most value in these situations:
Comprehensive System Analysis: Professional equipment can test the entire electrical system simultaneously, identifying problems that might be missed with basic tools.
Warranty Considerations: Many commercial applications require professional installation to maintain equipment warranties and insurance coverage.
Time-Critical Repairs: When downtime costs exceed the price of professional service, expert diagnosis and repair minimize business interruption.
Training and Consultation: Professional shops can provide training for in-house maintenance teams and consultation on preventive maintenance programs.
For professional support, contact us through our customer service portal or explore our comprehensive help center.
Safety Protocols and Final Considerations
Universal Safety Requirements
Personal Protection: Eye protection is mandatory when working with batteries due to the risk of acid splash and metal debris. Chemical-resistant gloves protect against battery acid and provide better grip on tools.
Electrical Safety: Always disconnect the negative cable first and reconnect it last. This simple rule prevents most accidental short circuits that can cause sparks, burns, or equipment damage.
Fire Prevention: Never smoke or create sparks near batteries. The hydrogen gas produced during charging is highly explosive, especially in enclosed spaces.
Ventilation: Work in well-ventilated areas to prevent hydrogen gas accumulation. Indoor work requires additional ventilation or exhaust fans.
Chemical Hazard Management
Battery Acid: Sulfuric acid causes severe chemical burns. Flush any skin contact immediately with large amounts of water and seek medical attention for significant exposure.
Corrosion Products: The white and green deposits around battery terminals are chemically active. Avoid breathing dust and wash hands thoroughly after handling corroded components.
Disposal: Old battery cables often contain lead and other materials requiring proper disposal. Many auto parts stores accept old cables for recycling.
Long-Term Electrical System Health
Regular battery cable maintenance is part of a comprehensive electrical system care program. Combined with proper battery maintenance, charging system service, and attention to electrical loads, good cable maintenance ensures reliable electrical performance for years.
Related Maintenance Topics: Consider exploring our guides on brake system electrical components and power steering system maintenance to maintain all electrical aspects of your vehicle or equipment.
Skill Development Path: Master battery cable service as a foundation for more advanced electrical repairs. The diagnostic skills and safety practices learned here apply to alternator service, starter repair, and general electrical troubleshooting.
Professional Growth: For those interested in developing professional-level electrical skills, consider formal training programs or ASE certification in electrical systems. The foundation built through careful DIY electrical work provides an excellent starting point for professional development.
Remember: successful battery cable repair combines technical knowledge with careful attention to safety. Take your time, follow proper procedures, and don’t hesitate to seek professional help when the situation exceeds your comfort level or skill. The goal is not just to fix the immediate problem, but to build lasting knowledge and confidence for future electrical maintenance challenges.
For additional technical resources and equipment-specific guidance, browse our comprehensive manual collection or contact our technical support team for personalized assistance.