Quick Answer: A failing purge valve causes rough starts after refueling, check engine lights (P0441/P0442), and costs $100-500 to fix. Read on to diagnose it yourself in 15 minutes.
You’re running late for work, and you just filled up at the gas station. You turn the key, and instead of your engine’s familiar smooth start, it coughs, sputters, and nearly dies. Your heart sinks as the check engine light glares at you from the dashboard. Not today. Not when you have that important meeting in 20 minutes.
This frustrating scenario plays out thousands of times daily across the country, and more often than you’d think, the culprit is a component most drivers have never heard of: the canister purge valve. It’s a part roughly the size of a coffee mug, hidden somewhere in your engine bay, quietly doing its job—until it doesn’t.
The canister purge valve, also known as the EVAP purge valve or purge solenoid, plays a vital role in preventing fuel vapors from escaping into the atmosphere. This electronically controlled valve manages the flow of stored fuel vapors from your vehicle’s charcoal canister back into the engine where they can be burned during normal combustion. When it fails, the consequences range from annoying check engine lights to failed emissions tests and reduced fuel economy—and yes, those embarrassing moments when your car refuses to cooperate.
Here’s the good news: understanding how this valve works, recognizing failure symptoms, and knowing when to seek professional help can save you hundreds of dollars in unnecessary repairs and prevent that morning panic. This guide breaks down the technical operation, diagnostic procedures, and replacement considerations for the canister purge valve, whether you’re a DIY enthusiast tackling your first emission system repair or a professional mechanic refining your diagnostic approach.
TL;DR – If You Only Remember 3 Things
1. Quick Diagnosis: If your car stumbles RIGHT AFTER refueling + shows P0441/P0442 code → 90% chance it’s the purge valve.
2. DIY or Shop?
- Top-mounted valve + basic tools: DIY saves $100-200 (30 min job)
- Tank-area valve or multiple codes: Shop visit ($200-400 total)
3. Don’t Ignore It: A $50 valve failure can destroy your $1,500 catalytic converter within months.
Understanding the Purge Valve’s Role
If you’ve ever stood at the pump watching the price climb while that gasoline smell wafts through the air, you’ve witnessed what emission systems work so hard to prevent. Those vapors represent not just wasted money, but environmental pollutants that older vehicles released freely into the atmosphere. The purge valve is your car’s answer to that problem—a small guardian that ensures those vapors get used rather than lost.
The canister purge valve goes by several names in the automotive world: EVAP purge valve, purge solenoid, or vapor canister purge valve. Despite the different terminology, they all refer to the same component positioned between the charcoal canister and the intake manifold in your vehicle’s evaporative emission control system.
This small solenoid valve typically measures just 3-4 inches in length and consists of three main parts: an electromagnetic coil that actuates the valve, a valve body with inlet and outlet ports, and an electrical connector that links to your engine’s computer. The valve’s design is elegantly simple—a spring-loaded mechanism holds it closed by default, and when the Engine Control Unit (ECU) applies voltage to the solenoid coil, the resulting magnetic force pulls the valve open against spring tension.
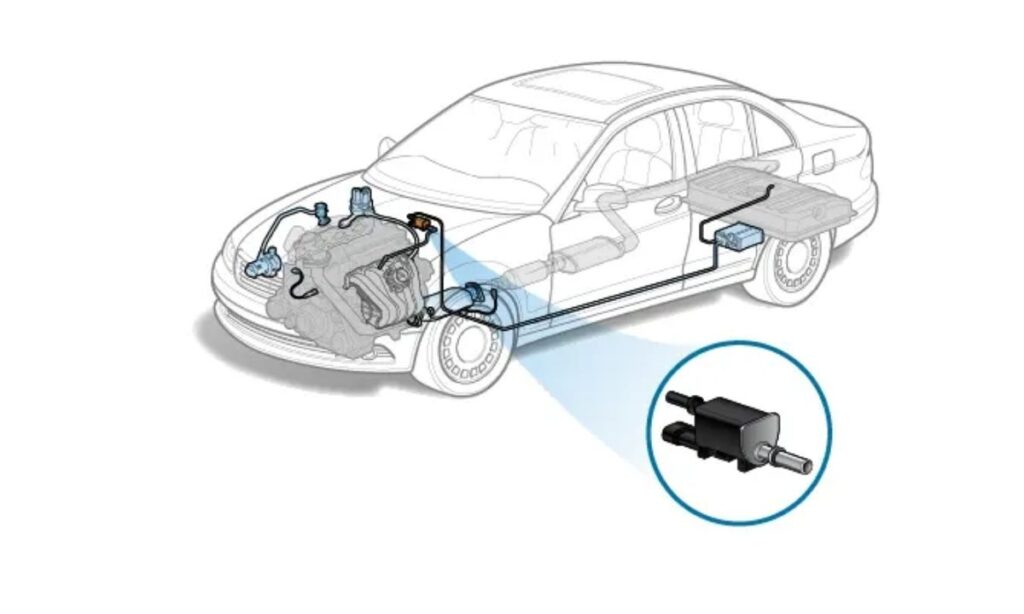
The purge valve’s location varies by vehicle make and model, but you’ll commonly find it mounted near the intake manifold at the engine’s firewall. Some vehicles position it closer to the fuel tank system, which can make replacement more labor-intensive. The valve connects to the vehicle’s vacuum system through rubber hoses approximately the diameter of a pencil—one line runs to the charcoal canister, while another connects to the intake manifold.
Within the broader EVAP system, the purge valve works alongside several other components to manage fuel vapors effectively. The charcoal canister stores vapors when the engine is off, the vent valve controls fresh air intake during purging, and the fuel tank pressure sensor monitors system integrity. This integrated approach ensures that volatile fuel vapors—which would otherwise contribute to smog formation—are captured and reused rather than released into the environment.
For beginners, think of the purge valve as a gatekeeper that only opens when conditions are right for the engine to handle extra fuel vapors. For professionals, it’s worth noting that modern systems use pulse-width modulation (PWM) to vary purge rates based on engine load, coolant temperature, and other parameters monitored by the ECU.
The valve remains closed whenever the engine is off, preventing unmetered air from entering the intake system and causing rough running or starting problems. This “normally closed” design is a critical safety feature that maintains proper air-fuel ratios during engine startup.
Here’s what most mechanics won’t tell you: The purge valve is one of the most commonly misdiagnosed components in EVAP systems. Many shops replace the expensive charcoal canister ($300-600) when a $50 valve is the real culprit. Why? Because the canister pays better. Always test the purge valve first—it fails 10x more often than the canister itself.
Purge Valve Operation Explained
Engine Off State
When your vehicle is parked with the engine off, the canister purge valve sits in its default closed position. Spring tension within the valve body keeps the internal plunger sealed against its seat, completely blocking any passage between the charcoal canister and intake manifold. This closed state serves multiple purposes.
First, it prevents fuel vapors stored in the charcoal canister from freely venting into the intake manifold where they would create an overly rich condition during the next cold start. Second, it maintains the integrity of the EVAP system’s sealed environment, allowing the fuel tank pressure sensor to accurately monitor for leaks. During this dormant phase, gasoline in your fuel tank naturally evaporates—especially on hot days—and those vapors travel through dedicated lines to the charcoal canister where activated carbon traps and holds them until the engine starts.
Engine Running – Normal Operation
The operational cycle of a purge valve is more sophisticated than a simple on/off switch. Modern engine management systems carefully orchestrate when and how much the valve opens based on dozens of parameters.
Startup Phase: When you first start your engine, particularly during a cold start, the ECU keeps the purge valve firmly closed. This prevents stored fuel vapors from flooding the intake manifold when the engine needs a precisely controlled rich mixture to fire up and warm its catalytic converter. The ECU monitors coolant temperature, and until the engine reaches approximately 140-160°F (60-70°C), the purge valve remains inactive.
Operating Phase: Once the engine reaches normal operating temperature and enters closed-loop fuel control mode—meaning the oxygen sensors are actively monitoring exhaust gases—the ECU begins pulsing the purge valve open. This isn’t a matter of flipping a switch; rather, the computer uses pulse-width modulation to vary the valve’s duty cycle anywhere from 5% to 50% depending on driving conditions.
At idle with a warmed engine, you might see a duty cycle of 10-15%, allowing a small but steady flow of fuel vapors into the combustion process. Under highway cruising conditions with stable engine load, the duty cycle can increase to 30-40% as the engine can more easily accommodate the additional fuel vapors without disrupting the air-fuel mixture. If you’re accelerating hard and the engine is already demanding maximum fuel from the injectors, the ECU might reduce or completely close the purge valve to maintain precise control.
The valve operates on a typical 12-volt DC electrical supply from the vehicle’s ECU, and when measured with a multimeter, a healthy purge valve solenoid typically shows resistance between 20-50 ohms across its terminals. The valve’s response time is remarkably quick—most can fully transition from closed to open in 100-300 milliseconds.
Vapor Flow Process
Understanding the complete vapor cycle helps explain why purge valve failures create the symptoms they do:
- Vapor Generation: As gasoline sits in your fuel tank, lighter hydrocarbon molecules naturally evaporate, particularly as temperature increases. This isn’t just a summer phenomenon—even on cool days, the mechanical action of fuel sloshing around and the slight temperature rise from a warm fuel pump can generate vapors.
- Vapor Storage: These fuel vapors travel through dedicated vapor lines to the charcoal canister, typically mounted under the vehicle near the fuel tank or along the frame rail. The canister contains activated charcoal with an enormous surface area—a handful of charcoal granules can have the surface area of a football field. This porous structure temporarily traps hydrocarbon molecules through adsorption (not absorption).
- Purge Activation: When driving conditions are optimal, the ECU opens the purge valve. Engine vacuum—which can be 15-22 inches of mercury (inHg) at idle—creates a powerful suction that draws air through the charcoal canister’s vent valve.
- Vapor Recovery: This fresh air flow strips the stored hydrocarbon molecules from the charcoal granules and carries them through the purge valve into the intake manifold. From there, they mix with incoming air and fuel from the injectors before entering the combustion chamber.
- Combustion and Efficiency: The recovered vapors burn just like regular gasoline, contributing approximately 1-2% to overall fuel economy in typical driving. While this might not sound significant, over the 100,000-mile life of a vehicle, proper EVAP system operation can save 50-100 gallons of fuel while preventing harmful emissions.
Professional mechanics should note that failure to purge regularly leads to canister saturation. Once the charcoal’s adsorptive capacity is exhausted, fuel vapors can’t be stored properly, leading to excessive pressure in the fuel tank, fuel odors, and eventual vent valve failure as vapors find alternative escape routes.
Quick Decision Flowchart: Is It Your Purge Valve?
Start here:
✅ Check engine light ON?
- YES → Scan for codes
- P0441, P0442, P0443-P0446: High probability purge valve
- Other P04XX codes: Could be EVAP system (continue below)
- No P04XX codes: Unlikely purge valve – check other systems
❌ No check engine light?
- Does car stumble ONLY after refueling? → 90% purge valve
- Rough idle all the time? → Probably vacuum leak elsewhere
- Fuel smell around car? → Could be purge valve OR gas cap
Next Step: Visual inspection takes 5 minutes → Do it before spending money on anything.
Don’t waste money replacing:
- Charcoal canister (unless purge valve tests good)
- Vent valve (uncommon failure)
- Fuel tank (almost never the issue)
→ Most common mistake: Shops replace the canister when only the valve is bad.
Signs of a Bad Canister Purge Valve
If you’re reading this, you probably have at least one of these symptoms. You’re not alone—purge valve failures affect thousands of drivers weekly, and most have no idea what’s wrong. Let’s decode what your car is trying to tell you.
Recognition matters: The faster you identify these symptoms, the less you’ll spend fixing downstream problems. A $50 valve today beats a $1,500 catalytic converter repair next year.
Primary Warning Signs
1. Check Engine Light (Most Common Symptom)
The illuminated check engine light is by far the most frequent indicator of purge valve problems. Modern vehicles constantly monitor EVAP system operation, and when the computer detects purge flow discrepancies, it stores diagnostic trouble codes and activates the warning light.
The most common codes associated with purge valve failure include:
- P0441: Evaporative Emission Control System Incorrect Purge Flow – This code indicates the ECU commanded the purge valve open but didn’t detect the expected change in engine behavior or oxygen sensor readings
- P0442: Small EVAP Leak Detected – Often caused by a purge valve that won’t seal completely when closed
- P0443: Evaporative Emission System Purge Control Valve Circuit Malfunction – Indicates electrical problems with the valve’s solenoid circuit
- P0444: Evaporative Emission System Purge Control Valve Circuit Open – Broken wiring or failed solenoid coil
- P0445: Evaporative Emission System Purge Control Valve Circuit Shorted – Solenoid windings shorted to ground
- P0440: Evaporative Emission System Malfunction – A general EVAP code that can indicate various issues including purge valve problems
These codes require a diagnostic scan tool to retrieve, making a basic OBD-II code reader an essential tool for DIY diagnosis. Understanding these OBD codes helps narrow down whether the purge valve itself has failed or if there’s a related issue with wiring, the charcoal canister, or other EVAP components.
2. Rough Idle or Engine Stumbling
Picture yourself stopped at a red light, feeling your car vibrate more than usual. You grip the steering wheel a little tighter, wondering if everyone around you notices your engine’s uneven rhythm. That coffee in your cup holder ripples with each stumble. It’s embarrassing, uncomfortable, and signals something’s wrong.
When a purge valve sticks in the open position, it creates what’s essentially a vacuum leak in the intake system. The engine receives unmetered air—air that’s flowing in through the EVAP system rather than past the throttle body where the engine management computer can measure it with the mass airflow or manifold pressure sensors.
This condition manifests as a rough, uneven idle where the engine speed fluctuates and the vehicle vibrates more than normal. You might notice the tachometer needle bouncing between 600-900 RPM instead of holding steady at 700 RPM. The roughness typically appears worse during cold starts and may gradually improve as the engine warms up and the computer makes fuel trim adjustments to compensate.
In severe cases with a completely stuck-open valve, the engine might stumble or hesitate during acceleration, particularly at lower RPMs where the vacuum leak represents a larger percentage of total intake air. The engine computer tries to adjust by injecting more fuel, but it’s essentially chasing a problem it can’t fully compensate for.
3. Hard Starting After Refueling
There’s a special kind of frustration reserved for car problems that follow predictable patterns. You need gas, so you fill up. Then your car punishes you for it by refusing to start properly. It’s like your vehicle is holding a grudge against the very fuel it needs to run.
This symptom is particularly frustrating because it creates a problematic pattern: you need to refuel, but refueling triggers starting problems. When a purge valve sticks open, the fuel vapors that accumulate in the charcoal canister during refueling—and there’s a lot of vapor displacement when adding 15 gallons of fresh fuel—immediately flow into the intake manifold.
The result is an overly rich mixture that can flood the engine. On the first cranking attempt, the engine might catch for a second or two, run extremely rough with black smoke from the exhaust, then stall. The second attempt usually goes better as some of the excess vapors clear out, but it still runs rough for the first 10-20 seconds.
This issue appears more frequently in certain vehicle makes. Hyundai vehicles (particularly Elantras, Santa Fes, and Tucsons) have experienced widespread purge valve problems triggering P0441 codes. Volkswagen and Audi vehicles across many model years show similar patterns. These aren’t design flaws per se, but rather the result of slightly different EVAP system configurations that make them more sensitive to purge valve failures.
4. Decreased Fuel Economy
You’ve noticed your trips to the gas station becoming more frequent. Maybe it’s your imagination, but you’re pretty sure you’re filling up more often than you used to. When you’re already watching every dollar in today’s economy, even a small decrease in fuel efficiency feels like money slipping through your fingers.
A malfunctioning purge valve affects fuel economy in a way that’s insidious because the change happens gradually. When the valve fails to open properly, those fuel vapors that should be captured and reused instead get vented to the atmosphere through the canister vent valve (after saturating the charcoal). You’re essentially throwing away 1-3% of your fuel.
Over a 15,000-mile year, that might translate to 15-30 extra gallons of fuel purchased. At $3.50 per gallon, that’s $50-100 annually—enough to pay for a replacement valve. The problem is that this decline happens slowly enough that most drivers don’t notice. If your fuel economy gradually drops from 28 MPG to 27 MPG over six months, you’re more likely to blame winter fuel blends, tire pressure, or driving conditions.
Professional technicians can spot this pattern by reviewing fuel trim data in scan tool live data. If long-term fuel trims show the engine consistently running lean (high positive numbers, typically above +10%), it suggests the engine is compensating for lost fuel—fuel that should have been recovered through the purge system.
5. Failed Emissions Test
In states and regions with mandatory emissions testing, a faulty purge valve often results in inspection failure. Modern emissions tests include an EVAP system integrity check where the testing equipment commands various valves to open and close while monitoring for pressure changes and leaks.
A purge valve that won’t respond to commands or can’t seal properly will cause test failure. Even in jurisdictions using older “sniffer” style emissions tests that sample exhaust gases, a malfunctioning purge valve can push hydrocarbon (HC) readings above acceptable limits since those unburned fuel vapors end up escaping to atmosphere rather than combusting in the engine.
6. Fuel Odor
The smell of gasoline around your vehicle—particularly noticeable when you return to a parked car after it’s been sitting in the sun—indicates fuel vapors are escaping somewhere. While a loose or damaged gas cap is the most common cause, a failed purge valve that won’t open can saturate the charcoal canister, forcing vapors to vent through the canister’s vent valve directly to atmosphere.
You might notice this smell most strongly near the rear of the vehicle (where the canister is typically mounted) or when entering the cabin after the car has been parked. It’s not just unpleasant—it represents wasted fuel and contributes to ground-level ozone formation.
Brand-Specific Vulnerability Patterns
Certain vehicle manufacturers and models have shown higher-than-average purge valve failure rates, though this doesn’t indicate poor quality as much as design choices that make the component more vulnerable to typical wear patterns:
- Hyundai/Kia vehicles: Multiple models including Elantra, Santa Fe, Tucson, and Tiburon have experienced common purge valve issues triggering P0441 codes. Some model years had extended warranty coverage for EVAP components.
- Volkswagen/Audi: German vehicles across various model lines show elevated purge valve failure rates, possibly related to the valves’ location near heat sources or the specific electrical characteristics of their solenoids.
- Ford/Mazda: These manufacturers share some engine platforms, and certain models trigger P0446 codes frequently due to purge valve circuit problems. The valve itself may function mechanically but experience electrical connector corrosion.
- GM vehicles: General Motors has acknowledged purge valve leaking issues on some models with special coverage extending warranty periods. Check with your dealership if you own an affected vehicle.
If you’re experiencing signs of a bad canister purge valve, comparing your symptoms against these common patterns can help confirm the diagnosis before committing to parts replacement.
⚠️ Warning: Why Replacing the Purge Valve Didn’t Fix Your Car
Seen this scenario? You replaced the purge valve. Code came back. Now you’re frustrated and out $150.
Here’s what probably happened:
- The valve wasn’t the problem – P0442 can also mean:
- Cracked EVAP hose ($5 fix)
- Bad gas cap ($20 fix)
- Loose connection at canister
- You didn’t clear the codes properly – Old codes stay in memory. Drive 50-100 miles after repair before judging success.
- You bought a cheap valve – $20 eBay specials fail within months. Spend $60-100 on Bosch/Delphi or OEM.
Pro tip: Before replacing ANYTHING, do the visual inspection below. 30% of “purge valve problems” are actually loose hoses or corroded connectors.
To see more details, let’s watch the video here.
Source: Auto Repair Guys
How to Test a Canister Purge Valve
Visual Inspection (Beginner-Friendly)
Before reaching for test equipment, a thorough visual inspection can reveal obvious problems and should always be your first diagnostic step. You don’t need expensive tools or years of experience for this—just your eyes, a flashlight, and patience. There’s something empowering about diagnosing a problem yourself, even if you ultimately decide to let a professional handle the repair.
Start by locating the purge valve—your vehicle’s service manual will show its exact position, but you’re typically looking near the intake manifold, along the firewall, or sometimes closer to the fuel tank. Take a moment to appreciate how this small component plays such a vital role in your vehicle’s operation.
Inspection checklist:
- Electrical connector examination: Disconnect the electrical connector and inspect both the valve’s pins and the connector’s socket terminals. Look for green corrosion (copper oxidation), bent pins, or moisture inside the connector. Corrosion is particularly common in humid climates or on vehicles frequently driven in rain. A contact cleaner spray and careful pin straightening can sometimes restore proper electrical connection.
- Vacuum hose condition: The rubber hoses connecting the purge valve should be supple, not cracked or hardened. Squeeze them gently—they should compress and spring back. Check where hoses connect to the valve’s ports for splits or deterioration. A common failure point is where the hose clamps grip the rubber; over-tightening can create stress cracks.
- Physical valve damage: Examine the valve body for cracks, impact damage, or oil contamination. While rare, impact damage from road debris can crack the valve housing. More commonly, you’ll see oil or fuel residue indicating leaks from deteriorated seals.
- Mounting security: Verify the valve is securely mounted to its bracket. A loose valve can create stress on the vacuum hoses and electrical connector, leading to premature failure of these components.
- Port inspection: If you can safely remove a hose, use a flashlight to peer into the valve’s ports. You’re looking for blockages from debris, insect nests, or excessive carbon buildup. A completely blocked port prevents proper purging even if the valve’s solenoid functions correctly.
Quick verdict from visual inspection:
- Cracked hoses or corroded connector? → Fix these first ($5-20). Might solve everything.
- Everything looks clean? → Move to electrical testing below.
- Oil leaking from valve? → Valve is bad. Skip testing, buy replacement.
Electrical Testing with Multimeter (Intermediate)
Electrical testing confirms whether the valve’s solenoid coil is functioning within specifications. You’ll need a basic digital multimeter—models from brands like Fluke, Klein, or even basic Harbor Freight units work fine for this testing.
Resistance Test:
- Preparation: Ensure the ignition is off and disconnect the valve’s electrical connector. This prevents any voltage from the ECU from interfering with your readings.
- Meter setup: Set your multimeter to the resistance (Ω) function, typically the lowest range such as 200 ohms. Some multimeters auto-range, which simplifies the process.
- Measurement: Place the multimeter’s test leads on the two pins of the purge valve’s electrical connector (on the valve side, not the wiring harness). The order doesn’t matter since you’re measuring resistance, not polarity.
- Interpretation:
- Specification range (typically 20-50 ohms): The valve’s solenoid coil is intact and within normal parameters. Consult your vehicle’s service manual for exact specifications as they vary by manufacturer.
- Infinite resistance (OL or overload on meter): The solenoid coil has an open circuit—the internal wire winding has broken. The valve has failed and requires replacement.
- Very low resistance (<5 ohms): The solenoid coil windings have shorted together or to ground. This is also a failure condition requiring valve replacement.
- Resistance outside specification but not open/shorted: Proceed with additional testing as the valve may be marginally functional but deteriorating.
Continuity Test:
This is a simpler variation that confirms electrical continuity exists through the solenoid coil. Set your multimeter to continuity mode (usually marked with a diode symbol and sound waves). Touch the probes to the valve’s electrical pins. The meter should beep or display a low resistance value. No beep means no continuity—the coil is open and failed.
Vacuum Test (Intermediate)
Vacuum testing confirms the valve’s mechanical operation—whether it actually opens and closes in response to electrical signals. This test requires a hand-operated vacuum pump (such as a MityVac) available at most auto parts stores for $30-60.
Test procedure:
- Valve removal: Remove the purge valve from the vehicle, disconnecting both the electrical connector and vacuum hoses. Note which port goes where—taking a photo with your phone helps during reassembly.
- Power preparation: Create a safe way to apply 12 volts to the valve. You can use jumper wires with alligator clips connected to your vehicle’s battery, or a bench power supply set to 12V. Add an inline fuse (5-10 amps) for safety.
- Initial test (unpowered): Connect your vacuum pump to one port of the valve. Pump it to create approximately 15-20 inches of mercury (inHg) vacuum—you’ll feel significant resistance as you pump. Expected result: The vacuum gauge reading should drop immediately, indicating the valve is closed and not holding vacuum. This is correct because the valve should be spring-loaded in the closed position when unpowered.
- Powered test: While maintaining the vacuum pump connection, apply 12V power to the valve’s electrical connector. You should hear a distinct clicking sound as the solenoid engages. Now pump the vacuum again to 15-20 inHg. Expected result: The gauge should hold steady or decrease very slowly (less than 2 inHg loss per minute). This confirms the valve opens when powered and creates a vacuum path.
- Release test: Remove the electrical power while watching the vacuum gauge. The reading should drop immediately as the valve spring returns it to the closed position, breaking the vacuum seal.
Failure indicators:
- Valve holds vacuum when unpowered: Stuck open failure—the valve can’t close properly even without electrical actuation
- Valve won’t hold vacuum when powered: Stuck closed failure or damaged seals—the valve can’t open or has internal damage preventing proper sealing
- No clicking sound when powered: Electrical failure—the solenoid coil may be open, shorted, or mechanically jammed
- Intermittent operation: Partially stuck valve or weak spring tension—the valve may work sometimes but is unreliable
Scan Tool Testing (Professional)
Advanced diagnostics require a scan tool with bidirectional control capabilities—not just the ability to read codes, but to command vehicle systems to operate. Professional tools from Snap-on, Autel, or Launch provide these features, though some advanced DIY scanners like the BlueDriver or FIXD include basic bidirectional controls.
Bidirectional control testing:
Navigate to your scan tool’s EVAP system controls and select the purge valve function. The tool sends commands through the vehicle’s data network instructing the ECU to activate the valve. While the tool operates the valve:
- Listen for operation: A properly functioning valve makes a distinct clicking sound as it pulses open and closed. With the hood open and a helper operating the scan tool, you should hear rhythmic clicking from the valve’s location.
- Monitor fuel trims: Watch the scan tool’s live data for fuel trim adjustments. When the purge valve opens, additional fuel vapors enter the intake. The oxygen sensors detect this, and short-term fuel trim (STFT) should decrease (become more negative) as the ECU cuts back on injector pulse width to compensate.
- Check duty cycle response: The scan tool may display purge valve duty cycle as a percentage. Command changes should produce corresponding responses. If the tool shows 30% duty cycle but you observe no changes in fuel trims or engine behavior, the valve may not be responding to commands.
EVAP system leak testing:
Many scan tools can initiate the EVAP system monitor test, the same test performed during emissions inspections. The tool commands the purge valve and vent valve to specific positions while monitoring fuel tank pressure. Any significant pressure loss indicates a leak somewhere in the system—possibly a stuck-open purge valve, though other leak sources should be investigated.
Smoke machine testing:
Professional shops often use smoke machines for EVAP leak detection. This equipment introduces non-toxic smoke into the EVAP system through the purge valve port. With the system pressurized slightly, any leaks reveal themselves as smoke streams. This quickly identifies whether the purge valve itself leaks around its seals or if the leak exists elsewhere in the fuel tank, lines, or charcoal canister.
Safety Warnings for Testing
CRITICAL SAFETY INFORMATION:
- Battery disconnection: Always disconnect the battery’s negative terminal before removing or reconnecting electrical components to prevent short circuits and accidental airbag deployment.
- Ventilation requirements: Fuel vapors are highly flammable and heavier than air, collecting in low spots. Perform all testing outdoors or in a shop with proper ventilation. Never test near open flames, running engines (other than your test vehicle), or potential ignition sources.
- Eye protection: Wear safety glasses when working with vacuum systems and electrical connections. Vacuum hose failures can send debris airborne, and electrical connectors can release at unexpected moments.
- Fire extinguisher proximity: Keep a fire extinguisher rated for fuel fires (Class B) within arm’s reach during any EVAP system work.
- No smoking: This should be obvious, but the mixture of fuel vapors and testing creates an extremely dangerous fire risk. No smoking anywhere near the work area.
When to stop DIY diagnosis: If you’re uncomfortable working with fuel system components, lack proper ventilation, or your initial tests reveal multiple EVAP system problems rather than just a purge valve issue, consult a professional technician. Emission control systems are complex, and misdiagnosis can lead to expensive parts replacement without solving the underlying problem.
Purge Valve Replacement: What to Expect
Before we talk money, let’s answer the question you’re really asking: Should you DIY this or pay a shop?
DIY or Mechanic? Use This Checklist
✅ DIY if:
- Valve is visible from above (near intake manifold)
- You can change your own oil confidently
- You have basic hand tools (10mm socket, screwdriver)
- You own or can borrow an OBD-II scanner ($25 on Amazon)
- Watching YouTube tutorials doesn’t intimidate you
→ Savings: $100-250 in labor costs | Time: 30-60 minutes
🔧 Go to a shop if:
- Valve is near/under fuel tank (requires lift)
- You got multiple EVAP codes (P0440 + P0442 + others)
- You’ve never worked on cars before
- You need your car working ASAP (no time to troubleshoot)
- The thought of fuel vapors makes you nervous
→ Cost: $200-400 total | Time: Done in 1-2 hours
The honest truth: This is one of the easiest emission repairs. If you’ve ever wanted to “level up” from oil changes, this is your chance. But don’t force it—there’s no shame in paying a pro if you’re not comfortable.
Cost Breakdown (2025-2026 Pricing)
Understanding replacement costs helps you budget appropriately and recognize when you’re getting a fair quote versus being overcharged. Prices vary significantly based on your vehicle make, model, parts choice, and geographic location.
Parts Cost:
Replacement purge valves span a wide price range depending on quality and source:
- Economy aftermarket: $35-$60 – Basic replacement valves from brands like Duralast, Standard Motor Products, or BWD. These meet minimum OEM specifications and typically include a 1-year warranty. Suitable for older vehicles or budget-conscious repairs.
- Premium aftermarket: $60-$120 – Higher-quality replacements from manufacturers like Bosch, Delphi, or Dorman with improved materials and often lifetime warranties. These represent the sweet spot for most DIY repairs—better quality than economy parts without the premium of OEM pricing.
- Original Equipment Manufacturer (OEM): $80-$200 – Factory parts from your vehicle’s manufacturer, sold through dealerships. Brands like Ford Motorcraft, GM ACDelco, or Toyota Denso parts guarantee exact fit and specifications. Necessary for warranty repairs or when you want absolute assurance of quality.
- Specialty/performance applications: $100-$250 – Some high-performance vehicles or luxury brands require specific purge valve designs with unique specifications or integrated sensors, driving up parts costs.
Labor Cost Variables:
Labor charges depend heavily on valve accessibility and local shop rates:
- Time investment: Industry-standard labor guides (Mitchell, AllData) list purge valve replacement at 0.3-1.5 hours depending on vehicle. A valve mounted conveniently at the top of the engine might take just 15-20 minutes for an experienced technician. One located near the fuel tank with components blocking access could require 90+ minutes.
- Shop rates: Geographic location dramatically affects labor pricing:
- Rural/small town independent shops: $60-$90 per hour
- Suburban independent shops: $90-$130 per hour
- Urban market shops and dealerships: $130-$200+ per hour
- Simple access (top-mounted valves): $50-$120 total labor – These fortunate situations occur on many Honda, Toyota, and Ford vehicles where the purge valve sits right near the intake manifold with minimal obstruction. A DIYer might complete the job in 30 minutes.
- Moderate access: $120-$200 total labor – Requires removing air intake components, engine covers, or working around wiring harnesses. Still manageable for experienced DIYers with basic tools and patience.
- Difficult access (tank-mounted valves): $200-$400 total labor – Some vehicles mount the purge valve near or on the fuel tank, requiring wheel removal, lifting the vehicle, and potentially dropping fuel tank shields or exhaust components. Professional installation strongly recommended for these configurations.
Total Project Costs:
Combining parts and labor gives realistic expectations:
- DIY with aftermarket parts: $35-$120 (parts only, your labor)
- DIY with OEM parts: $80-$200 (parts only, your labor)
- Independent shop with aftermarket: $150-$350 (parts + labor)
- Independent shop with OEM: $200-$450 (parts + labor)
- Dealership service: $250-$600+ (OEM parts + premium labor rates)
🚨 Red flags – Walk away if a shop says:
❌ “Your charcoal canister is saturated, needs replacement” ($400-600) before testing the purge valve ❌ “We need to replace the whole EVAP system” ($800-1,200) for a single P0441 code
❌ “This valve is backordered for 3 weeks” when AutoZone has it in stock same-day
What fair shops do:
✅ Test the purge valve first
✅ Show you the failed part
✅ Offer parts options (aftermarket vs OEM)
✅ Give written estimates before work
Pro move: Call 3 shops, describe symptoms, ask for estimate. If one quotes 2x higher than others, that’s your answer.
Additional costs to consider:
- Diagnostic fees: If you haven’t diagnosed the problem yourself, shops typically charge $80-$150 for diagnostic time to confirm the purge valve is the issue before authorizing repair.
- Related component replacement: Your mechanic might recommend replacing vacuum hoses, the canister vent valve, or gas cap simultaneously if they show wear. While this increases upfront cost, it prevents return visits for related failures.
- Code clearing and verification: Professional shops include a test drive and code clearing in their service, but some quick-service locations might charge separately for scan tool usage.
Replacement Procedure Overview
The actual replacement process is straightforward on most vehicles, making this an excellent learning opportunity for DIY enthusiasts ready to expand their skills beyond basic maintenance. If you’ve ever changed your own oil or replaced an air filter and thought, “I wonder what else I could do myself,” this might be your next step. That feeling when you fix something with your own hands? It’s worth the knuckle scrapes.
Difficulty assessment: Most purge valve replacements rate as beginner-to-intermediate difficulty. If you’re comfortable changing spark plugs or replacing an air filter, you can likely handle a purge valve replacement—assuming the valve location is accessible.
Basic replacement steps:
- Safety preparation:
- Park on level ground with the parking brake engaged
- Allow the engine to cool completely (30-60 minutes) to avoid burn injuries
- Disconnect the battery’s negative terminal and wait 2-3 minutes for systems to de-energize
- Access the valve:
- Remove any covers or air intake components blocking access
- Locate the purge valve using your service manual or online diagrams for your specific vehicle
- Take photos before disconnecting anything—they’re invaluable during reassembly
- Disconnect electrical:
- Press the release tab on the electrical connector and pull straight off
- Don’t pull on the wires themselves as this can damage the connector
- Inspect the connector for corrosion and clean if necessary
- Remove vacuum hoses:
- Note which hose connects to which port (photos help here)
- Loosen any hose clamps if present—spring clamps can be removed with hose clamp pliers
- Twist hoses gently while pulling to break any seal created by aging rubber
- If hoses are brittle or cracked, replace them while you have access
- Remove mounting hardware:
- Typically one or two 10mm bolts hold the valve to its bracket
- Some valves use plastic clips instead—press the release tabs and slide the valve free
- Keep all hardware in a small container so nothing gets lost
- Install new valve:
- Position the new valve in its mounting bracket
- Loosely install mounting bolts to allow slight adjustment if needed
- Connect vacuum hoses to their proper ports—incorrect routing causes operational problems
- Secure hose clamps snugly but don’t overtighten and damage the plastic valve ports
- Tighten mounting bolts to specification (typically 8-10 ft-lbs, though many techs simply snug them by hand)
- Reconnect electrical:
- Plug the electrical connector onto the valve—you should hear or feel a positive click
- Give the connector a gentle tug to confirm it’s fully seated
- System check:
- Reinstall any components removed for access
- Reconnect the battery negative terminal
- Turn the ignition to ON (without starting) and listen for the valve—you might hear a brief clicking as the ECU performs a self-check
- Start the engine and let it idle for 2-3 minutes while listening for rough running or unusual sounds
- Clear codes and verify:
- Use an OBD-II scanner to clear any stored trouble codes
- Drive the vehicle through several cold starts and varied driving conditions (city and highway)
- Re-scan for codes after 50-100 miles to confirm the problem is resolved
Time requirements vary by vehicle:
- Easy access (top-mounted): 15-30 minutes for experienced DIYers, 30-45 minutes for first-timers
- Moderate access: 45-75 minutes including time to remove air intake or covers
- Difficult access (tank-area): 1.5-3 hours due to lifting requirements and component removal
Essential tools:
- Socket set or combination wrenches (10mm most common, but verify for your vehicle)
- Phillips and flat-blade screwdrivers
- Hose clamp pliers (if spring clamps are used)
- OBD-II code scanner for clearing codes post-repair
- Optional but helpful: Torque wrench, needle-nose pliers, work light, mechanic’s mirror
Parts to consider replacing simultaneously:
- Vacuum hoses (if brittle or cracked)
- Hose clamps (if rusted or damaged)
- Gas cap (if older than 5 years or shows wear)
- PCV valve if due for service (often nearby and similarly easy to access)
When Professional Help is Recommended
Certain situations warrant professional assistance rather than DIY approaches:
Limited experience: If this would be your first emission control system repair and you lack a friend or mentor to guide you, the $150-250 labor charge from a reputable independent shop provides peace of mind and guarantees proper repair.
Safety concerns: Valves located near fuel tanks require lifting the vehicle safely and working beneath it—configurations that demand proper jack stands, safety protocols, and experience. Don’t risk injury to save $150 in labor.
Multiple diagnostic codes: If your scan reveals P0441, P0442, and several other EVAP or fuel system codes, the purge valve might be one of several failing components. Professional diagnosis can prevent throwing parts at the problem hoping something fixes it.
Time constraints: A professional can diagnose and replace the valve in their sleep. If you need your vehicle operational quickly for work or family obligations, professional service ensures speedy completion.
Warranty considerations: If your vehicle is under factory warranty or you purchased an extended warranty, dealer service ensures coverage isn’t voided and might cost you nothing but the deductible.
Uncertainty about diagnosis: If you’re not completely confident the purge valve is the problem—maybe you cleared the codes and they came back, or symptoms don’t perfectly match—professional diagnosis with proper equipment prevents expensive misdiagnosis.
When selecting a shop, look for facilities with good online reviews, ASE-certified technicians, and transparent pricing. Many shops offer free estimates for this straightforward repair. Getting quotes from 2-3 shops helps identify fair market rates in your area.
Extending Purge Valve Lifespan
While purge valves will eventually fail as part of normal wear, several practices can maximize their operational life and prevent premature failure.
Best Practices for Longevity
Fuel Quality Matters:
The composition of gasoline directly affects your entire fuel system, including the EVAP system and purge valve. Top Tier gasoline brands—those meeting enhanced EPA standards with extra detergent additives—keep fuel system components cleaner and reduce carbon deposits that can affect purge valve operation.
While Top Tier fuel costs 5-10 cents more per gallon, the investment protects your fuel injectors, valves, and emission components. Major brands include Chevron, Shell, Mobil, and others; the toptiergasoline.com website maintains a current list. Consistently using the lowest-grade, non-Top Tier fuel saves a few dollars per fill-up while potentially costing hundreds in premature component failure.
Avoid Overfilling at the Pump:
We’ve all been there—trying to squeeze just a little more fuel in to hit a round number, or to max out that tank before a road trip. It seems harmless, even thrifty. But those extra ounces after the pump clicks off? They’re doing more harm than good, and here’s why.
One of the most damaging habits for EVAP systems is “topping off” after the pump’s automatic shutoff clicks. When you add those extra few ounces trying to reach a round number or squeeze in “just a little more,” you’re actually flooding the fuel tank’s vapor space and potentially forcing liquid gasoline into vapor lines designed only for gaseous fuel.
This liquid fuel can contaminate the charcoal canister, drastically reducing its service life. It can also reach the purge valve itself, damaging internal seals and causing the valve to stick. The fuel you’re adding beyond the auto-shutoff doesn’t go in your tank anyway—it’s filling the filler neck and will splash back or evaporate while you drive.
Gas Cap Maintenance:
Your vehicle’s gas cap is the first line of defense in the EVAP system’s sealed environment. A worn, loose, or damaged cap allows atmospheric air to enter the fuel tank, preventing proper purge operation and potentially triggering check engine lights that mask real problems.
Inspect your gas cap quarterly:
- Ensure the rubber seal isn’t cracked, hardened, or missing chunks
- Tighten until you hear 3-4 clicks each time you refuel
- Replace every 3-5 years or immediately if damaged
- Test the seal by trying to over-tighten—if you can keep turning past the clicks without resistance, the ratchet mechanism has failed
A new gas cap costs $15-30 and takes 10 seconds to install, making it one of the most cost-effective preventive maintenance steps.
Regular System Inspections:
Incorporate these checks into your routine maintenance schedule:
- Annual hose inspection: During oil changes or tire rotations, have someone check EVAP hoses for cracks, holes, or disconnections. Even a tiny crack allows air into the system, stressing the purge valve.
- Electrical connector care: Spray electrical connectors with dielectric grease or contact protector annually, especially in humid coastal areas or snowy regions where road salt accelerates corrosion.
- Listen for anomalies: Get familiar with your engine’s normal sounds. A purge valve that’s beginning to fail might produce a rapid clicking sound different from its normal operation.
- Monitor fuel economy: Track your MPG over time. A gradual decrease without obvious cause (new winter blend fuel, tire pressure drop, increased A/C usage) might indicate EVAP system issues affecting efficiency.
Understanding Lifespan Expectations
Typical operational life:
Under normal conditions with quality maintenance, purge valves typically last 60,000-100,000 miles. However, this varies significantly based on operating environment:
- Favorable conditions (cool, dry climate): 80,000-120,000+ miles
- Average conditions: 50,000-80,000 miles
- Harsh conditions (extreme heat, high humidity, poor fuel quality): 30,000-60,000 miles
Some vehicles reach 200,000+ miles on their original purge valve, though this is exceptional rather than expected.
Environmental accelerators:
Several factors reduce purge valve lifespan:
- Extreme heat: Desert climates and engine bay temperatures above 200°F accelerate rubber seal deterioration and can warp plastic valve bodies over time. Parking in shade when possible reduces thermal stress.
- High humidity and salt exposure: Coastal areas and regions using road salt see faster electrical corrosion. The salt-laden moisture attacks electrical connections and corrodes the valve’s solenoid windings.
- Dusty environments: Fine dust particles can infiltrate vapor lines and accumulate in the purge valve, interfering with proper sealing. Off-road enthusiasts should inspect EVAP system components more frequently.
- Short trip patterns: Frequent cold starts without allowing the EVAP system to complete full purge cycles can lead to charcoal canister saturation, which then forces the purge valve to work harder and fail sooner.
The catalytic converter connection:
Your emission control systems work together as an integrated network. A failing purge valve affects more than just the EVAP system—it can damage your catalytic converter by allowing raw fuel into the exhaust stream. This creates excessive heat that degrades the catalyst substrate, potentially requiring a $1,000+ converter replacement alongside your $150 valve. Prompt attention to purge valve symptoms prevents this expensive cascade failure.
Conclusion
Let’s bring this full circle. Remember that sinking feeling from the beginning—late for work, car won’t start, check engine light mocking you? That doesn’t have to be your reality anymore.
The canister purge valve is a perfect example of how a $50 component can make or break your day. It’s small, it’s hidden, and most people don’t know it exists—until it fails. But now you’re not “most people.” You understand what it does, how to diagnose it, and whether you can fix it yourself or need help.
Here’s the uncomfortable truth nobody wants to say out loud: Ignoring a bad purge valve for “just a few more months” can destroy your catalytic converter. That’s a $1,500-2,500 repair that could’ve been prevented with a $150 valve replacement. Insurance doesn’t cover it. There’s no payment plan. It’s just gone from your bank account.
But here’s the relief: you caught this guide. You’re asking the right questions. And whether you tackle this repair in your driveway this weekend or drive to a trusted mechanic on Monday, you’re taking action instead of hoping the problem disappears. That puts you ahead of 90% of drivers who ignore warning signs until something catastrophic fails.
The empowerment you’ve gained:
✅ You can diagnose purge valve failure in 15 minutes with basic tools
✅ You know the difference between a $50 fix and a shop trying to upsell you $800 in parts
✅ You understand when DIY makes sense and when professional help is the smart move
✅ You can speak your mechanic’s language and ask informed questions
This isn’t just about fixing a car—it’s about taking control. About not feeling helpless when metal and plastic decide to stop cooperating. About saving money you can spend on literally anything else.
Your Next 5 Minutes
Don’t bookmark this and forget about it. Here’s exactly what to do right now:
If you have symptoms:
- Pop the hood, do the 5-minute visual inspection
- If you see obvious problems (cracked hoses, corroded connector) → order parts today
- If everything looks good → get an OBD-II scanner, pull the codes
- Match your codes to the diagnostic sections above
If you’re just learning:
- Find your purge valve’s location (Google: “[your car year/make/model] purge valve location”)
- Take a photo so you know where to look when problems arise
- Check your gas cap condition right now (cracked seal = preventable EVAP codes)
If you’re dealing with a shop quote:
- Ask specifically: “Did you test the purge valve with a vacuum pump?”
- Request: “Can I see the failed part?”
- Compare their quote against this guide’s price ranges
Professional Consultation Guidance
Seek professional assistance when:
- Multiple diagnostic trouble codes suggest widespread EVAP system problems beyond just the purge valve
- Your diagnostic tests produce ambiguous results that don’t clearly indicate valve failure
- The valve location requires extensive disassembly or specialized lifting equipment for safe access
- You lack proper ventilation or safety equipment for working with fuel system components
- Time constraints require quick vehicle return to service
- Warranty coverage might apply to the repair
A qualified technician brings professional-grade diagnostic equipment, years of experience recognizing EVAP system failure patterns across multiple vehicle makes, and the ability to address multiple issues discovered during service. The investment in professional diagnosis and repair—typically $200-400 for purge valve replacement—provides peace of mind and guarantees proper function.
But choose wisely. Not all shops are created equal. Look for:
- ASE-certified technicians
- Reviews mentioning fair pricing and honest diagnosis
- Willingness to explain what they found
- Written estimates before work begins
Why This Matters Beyond Your Car
Every year, millions of tons of gasoline evaporate into the atmosphere from vehicles with faulty EVAP systems. That’s fuel literally vanishing into air—wasting money and contributing to ground-level ozone pollution. Your purge valve, when working correctly, captures those vapors and turns waste into usable fuel.
So yes, fixing this helps your wallet and prevents your check engine light from glaring at you. But it’s also doing something larger—keeping fuel in your tank where it belongs, not floating around as pollution. Small actions, multiplied across thousands of vehicles, actually matter.
Moving Forward With Confidence
The canister purge valve, despite its modest size and hidden location, deserves attention as a critical emission control component that affects both vehicle performance and environmental responsibility. You’re not just fixing a car when you address this issue—you’re taking responsibility for keeping your vehicle running efficiently and doing your small part for cleaner air.
Regular fuel system maintenance—using quality fuel, avoiding overfilling, maintaining your gas cap, and responding promptly to check engine lights—extends purge valve life while preventing more expensive repairs. These aren’t just maintenance tasks; they’re investments in your vehicle’s longevity and your own peace of mind. No one wants to deal with a breakdown, especially not at the worst possible moment.
When failure occurs, the knowledge gained from this guide empowers you to diagnose the problem accurately, understand repair quotes from professionals, or confidently perform the replacement yourself. Whether you’re an intermediate DIY enthusiast tackling emissions system work for the first time (congratulations—you’re leveling up!), a professional mechanic refining your diagnostic approach, or a beginner simply trying to understand what your check engine light means, a solid understanding of canister purge valve operation forms the foundation for informed decision-making.
Why Repairs Advisor is different: We’re not here to sell you parts or push services. We provide factory-level repair information that dealerships charge $200/hour to access—available to you instantly in formats you can actually use. Our 180-day money-back guarantee isn’t marketing fluff; it’s confidence that our manuals work.
You’ve got this. And when that check engine light goes off after your repair? That feeling of accomplishment is something no mechanic’s invoice can provide.
Want to go deeper? Professional repair manuals for your specific vehicle include:
- Exact purge valve location with photos
- Factory torque specifications
- Wiring diagrams for electrical diagnosis
- Complete EVAP system troubleshooting procedures
- OEM part numbers and specifications
→ Browse repair manuals by vehicle manufacturer: Ford | Toyota | Chevrolet | Honda
Additional Resources:
Expand your automotive knowledge with related guides:
- Complete EVAP system operation guide
- Fuel pump diagnostics and replacement
- Understanding catalytic converter function
- PCV system maintenance
- Browse comprehensive vehicle care tips
For vehicle-specific repair information including wiring diagrams, torque specifications, and model-year-specific purge valve locations, explore our extensive collection of professional repair manuals covering all major manufacturers.
Safety Disclaimer:
EVAP system repairs involve fuel vapors which are highly flammable and heavier than air, accumulating in low areas where they create explosion hazards. Always work in well-ventilated outdoor areas or shops with proper exhaust ventilation. Keep fire extinguishers nearby and eliminate all potential ignition sources including cigarettes, open flames, and spark-producing tools. Disconnect vehicle batteries before electrical work to prevent short circuits.
If you’re uncomfortable working with emission control components, lack proper safety equipment, or your vehicle requires extensive disassembly to access the purge valve, consult a professional automotive technician. This information serves educational purposes and provides general guidance—it does not replace professional mechanical advice specific to your vehicle’s make, model, year, and condition. Always consult your vehicle’s factory service manual for exact specifications, procedures, and safety precautions relevant to your specific repair.