That glowing orange check engine light on your dashboard can be one of the most frustrating automotive experiences. Whether it appeared suddenly during your morning commute or has been nagging you for weeks, the urge to simply make it disappear is understandable. However, resetting your check engine light requires more than just making the warning disappear – it demands a systematic approach that prioritizes safety and addresses underlying issues.
The check engine light serves as your vehicle’s primary communication system for emissions and engine-related problems. Simply clearing the light without understanding why it illuminated can lead to more serious problems, failed emissions tests, and potentially dangerous driving conditions. This comprehensive guide will walk you through the proper methods to reset your check engine light while ensuring you understand when professional help is essential.
What you’ll learn in this guide:
- Safe and effective methods to reset your check engine light using OBD2 scanners and manual techniques
- When it’s appropriate to reset the light versus when professional diagnosis is absolutely necessary
- Step-by-step procedures for different vehicle types and situations
- Prevention strategies to avoid future check engine light occurrences
Important Safety and Legal Disclaimer: Resetting the check engine light does not fix the underlying problem that triggered it. This guide is for informational purposes only. Always diagnose the root cause before clearing codes, and remember that clearing codes may affect emissions testing and vehicle inspections. If your check engine light is flashing, pull over safely and seek immediate professional help – this indicates a severe problem that could cause engine damage.
Understanding the Check Engine Light System
What is the Check Engine Light?
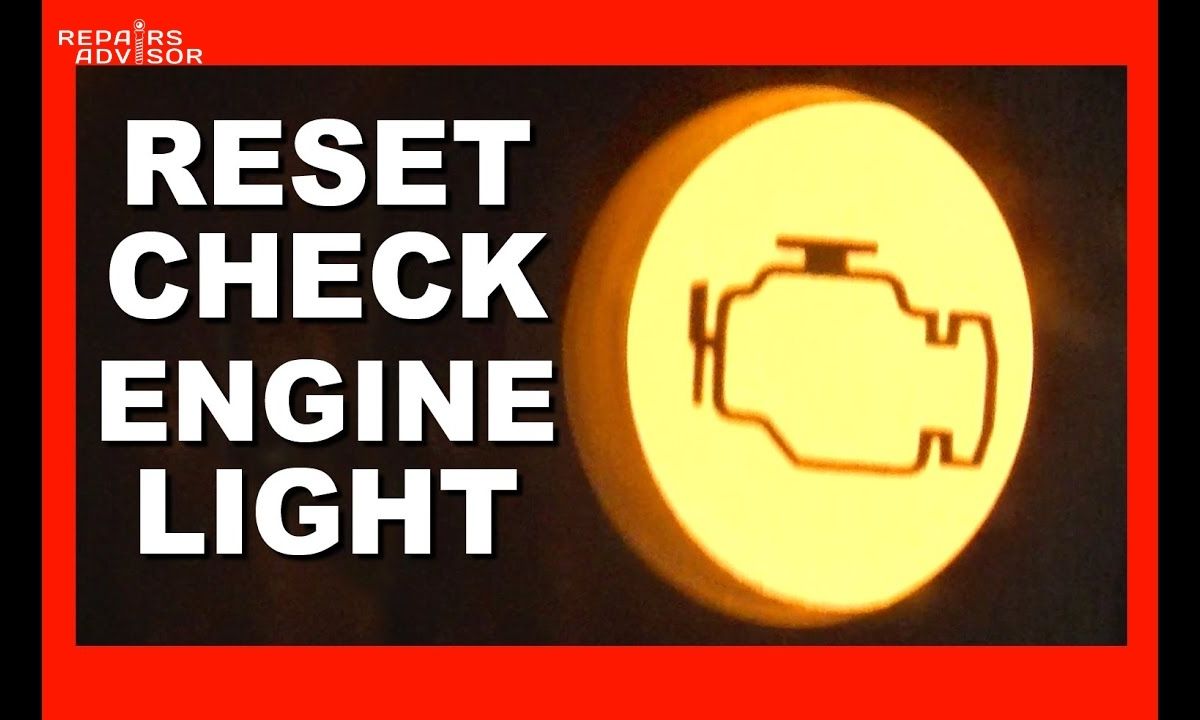
The check engine light, officially known as the Malfunction Indicator Lamp (MIL), is a federally mandated warning system that has been required on all vehicles sold in the United States since 1996. This amber-colored warning light is your vehicle’s primary method of communicating emissions and engine-related problems that could affect performance, fuel economy, or environmental compliance.
The light is part of your vehicle’s On-Board Diagnostics (OBD) system, a sophisticated computer network that continuously monitors dozens of engine and emissions system components. When the system detects a malfunction that could affect emissions or engine performance, it illuminates the check engine light and stores a diagnostic trouble code (DTC) in the vehicle’s computer memory.
How the System Works
Your vehicle’s Engine Control Module (ECM) or Powertrain Control Module (PCM) serves as the brain of the diagnostic system. This computer continuously monitors sensors throughout your engine and emissions system, including:
- Oxygen sensors that monitor exhaust gas composition
- Mass airflow sensors that measure incoming air
- Throttle position sensors that track accelerator input
- Catalytic converter efficiency monitors
- Evaporative emissions system components
- Engine temperature and pressure sensors
The system runs continuous monitoring for critical safety and emissions functions, and non-continuous monitoring during specific driving conditions called “drive cycles.” When a problem is detected, the ECM generates a specific diagnostic trouble code and illuminates the check engine light to alert the driver.
Different Check Engine Light Behaviors
Understanding how your check engine light behaves can provide important clues about the severity of the problem:
Solid Light: A steady, non-flashing check engine light indicates a detected malfunction that requires attention but is not immediately dangerous. You can typically continue driving, but should address the issue promptly to prevent more serious problems.
Flashing Light: A flashing check engine light indicates a severe problem that could cause immediate engine damage, typically engine misfires that can overheat and destroy the catalytic converter. Pull over safely immediately and seek professional help.
Intermittent Light: If the light comes on and off sporadically, it may indicate an intermittent problem or a malfunction that only occurs under specific driving conditions.
Common Triggers
While the check engine light can indicate hundreds of different problems, some of the most common triggers include:
- Loose or damaged gas cap (the most common and easily fixed cause)
- Oxygen sensor failures affecting fuel mixture control
- Catalytic converter problems reducing emissions control effectiveness
- Mass airflow sensor malfunctions disrupting air/fuel ratios
- Spark plug or ignition coil issues causing engine misfires
- Evaporative emissions system leaks allowing fuel vapors to escape
- EGR valve problems affecting exhaust gas recirculation
Before You Reset: Essential Diagnostic Steps
CRITICAL SAFETY WARNING
⚠️ Never ignore a flashing check engine light. Pull over safely immediately and seek professional help. A flashing light indicates severe engine misfires that can cause permanent engine damage and create dangerous driving conditions.
Why Diagnosis Must Come First
Resetting the check engine light without understanding the underlying cause is like turning off a smoke detector during a fire – you’ve eliminated the warning without addressing the danger. Here’s why proper diagnosis is essential:
- Understanding the root cause prevents recurring problems and more expensive repairs
- Preventing cascading damage from ignored issues that can affect multiple systems
- Legal compliance for emissions testing and vehicle inspections in many states
- Safety considerations for problems that could affect vehicle operation or passenger safety
Basic Preliminary Checks
Before connecting any diagnostic equipment, perform these simple checks that can sometimes resolve check engine light issues:
- Check your gas cap – Ensure it’s tight and properly sealed. A loose or damaged gas cap is the most common cause of check engine lights. Remove and reinstall it, making sure you hear several clicks.
- Note driving conditions when the light appeared – Was the engine cold? Were you accelerating hard? Was it during stop-and-go traffic? This information helps identify patterns.
- Monitor vehicle performance – Pay attention to unusual sounds, vibrations, rough idling, reduced power, or changes in fuel economy that might indicate the nature of the problem.
- Check fluid levels – Low oil, coolant, or other fluids can trigger various engine codes. Ensure all fluids are at proper levels and in good condition.
Reading Diagnostic Trouble Codes
Modern vehicles store specific diagnostic trouble codes (DTCs) that provide detailed information about detected malfunctions. Always read and record these codes before clearing them – they provide valuable diagnostic information that disappears once cleared.
Understanding code formats:
- P-codes (Powertrain): Engine, transmission, and emissions system problems
- B-codes (Body): Interior functions, lighting, and comfort systems
- C-codes (Chassis): ABS, airbag, and steering system issues
- U-codes (Network): Communication problems between vehicle computers
Recording codes properly: Write down the complete code (like P0420) along with the scanner’s description. Take photos of the scanner screen for reference, and note any “pending” or “permanent” codes that may indicate intermittent or serious problems.
For specific diagnostic trouble codes and their meanings, consult our comprehensive DTC Code Diagnostics resources.
When NOT to Reset
Certain situations require professional diagnosis before attempting any reset:
- Flashing check engine light – Indicates potential engine damage requiring immediate attention
- Recent major repairs – The light may be monitoring the effectiveness of the repair
- Upcoming emissions testing – Your vehicle may need drive cycles to complete readiness monitors
- Persistent performance issues – Engine problems that could worsen or create safety hazards
- Multiple warning lights – When check engine light appears with ABS, airbag, or other critical system warnings
Documentation Best Practices
Professional mechanics emphasize the importance of proper documentation:
- Record all codes with complete numbers and descriptions before clearing
- Note symptoms and conditions when codes first appeared
- Keep maintenance records to identify patterns or recurring issues
- Take photos of scanner readings for future reference
- Document any temporary fixes or conditions that make symptoms better or worse
Method 1: Using an OBD2 Scanner (Primary Method)
The OBD2 scanner method is the safest, most effective, and professionally recommended approach for resetting check engine lights. This method allows you to read codes before clearing them and provides the most reliable reset procedure.
What You’ll Need
- OBD2 scanner – Basic models start around $20-30, while professional units can cost several hundred dollars
- Vehicle owner’s manual to locate the OBD2 port
- Pen and paper for recording diagnostic trouble codes
- 15-20 minutes of uninterrupted time
- Safe work area with the vehicle parked on level ground
Finding Your OBD2 Port
The OBD2 port is a standardized 16-pin trapezoid connector required on all vehicles manufactured since 1996. Common locations include:
- Under the dashboard on the driver’s side, typically near the steering column
- Center console area near the gear shifter
- Behind panels that may require removal for access
- Glove compartment area in some European vehicles
Port identification: The connector should be labeled “OBD-II” or have a small diagram nearby. It’s typically black or gray and has a distinctive trapezoid shape that only fits one way.
Step-by-Step Scanner Reset Process
Step 1: Preparation and Safety
- Park your vehicle safely on level ground away from traffic
- Engage the parking brake and ensure the transmission is in Park (automatic) or Neutral (manual)
- Turn the ignition to the OFF position – not ACC or ON
- Locate the OBD2 port using your owner’s manual if necessary
- Ensure the engine is at normal operating temperature for most accurate readings
Step 2: Connect the Scanner
- Insert the scanner connector firmly into the OBD2 port – it should fit snugly without forcing
- Ensure a secure connection – the connector should click into place
- Turn the ignition to the ON position (engine off) – this powers the vehicle’s computers
- Wait for scanner initialization – most scanners take 30-60 seconds to establish communication
Troubleshooting connection issues: If the scanner shows “no communication,” verify the ignition is in the ON position, check that the connector is fully seated, and ensure the vehicle’s OBD2 fuse hasn’t blown.
Step 3: Read and Record Codes (Critical Step)
- Select “Read Codes,” “Scan,” or “Diagnostics” from the scanner menu
- Wait for the scan to complete – this may take 1-3 minutes depending on your vehicle
- Record all codes displayed along with their descriptions
- Note any “Pending” or “Permanent” codes separately – these indicate different types of problems
- Take photos of the scanner screen showing all codes for future reference
Why this step is crucial: Once codes are cleared, this diagnostic information is permanently lost. Recording codes allows you to research specific problems and provides valuable information if issues recur.
Step 4: Clear the Codes
- Select “Clear Codes,” “Erase Codes,” or “Reset” from the scanner menu
- Read any warnings carefully – some scanners provide additional safety information
- Confirm the action when prompted – most scanners require a second confirmation to prevent accidental clearing
- Wait for the completion message – typically “Codes Cleared,” “Reset Complete,” or similar
- Do not disconnect the scanner until you see confirmation that the process is complete
Step 5: Verification and Testing
- Turn the ignition off and wait 10 seconds before disconnecting the scanner
- Remove the scanner and store it safely
- Start the engine and verify the check engine light is off
- Take a short test drive (5-10 minutes) to ensure normal operation
- Monitor the dashboard for the next few days to ensure the light doesn’t return
Scanner Types and Recommendations
Basic Code Readers ($20-50):
- Autel AL319 – Reliable entry-level scanner with clear display
- FIXD – Smartphone-connected scanner with app interface
- BlueDriver – Bluetooth scanner with comprehensive mobile app
Mid-Range Scanners ($50-150):
- Autel AL529 – Enhanced diagnostics with oil reset functions
- Launch CRP123X – Multi-system scanner with special functions
- ANCEL AD410 – Professional-grade features at consumer price
Professional Scanners ($150+):
- Autel MaxiCOM series – Dealer-level diagnostics and programming
- Launch X431 series – Comprehensive system coverage and updates
- Snap-on and other professional brands for commercial use
Smartphone Apps and Bluetooth Adapters:
- Torque Pro with ELM327 adapter – Extensive customization options
- OBD Fusion – User-friendly interface with advanced features
- Car Scanner ELM OBD2 – Comprehensive diagnostic capabilities
Troubleshooting Common Scanner Issues
Scanner Won’t Connect:
- Verify the OBD2 port isn’t damaged or corroded
- Check that the ignition is in the ON position (not ACC)
- Try inserting the connector at different angles
- Verify the vehicle’s OBD2 fuse is intact
Communication Errors:
- Ensure the engine has been run recently (some vehicles “sleep” after extended periods)
- Try turning the ignition off and on again
- Check for aftermarket alarm systems or modifications that may interfere
- Some vehicles require specific key sequences for OBD2 access
Codes Won’t Clear:
- Some codes are “permanent” and require drive cycles to clear naturally
- Check for manufacturer-specific procedures in vehicle service manuals
- Professional-level diagnostics may be required for certain codes
- Multiple system problems may prevent clearing until all issues are addressed
Light Returns Immediately:
- The underlying problem still exists and requires repair
- Some intermittent problems may only trigger under specific conditions
- Multiple drive cycles may be needed to determine if the problem is resolved
- Consider professional diagnosis if codes return quickly
For vehicle-specific diagnostic procedures, consult our brand-specific manual collections such as FORD Manuals for Ford vehicles or HONDA Manuals for Honda-specific reset procedures.
Method 2: Manual Reset Techniques
Important Disclaimer
Manual reset methods are less reliable than OBD2 scanners and may not work on vehicles manufactured after 2000. These techniques should only be used when a scanner is unavailable and should never be used on vehicles with flashing check engine lights or serious performance issues.
Battery Disconnect Method
The battery disconnect method works by cutting power to the vehicle’s Engine Control Module, forcing it to reset and clear stored codes. This method has significant limitations and potential drawbacks.
What You’ll Need
- Wrench set (typically 8mm, 10mm, or 13mm for battery terminals)
- Safety gloves to protect from battery acid and sharp edges
- Safety glasses to protect from potential sparks
- Vehicle owner’s manual for specific battery location and procedures
Step-by-Step Battery Disconnect Process
- Turn off the engine completely and remove the key from the ignition
- Locate the battery – typically in the engine bay, but some vehicles have batteries in the trunk or under seats
- Identify the negative terminal clearly marked with a “-” symbol or “NEG”
- Loosen the negative cable clamp using the appropriate wrench – turn counterclockwise
- Remove the negative cable completely and secure it away from the battery terminal to prevent accidental contact
- Wait 15-20 minutes minimum for the ECM to fully reset – some technicians recommend 30 minutes for certain vehicles
- Reconnect the negative cable and tighten securely – ensure a clean, tight connection
- Start the engine and check if the check engine light has cleared
Important Considerations and Drawbacks
Data Loss Issues:
- Radio presets and clock will reset and need reprogramming
- Security system codes may require reentry
- Adaptive driving data will be lost, potentially affecting performance temporarily
- Trip computer information will be erased
- Seat memory and comfort settings may reset
Modern Vehicle Complications:
- Anti-theft systems may activate and prevent starting
- Engine management may run poorly until adaptive values are relearned
- Transmission shifting may be rough until the system relearns shift points
- Idle speed may be irregular until the system recalibrates
Safety Considerations:
- Always disconnect negative terminal first to prevent shorts
- Never touch both terminals simultaneously with tools
- Be aware of battery acid and potential corrosion
- Some vehicles have multiple batteries that may need disconnection
Fuse Removal Method
This method involves removing the specific fuse that powers the Engine Control Module, forcing a reset without disconnecting the entire electrical system.
Process Overview
- Locate the ECM/PCM fuse in the engine bay or interior fuse box (consult owner’s manual)
- Turn off the ignition completely and remove the key
- Remove the specific fuse using the fuse puller tool typically found in the fuse box
- Wait 15 minutes with the fuse removed to allow the system to reset
- Reinstall the fuse ensuring it’s properly seated
- Start the engine and check for light clearing
Risks and Limitations
Identification Challenges:
- Multiple ECM-related fuses may exist in modern vehicles
- Fuse box diagrams may be unclear or outdated
- Wrong fuse removal could affect other critical systems
- Some fuses are shared between multiple systems
Modern Vehicle Issues:
- Security systems may prevent the method from working
- Multiple computer modules may not all reset
- Fuse removal may not clear all code types
- Some vehicles learn that fuses have been removed
Not Recommended For:
- Vehicles newer than 2010 due to complex electronics
- Any vehicle with active safety systems (stability control, collision avoidance)
- Vehicles with advanced security or anti-theft systems
- Any situation where you’re uncertain about fuse identification
For comprehensive information about your vehicle’s fuse box and electrical systems, refer to our detailed guide on Car’s Fuse Box: All Things You Should Know.
Alternative Methods and Special Cases
Specific Vehicle Brand Procedures
Different manufacturers have developed unique reset procedures and diagnostic requirements that may affect how you approach check engine light resets.
Ford Vehicles
Ford vehicles, particularly those from 2000 onward, often have specific key cycling procedures:
Key Cycling Method for Some Ford Models:
- Turn ignition to ON position (engine off) for 3 seconds
- Turn ignition OFF for 3 seconds
- Repeat this cycle 3 times
- On the fourth cycle, turn to ON and hold for 10 seconds
- Turn to OFF and start the engine
Ford-Specific Considerations:
- Many Ford vehicles require specific drive cycles to complete readiness monitors
- Some models have manufacturer-specific diagnostic trouble codes not found in generic OBD2 references
- Ford’s IDS (Integrated Diagnostic Software) provides the most comprehensive diagnostic capabilities
For detailed Ford-specific procedures and service information, consult our FORD Manuals collection.
GM/Chevrolet Vehicles
General Motors vehicles have historically used different approaches to diagnostics and resets:
Turn Signal Method (Pre-2000 Models): Some older GM vehicles respond to specific turn signal sequences, though this method is largely obsolete and unreliable.
OnStar Integration: Modern GM vehicles with OnStar may allow remote diagnostics and some code clearing through the service, though this typically requires professional involvement.
GM-Specific Scanners: GM vehicles often respond better to GM MDI (Multiple Diagnostic Interface) scanners or other GM-specific diagnostic tools.
Honda/Acura Vehicles
Honda and Acura have unique characteristics that affect diagnostic procedures:
Maintenance Light vs. Check Engine Light: Honda vehicles have separate maintenance reminder lights that use different reset procedures than the check engine light. Ensure you’re addressing the correct warning.
Honda HDS System: Many Honda-specific codes and procedures require the Honda Diagnostic System (HDS) for proper diagnosis and clearing.
DIY Limitations: Some Honda codes, particularly those related to the immobilizer or advanced safety systems, can only be cleared using dealer-level equipment.
For Honda-specific diagnostic information, see our HONDA Manuals resource.
Toyota/Lexus Vehicles
Toyota and Lexus vehicles have sophisticated diagnostic systems with specific requirements:
Techstream Compatibility: Many advanced Toyota diagnostics require Toyota’s Techstream software for complete system access.
Hybrid System Considerations: Toyota hybrid vehicles have additional high-voltage system monitoring that may require special procedures and safety precautions.
Toyota-Specific DTCs: Some Toyota diagnostic trouble codes are manufacturer-specific and may not appear in generic OBD2 references.
Motorcycle and Small Engine Reset
Motorcycles and small engines present unique challenges for check engine light diagnostics:
Limited OBD Systems:
- Not all motorcycles have OBD2 systems, particularly older or smaller displacement models
- Some use manufacturer-specific diagnostic protocols
- Basic troubleshooting may rely more on visual inspection and manual testing
Manufacturer-Specific Procedures:
- Kawasaki, Honda, Yamaha, and other manufacturers each have unique diagnostic approaches
- Some motorcycles use dealer-specific diagnostic tools
- Reset procedures may involve specific button combinations or key sequences
Fuel Injection vs. Carburetor:
- Carbureted engines typically don’t have check engine lights
- Fuel-injected motorcycles follow similar principles to automotive systems but with simplified implementations
Heavy-Duty and Commercial Vehicle Considerations
Commercial vehicles and heavy equipment operate under different diagnostic standards:
J1939 vs. OBD2 Protocols:
- Many commercial vehicles use the J1939 diagnostic protocol instead of standard OBD2
- Different diagnostic tools and procedures are required
- Professional-grade equipment is typically necessary
Fleet Management Systems:
- Many commercial vehicles have integrated fleet management systems that may interfere with standard diagnostic procedures
- Company policies may restrict unauthorized diagnostic work
DOT Compliance:
- Commercial vehicles subject to Department of Transportation regulations may have specific requirements for diagnostic work
- Emission system tampering carries significant legal penalties for commercial operators
For commercial vehicle diagnostics and service information, professional consultation is strongly recommended due to regulatory and safety requirements.
Post-Reset Procedures and Drive Cycles
After successfully resetting your check engine light, your vehicle’s diagnostic system needs to relearn normal operating parameters and complete various system tests. This process is called completing “drive cycles” or “readiness monitors.”
Understanding Drive Cycles
A drive cycle is a specific sequence of driving conditions that allows your vehicle’s diagnostic system to test various components and systems. Think of it as your car’s way of running a comprehensive self-test to ensure everything is working properly after a reset.
Why Drive Cycles Matter:
- System verification – Confirms that cleared problems haven’t returned
- Emissions compliance – Required for passing emissions tests in most states
- Performance optimization – Allows the ECM to relearn optimal operating parameters
- Safety assurance – Verifies that all monitoring systems are functioning correctly
Readiness Monitors Explained
Your vehicle’s diagnostic system includes several readiness monitors that test different systems:
Typical Readiness Monitors Include:
- Catalyst Monitor – Tests catalytic converter efficiency
- Oxygen Sensor Monitor – Verifies oxygen sensor operation
- EGR Monitor – Checks exhaust gas recirculation system
- EVAP Monitor – Tests evaporative emissions system
- Secondary Air Monitor – Verifies air injection system (if equipped)
- Fuel System Monitor – Checks fuel delivery and mixture control
- Misfire Monitor – Detects engine misfires
- Comprehensive Component Monitor – Tests various sensors and circuits
Typical Drive Cycle Requirements
While specific requirements vary by vehicle, a typical complete drive cycle includes:
Phase 1: Cold Start (Engine at Ambient Temperature)
- Start with cold engine (not driven for at least 8 hours)
- Idle for 2-3 minutes without touching the accelerator
- Allow engine to warm to normal operating temperature
Phase 2: Acceleration and Highway Driving
- Accelerate gradually to 40-60 mph
- Maintain steady speed for 5-10 minutes
- Brief acceleration to highway speeds (if safe and legal)
- Steady cruise at highway speeds for several minutes
Phase 3: Deceleration and City Driving
- Gradual deceleration using engine braking
- Stop-and-go traffic simulation with complete stops
- Idle periods of 30 seconds to 2 minutes
- Low-speed driving with frequent stops
Phase 4: Final Highway Segment
- Return to highway speeds for final system tests
- Maintain constant speed for 5-10 minutes
- Complete cycle with normal shutdown
Monitoring System Readiness
Using Your OBD2 Scanner: Most OBD2 scanners can display readiness monitor status. Look for:
- “Ready” or “Complete” – Monitor has finished testing and passed
- “Not Ready” or “Incomplete” – Monitor hasn’t completed testing yet
- “Failed” or “Not Supported” – Monitor detected a problem or isn’t used on your vehicle
Dashboard Indicators: Some vehicles provide readiness status through specific dashboard procedures involving odometer buttons or other controls. Consult your owner’s manual for vehicle-specific methods.
Time Requirements: Different monitors complete at different times:
- Continuous monitors (misfire, fuel system) – Complete within minutes
- Non-continuous monitors – May require multiple drive cycles
- EVAP monitor – Often requires specific fuel level and temperature conditions
- Catalyst monitor – May need several complete drive cycles
Emissions Testing Considerations
Readiness Requirements for Testing:
- Most states allow one incomplete monitor for vehicles 2001 and newer
- Two incomplete monitors may be allowed for vehicles 1996-2000
- All safety-related monitors must be complete (misfire, fuel system)
State-Specific Regulations:
- Requirements vary significantly between states
- Some states have exemptions for vehicles under certain mileage or age
- California and CARB states often have stricter requirements
Timing Your Test:
- Complete drive cycles before scheduling emissions testing
- Allow at least 100-200 miles of varied driving after a reset
- Check readiness status with your scanner before testing
Professional Help When Needed: If monitors won’t complete after extensive driving:
- Underlying problems may prevent completion
- Professional diagnosis may be required
- Some monitors require specific repair procedures to complete
For comprehensive emissions system information and diagnostic support, explore our Vehicle Systems & Parts Explained resources.
When to Seek Professional Help
While this guide provides comprehensive information for resetting check engine lights, certain situations absolutely require professional diagnosis and repair. Recognizing when to seek professional help can prevent expensive damage, ensure safety, and save time and frustration.
Red Flag Situations Requiring Immediate Professional Attention
Flashing Check Engine Light
Stop driving immediately and seek professional help. A flashing check engine light indicates severe engine misfires that can cause:
- Permanent catalytic converter damage (repairs costing $1,000-3,000)
- Engine internal damage from overheating
- Dangerous driving conditions with potential loss of power
- Fire hazard from overheated exhaust components
Multiple Warning Lights
When the check engine light appears alongside other warning lights:
- ABS + Check Engine – May indicate communication problems between systems
- Airbag + Check Engine – Could affect crash safety systems
- Oil Pressure + Check Engine – Potential engine damage from lubrication problems
- Temperature + Check Engine – Risk of engine overheating and severe damage
Severe Performance Issues
Seek professional help when you experience:
- Complete loss of power or engine stalling
- Loud knocking or unusual engine noises that could indicate internal damage
- Excessive smoke from the exhaust (white, blue, or black)
- Strong fuel or burning odors that could indicate fire hazards
- Transmission problems combined with check engine light
Safety-Related Codes
Certain diagnostic trouble codes indicate problems that affect vehicle safety:
- P0xxx codes related to engine control that affect drivability
- C0xxx codes involving ABS, stability control, or steering systems
- B0xxx codes affecting airbag systems or critical lighting
- U0xxx codes indicating communication failures between safety systems
Professional Diagnostic Advantages
Advanced Equipment and Software:
- Manufacturer-specific scanners that access all vehicle systems
- Oscilloscopes and multimeters for electrical system analysis
- Exhaust gas analyzers for emissions system testing
- Technical service bulletins and manufacturer updates not available to consumers
Technical Expertise:
- ASE-certified technicians with specialized training
- Brand-specific knowledge for complex manufacturer procedures
- Pattern recognition from experience with similar problems
- Safety protocols for working with high-voltage systems (hybrids/EVs)
Warranty and Liability Protection:
- Professional liability coverage for diagnostic and repair work
- Warranty coverage for parts and labor
- Documentation for insurance and resale purposes
- Compliance with manufacturer requirements
Finding Qualified Technicians
Certification and Training:
- ASE (Automotive Service Excellence) certification indicates proven competency
- Manufacturer-specific training for brand-specific issues
- Ongoing education requirements for maintaining certifications
- State licensing where required
Facility Capabilities:
- Modern diagnostic equipment capable of accessing all vehicle systems
- Technical information systems with access to service bulletins and updates
- Parts availability for efficient repair completion
- Clean, organized work environment indicating professional standards
Customer Service Indicators:
- Clear communication about diagnostic procedures and findings
- Written estimates with detailed explanations of recommended work
- Customer reviews and recommendations from trusted sources
- Transparent pricing without hidden fees or surprise charges
Questions to Ask Potential Service Providers:
- What diagnostic equipment do you use for my specific vehicle make?
- Are your technicians ASE-certified or manufacturer-trained?
- Can you provide a written estimate before performing any work?
- What warranty do you provide on diagnostic and repair work?
- Do you have experience with my specific problem or vehicle type?
Cost Considerations and Value
Diagnostic Fees:
- Standard diagnostic fees typically range from $100-150
- Specialist or dealer diagnostics may cost $150-250
- Complex system diagnosis can require 2-3 hours of labor
- Consider diagnostic fees as investment in proper problem identification
Repair Cost Factors:
- Parts quality (OEM vs. aftermarket vs. remanufactured)
- Labor complexity and time requirements
- Shop location and local market rates
- Warranty coverage for both parts and labor
Prevention vs. Major Repair Economics:
- Early intervention often prevents more expensive problems
- Ignoring check engine lights can lead to cascading failures
- Professional diagnosis can identify root causes that DIY approaches might miss
- Proper repairs maintain vehicle value and reliability
When Professional Help Pays for Itself:
- Complex electrical problems that require specialized equipment
- Intermittent issues that need advanced diagnostic techniques
- Warranty work where professional documentation is required
- Safety-critical systems where mistakes could be dangerous
For vehicle-specific service information and professional repair procedures, consult our comprehensive manual collections including TOYOTA Manuals and other manufacturer-specific resources.
Prevention and Maintenance Tips
Preventing check engine light occurrences is significantly more cost-effective than addressing problems after they develop. A proactive maintenance approach can extend your vehicle’s life, maintain performance, and help you avoid unexpected breakdowns and expensive repairs.
Regular Maintenance Schedule
Follow Manufacturer Recommendations: Your vehicle’s maintenance schedule is specifically designed to prevent problems that trigger check engine lights:
- Oil changes at recommended intervals prevent engine wear and sensor contamination
- Air filter replacement ensures proper air/fuel mixture and prevents sensor damage
- Fuel filter changes maintain clean fuel delivery and prevent injector problems
- Spark plug replacement prevents misfires and catalyst damage
- Coolant system service prevents overheating and temperature sensor failures
Quality Parts and Fluids:
- Use recommended oil specifications to maintain proper engine operation
- Quality fuel filters prevent contamination of fuel system components
- OEM or equivalent sensors ensure proper system communication
- Proper coolant mixtures prevent corrosion and maintain accurate temperature readings
Seasonal Maintenance Considerations:
- Winter preparation including battery and charging system testing
- Summer cooling system inspection and service
- Seasonal fuel additive use (where appropriate for your region)
- Environmental factor preparation for extreme weather conditions
Early Warning Sign Recognition
Performance Changes That May Precede Check Engine Light:
- Rough idling or engine hesitation during acceleration
- Decreased fuel economy without obvious explanation
- Unusual exhaust smoke or odors during startup or operation
- Engine knocking or pinging under load or acceleration
Dashboard Warning Patterns:
- Oil pressure fluctuations that could indicate internal engine problems
- Temperature gauge irregularities suggesting cooling system issues
- Voltage or charging system warnings that affect engine management
Sensory Indicators:
- Unusual sounds such as clicking, grinding, or whistling noises
- Vibrations that weren’t present previously, especially during idle
- Odors including fuel, exhaust, burning oil, or coolant smells
- Visual indicators like excessive exhaust smoke or visible leaks
Fuel System Maintenance
Fuel Quality and Source Selection:
- Choose reputable fuel stations with high turnover to ensure fresh fuel
- Use top-tier gasoline when available, which contains enhanced detergent packages
- Avoid stations during fuel delivery when sediment may be stirred up
- Consider fuel system cleaners periodically, but avoid overuse
Gas Cap Maintenance:
- Inspect gas cap seals regularly for cracks, damage, or contamination
- Replace gas caps every 5-7 years or when seals show wear
- Always tighten until clicking to ensure proper seal
- Clean cap threads and sealing surfaces to prevent leaks
Fuel Filter Replacement:
- Follow manufacturer intervals typically every 30,000-50,000 miles
- Consider more frequent replacement in areas with poor fuel quality
- Watch for symptoms of clogged filters: poor acceleration, engine stumbling
- Professional replacement recommended for most modern vehicles with integrated fuel pump assemblies
Emission System Care
Driving Habits That Protect Emissions Systems:
- Avoid excessive short trips that prevent proper engine warm-up
- Allow proper warm-up time in cold weather before driving aggressively
- Use highway driving periodically to allow systems to complete self-tests
- Maintain steady speeds when possible to reduce system stress
PCV System Maintenance:
- Replace PCV valve according to manufacturer schedule (typically 60,000-100,000 miles)
- Inspect PCV hoses for cracks, oil contamination, or disconnection
- Clean breather elements to maintain proper crankcase ventilation
- Monitor oil consumption which can indicate PCV system problems
Catalytic Converter Protection:
- Use quality engine oil and change at recommended intervals
- Address misfires immediately to prevent converter damage
- Avoid fuel additives that aren’t specifically designed for your vehicle
- Don’t ignore oxygen sensor codes which can lead to converter failure
Environmental Factors and Seasonal Care
Extreme Weather Considerations:
- Cold weather impacts on battery, fluids, and engine management systems
- Hot weather stress on cooling, air conditioning, and fuel systems
- Humidity effects on electrical connections and sensor operation
- Altitude changes that may affect engine management calibration
Storage and Seasonal Vehicle Considerations:
- Proper storage procedures for vehicles not driven regularly
- Fuel stabilizers for long-term storage to prevent fuel system problems
- Battery maintenance during storage periods
- Periodic operation to maintain system calibration and prevent problems
Regional Fuel Quality Considerations:
- Seasonal fuel blends that may affect engine operation
- Ethanol content variations and their impact on fuel systems
- Regional additive requirements for emissions compliance
- Altitude-specific fuel formulations in mountainous areas
For comprehensive vehicle care information, explore our Vehicle Care Tips section for detailed maintenance guidance.
Frequently Asked Questions
Will resetting the check engine light pass emissions testing?
Simply resetting the check engine light will not guarantee passing emissions testing. When you clear diagnostic codes, you also reset the readiness monitors that emissions testing stations check. Most states require these monitors to show “Ready” status before testing, and this can take anywhere from 50-200 miles of varied driving.
Key points about emissions testing:
- Readiness monitors must complete before testing in most states
- One incomplete monitor may be allowed for vehicles 2001 and newer
- Two incomplete monitors may be allowed for vehicles 1996-2000
- If the underlying problem still exists, codes will return and cause test failure
Recommended approach: Address the root cause of the check engine light, complete the necessary drive cycles, and verify all readiness monitors show “Ready” before scheduling emissions testing.
How long does it take for the light to come back on if there’s still a problem?
The timing varies significantly depending on the type of problem and driving conditions. Some issues will trigger the check engine light within minutes of starting the engine, while others may take days or weeks to reappear.
Typical timeframes:
- Continuous monitors (misfire, fuel system): May trigger within 1-5 minutes of driving
- Sensor failures: Often reappear within the first drive cycle (10-20 minutes of varied driving)
- Intermittent problems: May take days or weeks to trigger again
- EVAP system issues: Often require specific fuel level and temperature conditions
Monitoring recommendations: Pay close attention to vehicle performance for the first 100 miles after resetting. If codes return quickly, the underlying problem definitely requires professional attention.
Can I reset the light myself without affecting my warranty?
Reading and clearing diagnostic codes typically does not void vehicle warranties, as this is considered normal maintenance that owners are allowed to perform. However, there are important considerations:
Warranty-safe practices:
- Reading codes for information is generally always acceptable
- Clearing codes to reset the light is typically allowed
- Documenting any problems before clearing helps protect warranty claims
- Following manufacturer procedures when available
Potential warranty concerns:
- Tampering with emissions systems can void related warranty coverage
- Failing to address serious problems might void coverage for resulting damage
- Using non-OEM scanning equipment for programming functions could cause issues
- Clearing codes without proper diagnosis might complicate warranty claims
Best practice: Keep records of all diagnostic codes and any problems experienced. If warranty work is needed, provide this information to the service department.
What’s the difference between clearing codes and fixing the problem?
This is a crucial distinction that many vehicle owners misunderstand. Clearing codes eliminates the warning light but does not repair the underlying malfunction that triggered it.
Think of it this way:
- Clearing codes is like turning off a smoke detector during a fire
- Fixing the problem is like extinguishing the fire that triggered the alarm
- The warning system is designed to protect you and your vehicle
- Ignoring the root cause can lead to more expensive problems and safety risks
What happens when you only clear codes:
- Symptoms may continue even without the warning light
- Underlying problems often worsen over time
- Related systems may be affected by the original problem
- Emissions compliance may be compromised
- Vehicle safety could be affected depending on the issue
Proper approach: Use code clearing as part of a complete diagnostic and repair process, not as a substitute for proper problem-solving.
Will disconnecting the battery hurt my car’s computer?
Modern vehicle computers are designed to handle power disconnection, but there are several important considerations and potential consequences:
Generally safe for the computer itself:
- ECMs are designed to handle power interruption
- No permanent damage typically occurs from brief disconnection
- Built-in protection prevents most electrical damage
- Memory systems are designed to retain critical programming
Potential inconveniences and issues:
- Radio and clock reset requiring reprogramming
- Security system activation that may prevent starting
- Adaptive driving parameters lost causing temporary poor performance
- Seat and mirror memory settings erased
- Idle speed irregularities until the system relearns
- Transmission shift quality may be affected temporarily
Modern vehicle complications:
- Anti-theft systems may require dealer reactivation
- Advanced driver assistance systems may need recalibration
- Hybrid and electric vehicles have special procedures and safety concerns
- Some luxury vehicles have complex electronic systems that may malfunction
Recommended approach: Use an OBD2 scanner instead of battery disconnection whenever possible. If you must disconnect the battery, consult your owner’s manual for specific procedures and be prepared for temporary performance issues and the need to reprogram various systems.
For specific diagnostic trouble codes that might be causing your check engine light, explore our comprehensive Code P0420: Catalyst System Efficiency Below Threshold and Code P0300: Random/Multiple Cylinder Misfire diagnostic guides.
Conclusion and Final Recommendations
Successfully resetting your check engine light requires a balance of technical knowledge, proper tools, and most importantly, a commitment to understanding and addressing the underlying problems that triggered the warning. The check engine light is your vehicle’s primary communication system for potentially serious issues – treating it with the respect and attention it deserves can save you thousands of dollars in repairs and ensure your safety on the road.
Key Takeaways
Diagnosis Always Comes First: The most important lesson from this guide is that proper diagnosis must precede any reset attempt. Reading and recording diagnostic trouble codes provides crucial information that disappears once codes are cleared. This information is invaluable for understanding problems, tracking patterns, and ensuring that any repairs are effective.
OBD2 Scanners Provide the Best Approach: While manual reset methods exist, OBD2 scanners offer the safest, most reliable, and most informative method for resetting check engine lights. Basic scanners are affordable and provide professional-level diagnostic capabilities that were once only available to repair shops.
Professional Help for Complex Issues: Recognize when problems exceed your skill level or safety comfort zone. Flashing check engine lights, multiple warning systems, and persistent performance issues require immediate professional attention. The cost of professional diagnosis is minimal compared to the potential expense of ignored problems.
Prevention Through Maintenance: The most effective approach to check engine lights is preventing them through consistent, quality maintenance following manufacturer recommendations. Regular oil changes, filter replacements, and attention to early warning signs can prevent most check engine light occurrences.
Safety Reminders
Never Ignore Flashing Lights: A flashing check engine light indicates severe engine misfires that can cause permanent engine damage and create dangerous driving conditions. Pull over safely immediately and seek professional help – continuing to drive can result in thousands of dollars in additional damage.
Address Root Causes: Clearing the light without fixing the problem is dangerous and counterproductive. The warning system exists to protect you, your vehicle, and the environment. Respect the technology and address problems properly.
Document Everything: Keep detailed records of all diagnostic codes, symptoms, and repairs. This documentation protects warranty claims, helps identify patterns, and provides valuable information for professional technicians when needed.
Follow Legal Requirements: Remember that emissions testing and vehicle inspections have specific requirements for readiness monitors and system operation. Plan accordingly and ensure your vehicle is properly prepared for any required testing.
Next Steps for Vehicle Owners
Immediate Actions:
- Invest in a quality OBD2 scanner appropriate for your needs and budget
- Read and record any current codes before they’re cleared accidentally
- Address any existing check engine lights using the procedures outlined in this guide
- Establish a relationship with a qualified professional technician for complex issues
Ongoing Maintenance:
- Follow manufacturer maintenance schedules religiously
- Monitor vehicle performance for early warning signs of developing problems
- Keep detailed maintenance records for warranty protection and resale value
- Stay educated about your vehicle’s systems and requirements
Long-term Strategy:
- Learn to recognize warning signs before they trigger check engine lights
- Understand your vehicle’s specific requirements and common problem areas
- Build a relationship with trusted professional service providers
- Consider advanced diagnostic training if you perform your own maintenance
Final Words of Advice
The modern automobile is a sophisticated machine with complex interconnected systems designed to provide safe, efficient, and environmentally responsible transportation. The check engine light is your partner in maintaining this complex system – not an adversary to be defeated or ignored.
Approach check engine light issues with patience, proper tools, and respect for safety. When in doubt, seek professional help. The investment in proper diagnosis and repair pays dividends in reliability, safety, and long-term vehicle value.
Remember that clearing a check engine light is not a repair – it’s the first step in a proper diagnostic and repair process. Use the techniques in this guide responsibly, always prioritize safety, and never hesitate to seek professional help when problems exceed your expertise or comfort level.
For comprehensive diagnostic support and vehicle-specific repair information, explore our extensive collection of technical resources including our Car category for automotive repair manuals and Engine category for engine-specific diagnostic and repair information.
Drive safely, maintain regularly, and remember: your check engine light is there to help you maintain a reliable, safe, and efficient vehicle. Treat it as the valuable diagnostic tool it was designed to be, and it will serve you well throughout your vehicle ownership experience.