A failing clutch pressure plate typically shows symptoms like slipping gears, hard shifting, unusual noises, or burning smells during operation. The pressure plate is a spring-loaded component that clamps the clutch disc against the flywheel to transfer engine power to the transmission. For intermediate DIYers: This repair requires transmission removal and is within reach if you have 2-5 years of mechanical experience, proper tools, and a safe workspace. Key safety consideration: Always use proper lifting equipment and follow manufacturer torque specifications. Professional consultation recommended for hydraulic system bleeding, flywheel resurfacing, or if you encounter unexpected complications. Most pressure plate failures occur between 60,000-100,000 miles and typically require complete clutch assembly replacement for optimal results.

Understanding Your Clutch Pressure Plate
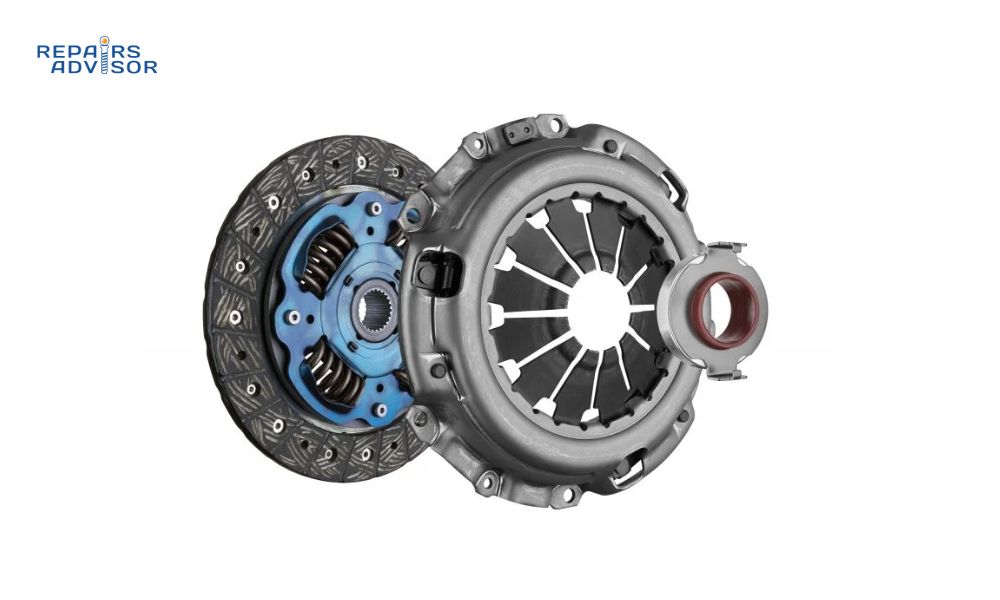
The clutch pressure plate serves as the muscle of your manual transmission system, applying the clamping force necessary to connect your engine’s power to the wheels. When you release the clutch pedal, springs within the pressure plate push it against the clutch disc, sandwiching it between the pressure plate and flywheel. This creates the friction needed to transfer rotating power from your engine to the transmission.
Think of it like a powerful clamp that can instantly engage and disengage. When you press the clutch pedal, you’re actually releasing this clamp, allowing the engine to spin independently from the transmission so you can shift gears smoothly. The entire process happens hundreds of times during normal driving, making the pressure plate one of the hardest-working components in your vehicle.
The Three Main Pressure Plate Types
Understanding which type of pressure plate your vehicle uses helps you make better repair decisions and select appropriate replacement parts.
Diaphragm Pressure Plates are found in most modern vehicles manufactured after 1980. These use a single Belleville spring that looks like a shallow cone with multiple fingers extending inward. The diaphragm design provides smooth engagement with relatively light pedal effort, making it ideal for daily driving. Most intermediate DIYers will encounter this type, and it’s generally the most forgiving to work with during replacement procedures.
Borg & Beck Pressure Plates were commonly used in older GM, Chrysler, and AMC vehicles. These feature multiple coil springs arranged around the pressure plate’s circumference, controlled by three wide levers approximately one inch across. While more durable under extreme conditions, they require significantly more pedal effort and are primarily found in vehicles from the 1960s and 1970s.
Long-Style Pressure Plates originated in Ford muscle cars and remain popular in drag racing applications. These feature weighted levers that provide additional clamping force through centrifugal pressure as engine RPM increases. This means the clutch actually gets stronger at higher speeds, making it excellent for performance applications but potentially challenging for street use.
For most repair scenarios, you’ll be working with diaphragm-style pressure plates, which offer the best balance of performance, reliability, and ease of installation for intermediate-level DIY mechanics.
Recognizing Pressure Plate Problems
Successfully diagnosing pressure plate issues requires understanding both obvious symptoms and subtle warning signs. Early recognition can prevent more expensive damage to related components like the flywheel or transmission.
Primary Warning Signs
Clutch Slipping is often the first noticeable symptom of pressure plate failure. You’ll feel the engine revving higher than normal without a corresponding increase in vehicle speed, particularly when accelerating uphill or under load. This happens when the pressure plate can no longer maintain adequate clamping force against the clutch disc. If you notice a burning smell accompanying the slipping, stop driving immediately – continued operation can damage the flywheel surface and require expensive machining.
Difficult Gear Engagement manifests as hard shifting, especially into first gear and reverse. You might experience grinding noises when attempting to shift, or find that the clutch pedal doesn’t seem to fully disengage the clutch even when pressed to the floor. This symptom often indicates that the pressure plate’s release mechanism isn’t functioning properly, preventing complete separation of the clutch disc from the flywheel.
Unusual Noises and Vibrations can indicate several pressure plate problems. A chattering noise during engagement often means the pressure plate surface has become warped or contaminated. Squealing sounds might indicate problems with the release bearing or pressure plate fingers. Vibrations felt through the clutch pedal typically suggest issues with the pressure plate’s spring system or mounting.
Changes in Pedal Feel are particularly important for intermediate mechanics to recognize. If your clutch pedal suddenly requires much more effort to depress, check the pressure plate’s release mechanism and related linkage. Conversely, a pedal that feels spongy or loose might indicate hydraulic system problems or worn pressure plate components.
Advanced Diagnostic Techniques
For those with intermediate mechanical experience, performing systematic diagnostic procedures can pinpoint the exact nature of pressure plate problems before beginning repair work.
Start with a Visual Inspection of accessible components. Check the clutch master cylinder reservoir for proper fluid level and contamination. Examine the clutch fork boot for tears that might allow contamination of the release bearing area. Look for fluid leaks around the clutch housing that could indicate hydraulic problems or transmission seal failure.
Performance Testing involves evaluating clutch behavior under controlled conditions. Test the clutch engagement point by slowly releasing the pedal while applying gentle throttle. A normal clutch should engage within the middle third of pedal travel. If engagement occurs very high or low in the pedal travel, suspect pressure plate or adjustment problems.
Try the Hill Hold Test if you can safely perform it. On a moderate incline, attempt to hold the vehicle stationary using only the clutch with the transmission in first gear. A healthy pressure plate should allow you to modulate the engagement point smoothly without excessive slipping or immediate stalling.
Professional Tip: Many experienced mechanics use a simple load test where they apply the parking brake firmly and attempt to drive forward in a high gear. A failing pressure plate will often slip noticeably during this test, while a healthy one will simply stall the engine.
Step-by-Step Replacement Process
Replacing a clutch pressure plate requires careful planning, proper equipment, and methodical execution. This procedure is well within the capabilities of intermediate DIY mechanics with adequate preparation and patience.
Essential Safety and Preparation
Critical Safety Warning: Pressure plate replacement requires removing the transmission, which weighs 100-200 pounds depending on your vehicle. Never attempt this repair without proper lifting equipment and adequate workspace. Always use approved jack stands rated for your vehicle’s weight, and never rely solely on hydraulic jacks for support.
Before beginning work, gather these essential tools: a complete metric and standard socket set, multiple lengths of extensions, universal joints, torque wrench capable of 15-150 ft-lbs, transmission jack or equivalent support, clutch alignment tool specific to your vehicle, and appropriate safety equipment including safety glasses and work gloves.
Plan for replacement parts beyond just the pressure plate. Professional mechanics typically recommend replacing the entire clutch assembly as a unit – pressure plate, clutch disc, and release bearing – since labor costs far exceed part costs for this repair. Having the flywheel resurfaced during this process often extends the life of your new clutch significantly.
Transmission Removal Process
Start by disconnecting the battery and removing any access panels or shields that might interfere with transmission removal. Drain the transmission fluid into an appropriate container, and mark or photograph electrical connections before disconnecting them.
Support the engine using an appropriate engine support fixture or jack placed under the oil pan with a protective board. The transmission provides significant support to the engine, so this step is crucial for preventing engine damage during removal.
Remove the driveshaft by marking its relationship to the differential flange for proper reinstallation. Most driveshafts have four bolts connecting them to the rear differential. Support the driveshaft’s weight to prevent damage to the universal joints during removal.
Disconnect all transmission connections systematically, including the shift linkage, speedometer cable (if equipped), hydraulic lines, and electrical connections. Take photographs of complex connections to ensure proper reassembly.
Support and remove the transmission using a transmission jack or equivalent. Remove the transmission-to-engine bolts, typically found around the bellhousing perimeter. Work carefully to maintain alignment as you separate the transmission from the engine – the transmission’s weight can bind the input shaft in the clutch disc if not properly supported.
Clutch Assembly Access and Inspection
With the transmission removed, you’ll have clear access to the clutch assembly. The pressure plate is bolted to the flywheel with typically six to nine bolts arranged in a circular pattern.
Mark the pressure plate position relative to the flywheel before removal. Many pressure plates and flywheels have index marks, but creating your own reference ensures proper balance during reinstallation.
Remove pressure plate bolts gradually in a crossing pattern to prevent warping. Loosen each bolt partially before fully removing any of them. The pressure plate is under spring tension and can bind if removed unevenly.
Inspect the flywheel surface carefully for scoring, heat discoloration, or warping. Minor surface imperfections can often be corrected with resurfacing, but deep scoring or significant heat damage requires flywheel replacement. Check with your local machine shop for specific guidance on your flywheel’s condition.
Examine the old pressure plate for clues about failure causes. Overheating appears as blue discoloration on the pressure surface. Warping can be detected by checking if the pressure plate sits flat on a known surface. Broken or weakened springs are often visible during inspection.
Installation and Final Assembly
Prepare all surfaces thoroughly before installation. Clean the flywheel and pressure plate mounting surfaces with brake cleaner or denatured alcohol. Any oil, grease, or debris will cause premature clutch failure.
Install the new clutch disc using the appropriate alignment tool. The disc typically has “flywheel side” markings to ensure proper orientation. Insert the alignment tool through the disc center and into the pilot bearing to maintain proper positioning during pressure plate installation.
Mount the new pressure plate according to any index marks or balance considerations. Start all bolts by hand before tightening any of them. Follow the manufacturer’s torque specifications and tightening sequence – typically a crossing pattern with incremental torque increases.
Remove the alignment tool only after the pressure plate is fully secured. Test the clutch disc for smooth movement by rotating it by hand – it should turn freely without binding.
Reinstall the transmission by reversing the removal process. Take special care to align the transmission input shaft with the clutch disc center. The transmission should slide into place smoothly without forcing – any binding indicates misalignment that must be corrected.
When to Call a Professional
Understanding your skill limitations protects both your safety and your wallet. Certain aspects of clutch pressure plate service require professional expertise or specialized equipment.
Flywheel machining requires precision equipment found only in professional machine shops. While you can remove and reinstall the flywheel yourself, determining whether it needs resurfacing and performing that work requires professional assessment. Most flywheels can be resurfaced 2-3 times before requiring replacement.
Hydraulic system service can be complex, particularly bleeding procedures that require specific sequences and pressure levels. While basic hydraulic maintenance is within intermediate DIY scope, complex system diagnosis often requires professional tools and experience.
Transmission internal problems discovered during clutch replacement require professional attention. If you find metal debris in the transmission fluid or notice unusual wear patterns on the clutch disc, have a transmission specialist evaluate the situation before proceeding.
For more complex diagnostic procedures or if you’re working on your primary transportation, consider having professional service manuals available for your specific vehicle. These provide manufacturer-specific torque specifications, procedures, and troubleshooting guides that can make the difference between success and costly mistakes.
Troubleshooting Common Post-Installation Issues
Even properly installed clutch pressure plates can exhibit problems if related systems aren’t properly serviced or adjusted.
New Clutch Break-In requires specific driving techniques for the first 500-1000 miles. Avoid heavy acceleration, towing, or mountain driving during this period. The new friction surfaces need time to properly mate, and excessive heat generation during break-in can cause premature failure.
Hydraulic System Bleeding is often necessary after clutch replacement, particularly if hydraulic lines were disconnected. Air in the system can cause spongy pedal feel or incomplete clutch disengagement. Follow manufacturer-specific bleeding procedures, as these vary significantly between vehicles.
Adjustment Verification applies to vehicles with mechanical clutch linkage. Check that the clutch pedal has proper free play – typically 1/2 to 1 inch before resistance is felt. Insufficient free play can cause premature release bearing failure, while excessive free play can prevent complete clutch disengagement.
Cost Analysis and Planning
Understanding the financial aspects of clutch pressure plate replacement helps you make informed decisions about DIY versus professional service.
Parts costs for a complete clutch assembly typically range from $150-400 for most domestic vehicles, with European and performance applications often costing more. While it’s possible to replace only the pressure plate, the minimal additional cost of a complete clutch kit makes this approach economically sensible.
Tool investment can be significant if you don’t already own appropriate equipment. A transmission jack, engine support, and specialized tools might cost $200-500, but these tools serve you for multiple future repairs. Consider borrowing or renting specialized tools for one-time use.
Professional labor for clutch replacement typically ranges from $800-1500, depending on vehicle complexity and regional labor rates. Factor in the learning experience value and personal satisfaction of completing this challenging repair yourself.
Time investment varies greatly with experience level. First-time intermediate mechanics should plan for a full weekend, while experienced DIYers might complete the job in 6-8 hours. Having a backup transportation plan is essential since unexpected complications can extend the timeline.
Maintenance and Prevention
Proper driving techniques and routine maintenance significantly extend clutch pressure plate life and prevent premature failure.
Driving Techniques that preserve clutch life include avoiding “riding the clutch” with your foot resting on the pedal, using proper hill-starting techniques that minimize slipping, and shifting smoothly without excessive engine RPM. Learn to anticipate traffic flow to minimize stop-and-go clutch usage.
Regular Inspection should include checking clutch fluid levels monthly, monitoring engagement point changes that might indicate wear, and paying attention to any changes in pedal feel or operation. Early detection of problems prevents more expensive damage to related components.
Performance Considerations apply if you regularly drive in demanding conditions. Mountain driving, towing, or performance driving may justify upgrading to a heavy-duty pressure plate designed for increased clamping force and heat resistance.
For vehicle-specific maintenance schedules and detailed procedures, consult appropriate service manuals for your vehicle. Different manufacturers have varying recommendations for clutch service intervals and inspection procedures.
Advanced Troubleshooting Scenarios
Experienced intermediate mechanics may encounter complex problems that require systematic diagnostic approaches.
Intermittent Clutch Problems can be particularly challenging to diagnose. Temperature-related issues often indicate internal problems with the pressure plate spring system or hydraulic components that expand or contract with heat. Load-dependent problems might suggest marginal pressure plate capacity that fails only under high stress conditions.
Multiple System Interactions sometimes create confusing symptoms. For example, worn engine mounts can cause vibrations that feel like clutch problems, while transmission input shaft bearing wear can create noises that seem clutch-related. Systematic testing and component isolation help identify the actual problem source.
Performance Modifications require careful consideration of clutch system capacity. Engine modifications that increase torque output may exceed the original pressure plate’s design limits, requiring upgrades to handle additional power. Consult with performance specialists when planning modifications that affect drivetrain components.
For complex diagnostic scenarios, consider accessing professional repair databases that provide manufacturer technical service bulletins and known issue documentation.
Professional Tips and Efficiency Improvements
Experienced mechanics develop techniques that improve both speed and quality of clutch pressure plate service.
Preparation Efficiency involves organizing all tools and parts before beginning work, creating adequate workspace lighting, and having backup plans for unexpected complications. Professional mechanics often keep a “clutch job kit” with all necessary tools and supplies ready for immediate use.
Quality Control Checkpoints throughout the repair process prevent costly mistakes. Verify all torque specifications before final assembly, double-check component orientation and alignment, and test all systems before closing access panels. Taking photographs during disassembly provides valuable references during reassembly.
Common Shortcuts that experienced mechanics use include pre-positioning the transmission jack for efficient removal, using magnetic parts trays to organize small fasteners, and having a helper available for heavy component handling. These techniques reduce both time and physical strain during the repair process.
For additional technical guidance and vehicle-specific procedures, professional-quality repair information provides manufacturer specifications and proven techniques that ensure reliable results.
For additional support during your repair, the comprehensive help center provides troubleshooting guides and technical assistance. When working on specific vehicle brands, access detailed manufacturer repair information to ensure you have the most accurate procedures and specifications.
Remember that while this repair is challenging, it’s well within the capabilities of prepared intermediate mechanics. Take your time, prioritize safety, and don’t hesitate to seek professional consultation when you encounter unexpected complications. The satisfaction of successfully completing this complex repair, combined with the significant cost savings, makes it a worthwhile project for dedicated DIY enthusiasts.
Safety Disclaimer: This information is provided for educational purposes only. Always consult manufacturer-specific repair manuals and follow all safety procedures. If you’re uncertain about any aspect of this repair, seek professional assistance. Repairs Advisor provides technical information only and does not perform direct repair services. Working on vehicle clutch systems involves significant safety risks and should only be attempted by individuals with appropriate mechanical experience and proper equipment.