Picture this: you’ve just filled up your gas tank and are driving home when suddenly your check engine light comes on. A quick scan with your OBD-II reader reveals the dreaded “P0442” code. Before you panic about expensive repairs, take a deep breath – this diagnostic trouble code, while requiring attention, is often one of the easier and more affordable automotive issues to resolve.
Code P0442 indicates a small leak in your vehicle’s Evaporative Emission Control (EVAP) system. This system prevents fuel vapors from escaping into the atmosphere, playing a crucial role in reducing harmful emissions and maintaining environmental compliance. While P0442 won’t leave you stranded on the roadside, ignoring it can lead to failed emissions tests, increased air pollution, and potentially more expensive repairs down the road.
What exactly is Code P0442? This OBD-II diagnostic trouble code specifically identifies a small leak in the EVAP system – typically equivalent to a hole approximately 0.040 inches (1.0mm) in diameter. That’s incredibly small, roughly the size of a pinhole, which explains why these leaks can be challenging to locate without proper diagnostic equipment. The code is generic across all vehicles manufactured from 1996 onward, meaning the same P0442 code appears whether you’re driving a Ford pickup, Toyota sedan, or Chevrolet SUV.
The good news? In our experience analyzing thousands of P0442 cases, approximately 60-70% are resolved with a simple fuel cap inspection or replacement – often costing less than $40. This article will guide you through understanding your EVAP system, diagnosing the root cause, and implementing the right repair solution, whether you’re a DIY enthusiast or planning to work with a professional technician.
Understanding Your Vehicle’s EVAP System
Before diving into diagnosis and repair, it’s essential to understand how your Evaporative Emission Control system works. Think of the EVAP system as your vehicle’s environmental protection network, designed to capture and recycle fuel vapors that would otherwise escape into the atmosphere.
Key System Components
Fuel Tank: The primary source of fuel vapors, your tank constantly generates vapors as gasoline evaporates, especially during temperature changes and vehicle operation.
Charcoal Canister: This component acts as a temporary storage facility for fuel vapors. Activated charcoal pellets inside the canister absorb and hold vapors until the engine can burn them. The canister typically lasts the vehicle’s lifetime but can become saturated or damaged in extreme cases.
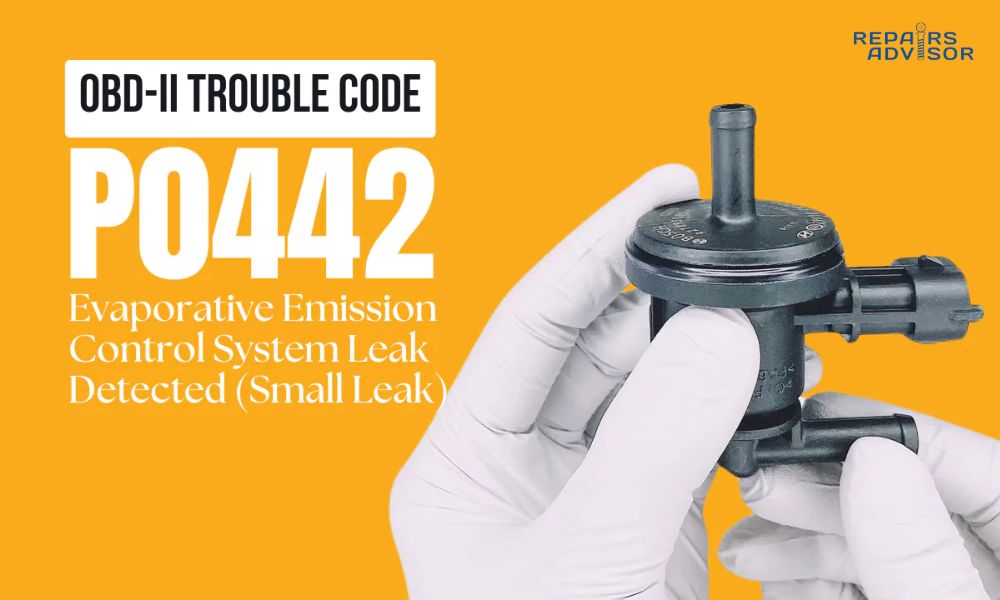
Purge Valve (Canister Purge Solenoid): This electrically controlled valve is normally closed and opens only when commanded by the Engine Control Module (ECM). Located usually near the intake manifold, it controls the flow of stored vapors from the canister into the engine for combustion.
Vent Valve (Canister Vent Solenoid): Positioned near the charcoal canister, often in the rear of the vehicle, this valve is normally open to allow atmospheric pressure into the system. It closes during leak detection tests to seal the system for pressure monitoring.
Fuel Tank Pressure Sensor: This sensor continuously monitors pressure changes within the fuel tank, providing the ECM with real-time data to detect leaks and system malfunctions.
Fuel Cap: More than just a cover, your fuel cap serves as a critical seal point and often includes pressure relief mechanisms. Modern caps are engineered to maintain specific pressure levels while preventing vapor escape.
EVAP Lines and Hoses: A network of rubber hoses and hard plastic lines connects all components, creating a sealed system for vapor transport.
How the System Operates
The EVAP system operates in a continuous cycle that coordinates with your engine’s operation:
- Vapor Collection Phase: As fuel evaporates in your tank, vapors travel through lines to the charcoal canister, where they’re absorbed and stored.
- Purge Cycle: When your engine reaches operating temperature and specific conditions are met, the ECM opens the purge valve, creating vacuum that draws stored vapors into the engine’s intake system.
- Combustion: These vapors mix with incoming air and fuel, burning completely in the combustion chamber – essentially turning waste vapors into useful energy.
- System Monitoring: Throughout this process, the ECM continuously monitors system pressure and component function, ready to detect any irregularities.
Leak Detection Testing
Your vehicle’s computer performs sophisticated leak detection tests, typically during the “engine-off natural vacuum test.” As your vehicle cools after driving, heat from the exhaust system warms the fuel tank, creating vapor expansion. When the system seals properly, this creates measurable pressure changes that the ECM monitors. If a leak exists, pressure dissipates too quickly, triggering the P0442 code.
This testing process is incredibly sensitive – capable of detecting leaks as small as 0.040 inches in diameter. That’s why seemingly minor issues like a loose fuel cap can trigger the code, and why finding the exact leak location often requires professional diagnostic equipment.
Recognizing P0442 Symptoms and Understanding Severity
Unlike engine misfires or transmission problems that announce themselves with obvious performance issues, P0442 is often a “silent” code that reveals itself primarily through your check engine light. Understanding what to expect – and what warrants immediate attention – helps you respond appropriately.
Primary Symptoms
Check Engine Light Activation: This is virtually guaranteed when P0442 sets. The light may appear immediately after refueling (especially if fuel cap-related) or during normal driving as the ECM completes its leak detection testing. Some vehicles may show the light constantly, while others display it intermittently depending on driving conditions.
Fuel Odor Detection: You might notice a faint gasoline smell around your vehicle, particularly near the fuel filler area or inside the cabin with windows down. This odor is typically mild with small leaks – if you detect strong fuel smells, this indicates a more serious problem requiring immediate professional attention.
Minimal Performance Impact: Unlike many other diagnostic codes, P0442 rarely affects how your vehicle runs. You shouldn’t experience rough idle, stalling, or acceleration problems directly from this code.
Secondary Symptoms
Slight Fuel Economy Reduction: Some drivers report a minor decrease in gas mileage, though this is often so subtle it’s difficult to measure without careful tracking.
Rough Idle (Rare): Only occurs if the leak is significant enough to create a vacuum leak affecting engine operation – this is uncommon with P0442 specifically.
Failed Emissions Testing: This is often how drivers first discover their P0442 code, as emissions testing equipment detects the malfunction before the owner notices any symptoms.
Severity Assessment and Safety Considerations
Immediate Safety Level: Low – P0442 poses minimal immediate risk to vehicle safety or operation. You can typically continue driving normally while planning your repair approach.
Environmental Impact: Moderate – While the leak is small, it contributes to air pollution by releasing unburned hydrocarbons into the atmosphere. From an environmental responsibility standpoint, timely repair is important.
Long-term Vehicle Health: Low to Moderate – Left unaddressed, small leaks can potentially worsen over time, though this progression is usually gradual. The primary risk is failing required emissions testing.
When to Seek Immediate Professional Help
Strong Fuel Odors: If you smell gasoline strongly inside your vehicle or notice fuel odors that seem to be getting worse, stop driving and consult a professional immediately. This may indicate a more serious leak or safety hazard.
Multiple Related Codes: If your scan reveals P0442 along with codes like P0440, P0441, P0446, or P0455, this suggests more complex EVAP system problems that benefit from professional diagnosis.
Liquid Fuel Leakage: Any visible fuel leakage requires immediate attention and should not be ignored or delayed.
For most straightforward P0442 cases, you have time to research, gather tools, and approach the repair methodically without safety concerns.
Most Common Causes of Code P0442
Understanding the typical failure patterns helps you prioritize your diagnostic approach and manage repair costs effectively. Based on extensive automotive repair data, certain causes account for the vast majority of P0442 codes.
The Leading Culprit: Fuel Cap Issues (60-70% of Cases)
Loose Fuel Cap: This is by far the most common cause. Many drivers don’t turn their fuel cap until they hear the clicking sound that indicates proper sealing. Even one or two clicks short of full tightness can create enough of a leak to trigger P0442.
Worn Cap Seal: The rubber gasket inside your fuel cap naturally deteriorates over time, especially in extreme temperatures. UV exposure, ozone, and normal aging cause the rubber to harden, crack, or lose its flexibility, preventing proper sealing.
Damaged Cap Mechanism: The internal check valve or pressure relief mechanisms can fail, disrupting the cap’s ability to maintain proper system pressure.
Incorrect Cap Type: Using an aftermarket cap that doesn’t meet your vehicle’s specific pressure requirements can cause persistent P0442 codes even when properly installed.
What to Look For:
- Cracks in the rubber seal (even hairline fractures matter)
- Hardened or brittle rubber that doesn’t compress properly
- Missing or damaged internal components
- Fuel staining around the cap threads indicating poor sealing
Purge Valve Failures (15-20% of Cases)
The canister purge valve, also called the purge solenoid, is an electrically controlled component that experiences regular cycling during normal operation. Over time, these valves can fail in several ways:
Stuck Open Position: When the purge valve fails to close completely, it creates a continuous vacuum leak. This is particularly common in vehicles with higher mileage where internal seals deteriorate.
Stuck Closed Position: A valve that won’t open prevents proper purge function, though this typically triggers different codes like P0441 rather than P0442.
Internal Seal Leakage: The valve may operate electrically but develop internal leaks that allow vapor to escape when it should be sealed.
Electrical Connection Problems: Corrosion or loose connections can prevent proper valve operation, though this usually sets electrical fault codes rather than P0442.
Location and Testing: Purge valves are typically located in the engine bay, often mounted on or near the intake manifold for easy vacuum line connection. You can perform a basic test by disconnecting the valve and attempting to blow through it – when unpowered, the valve should block airflow completely.
Vent Valve Malfunctions (10-15% of Cases)
The canister vent valve (also called the vent solenoid or CVS) is normally open to allow atmospheric pressure into the system. It closes only during leak detection tests to seal the system for monitoring.
Common Failure Modes:
- Contamination: Dirt, debris, or water can prevent proper valve sealing
- Internal Corrosion: Especially problematic in areas with road salt exposure
- Electrical Failure: The solenoid mechanism can fail due to age or environmental exposure
Manufacturer-Specific Issues: General Motors issued service bulletins addressing vent solenoid problems in certain 2011-2013 Chevrolet, Buick, and Cadillac models. These vehicles commonly develop P0442 codes due to leaking vent solenoids that must be tested under vacuum and replaced if defective.
Less Common but Important Causes
EVAP Hose Deterioration: Rubber hoses throughout the system can develop pinhole leaks, especially those exposed to engine heat or road debris. Common failure points include hoses near the exhaust system and connection points where movement causes wear.
Charcoal Canister Problems: While rare, canisters can crack or become internally damaged. Overfilling your fuel tank (continuing to pump after the automatic shutoff) can flood the canister with liquid fuel, potentially causing damage.
Fuel Tank and Filler Neck Issues: Corrosion of the filler neck, particularly where the fuel cap seals, can prevent proper system sealing. Toyota issued service bulletins for 2003-2004 Corolla and Matrix models specifically addressing filler neck corrosion leading to P0442 codes.
Fuel Tank Pressure Sensor: A malfunctioning sensor can provide incorrect readings to the ECM, though this typically sets different diagnostic codes.
Brand-Specific Patterns
Ford Vehicles: Often show a progression from P1450 (unable to bleed up fuel tank vacuum) to P0442, typically indicating purge valve degradation.
Mazda 5 Minivans: Commonly develop vent valve leaks, with the vent valve located near the rear subframe requiring professional access for replacement.
GM Trucks (Silverado/Sierra): Service bulletins recommend replacing vent valve solenoid assemblies and adding filter boxes for certain model years experiencing recurring P0442 codes.
Understanding these patterns helps focus your diagnostic efforts and provides realistic expectations for repair complexity and cost.
Professional Diagnostic Procedures
Professional automotive technicians follow systematic diagnostic procedures that maximize efficiency while ensuring accurate problem identification. Understanding these processes helps you communicate effectively with service providers and make informed decisions about DIY versus professional repair approaches.
Essential Professional Equipment
Advanced OBD-II Scanners: Professional-grade scanners provide bi-directional communication with your vehicle’s ECM, allowing technicians to command EVAP system components on and off while monitoring real-time pressure data. This capability far exceeds basic code readers in diagnostic power.
Automotive Smoke Machines: These specialized tools introduce visible smoke into the EVAP system under controlled pressure, making even tiny leaks visible to the naked eye. Professional smoke machines use mineral oil-based smoke that’s safe for automotive systems and won’t contaminate components.
Digital Multimeters: For electrical testing of solenoids, sensors, and wiring harnesses. Professional multimeters offer automotive-specific functions like duty cycle measurement and component testing capabilities.
Vacuum Pumps: Hand-operated or electric vacuum pumps allow technicians to test individual components like purge valves and vent valves in isolation from the complete system.
Step-by-Step Professional Diagnosis
Phase 1: Code Verification and System Analysis
Experienced technicians begin with comprehensive code scanning, looking not just for P0442 but for related codes that provide diagnostic clues:
- P0440 (General EVAP Malfunction): Often accompanies P0442 and suggests broader system issues
- P0441 (Purge Flow Fault): May indicate the same failed purge valve causing P0442
- P0446 (Vent System Fault): Points toward vent valve problems
- P0456 (Very Small Leak): Some manufacturers use this instead of P0442 for similar-sized leaks
Freeze frame data reveals environmental conditions when the code set – temperature, engine load, fuel level, and vehicle speed. This information helps technicians understand whether the leak is consistent or occurs only under specific conditions.
Phase 2: Systematic Visual Inspection
Professional diagnosis always begins with the most common cause: fuel cap inspection. Even experienced technicians check this first because it’s quick, inexpensive to address, and resolves the majority of cases.
The inspection extends to all visible EVAP components:
- Vacuum lines for obvious cracks, disconnections, or heat damage
- Electrical connections for corrosion or looseness
- Component mounting for physical damage
- Areas where lines pass near heat sources or moving parts
Phase 3: Smoke Testing Protocol
When visual inspection doesn’t reveal obvious problems, professional smoke testing provides definitive leak location:
- System Preparation: The fuel cap is removed and replaced with a smoke machine adapter
- Pressurization: Smoke is introduced into the system at controlled pressure (typically 0.5-1.0 PSI)
- Leak Detection: Technicians systematically inspect all EVAP components and lines for visible smoke escape
- Documentation: Leak locations are marked and photographed for repair planning
Safety Note: Professional smoke testing requires proper ventilation and fire safety precautions, as the process involves introducing substances into fuel system components.
Phase 4: Component-Specific Testing
Individual components are tested to verify their operation:
Purge Valve Testing:
- Vacuum hold test (valve should maintain vacuum when closed)
- Electrical resistance measurement (typically 14-50 ohms)
- Command operation using scan tool (valve should open/close on command)
Vent Valve Testing:
- Airflow verification (should allow airflow when unpowered)
- Vacuum operation (should seal when powered)
- Electrical circuit verification
Pressure Sensor Validation:
- Live data monitoring during system operation
- Comparison with known good values
- Response testing during simulated leak conditions
Professional Diagnostic Time Investment
Standard Diagnosis: 1-2 hours for most P0442 codes Complex Cases: 2-4 hours when multiple components are involved or access is difficult Smoke Testing: Adds 30-60 minutes but often saves time by pinpointing exact leak locations
Professional vs. DIY Diagnostic Advantages
Professional Advantages:
- Specialized equipment unavailable to most DIYers
- Pattern recognition from experience with thousands of similar cases
- Access to manufacturer service bulletins and technical databases
- Ability to test individual components in isolation
- Time efficiency through systematic approaches
DIY Limitations:
- Lack of smoke testing equipment (aftermarket versions available but expensive)
- Limited ability to command system components
- Difficulty accessing components in tight spaces
- Time investment learning system operation and testing procedures
Most professional shops charge diagnostic fees of $100-$150, which can be cost-effective compared to purchasing specialized equipment for one-time use. However, if you enjoy automotive work and plan to maintain your vehicle long-term, basic diagnostic tools can be worthwhile investments.
DIY Troubleshooting and Repair Guide
For mechanically inclined vehicle owners, P0442 diagnosis often provides an excellent entry point into EVAP system understanding. The key to successful DIY diagnosis lies in starting with the most common causes and progressing systematically through increasingly complex possibilities.
Essential Safety Precautions
Fire Safety: Never smoke or allow open flames near your vehicle during EVAP system work. Fuel vapors are highly flammable, and even small leaks can create hazardous conditions in enclosed spaces.
Ventilation: Work in well-ventilated areas, preferably outdoors or in garages with open doors. Fuel vapor accumulation in enclosed spaces poses both fire and health risks.
Personal Protection: Wear safety glasses when working under the hood, and consider nitrile gloves when handling fuel system components to protect against skin contact with gasoline residue.
When to Stop: If you detect strong fuel odors at any point during your diagnosis, discontinue work immediately and seek professional assistance. Strong odors may indicate larger leaks or safety hazards beyond the scope of DIY repair.
Step 1: The Fuel Cap Solution (Resolves 60-70% of Cases)
Required Materials: None initially – just your hands and eyes Time Investment: 5-10 minutes Success Rate: Extremely high for cap-related issues
Detailed Inspection Process:
Begin by completely removing your fuel cap and examining it in good lighting. Look for these specific failure indicators:
Rubber Seal Assessment:
- Run your finger around the rubber gasket, feeling for cracks, hardness, or rough spots
- Gently flex the rubber – it should be pliable, not brittle or cracking
- Check for fuel staining or residue that indicates poor sealing
- Look for embedded debris or contamination in the seal surface
Cap Mechanism Check:
- If your cap has a ratcheting mechanism, test the clicking function
- Ensure the cap turns smoothly without binding or resistance
- Check that internal pressure relief mechanisms (if visible) aren’t damaged or stuck
Thread and Filler Neck Inspection:
- Examine cap threads for damage, cross-threading, or wear
- Inspect the filler neck threads for corrosion, especially if you live in an area with road salt
- Look for rust or corrosion around the sealing surface where the cap gasket contacts
Reinstallation Test:
- Thread the cap on smoothly without forcing
- Turn until you hear distinct clicking sounds (usually 3-4 clicks)
- The cap should stop turning easily when properly seated
- Check that the cap sits flush against the filler neck
Code Clearing and Verification: After proper cap installation, use an OBD-II scanner to clear the P0442 code. Drive normally for 2-3 days, allowing the ECM to complete its EVAP system monitoring. If the code doesn’t return, your problem is solved for less than 10 minutes of effort.
When Cap Replacement is Needed: If your inspection reveals seal damage, mechanism problems, or if proper installation doesn’t resolve the code after several days, replace the fuel cap. Always use OEM or OEM-equivalent caps – aftermarket caps may not meet your vehicle’s specific pressure requirements, leading to persistent codes even when properly installed.
Step 2: Visual System Inspection
Required Tools: Flashlight, basic hand tools Time Investment: 20-40 minutes Focus Areas: Accessible EVAP components and connections
Engine Bay Inspection:
Purge Valve Location and Assessment: Most purge valves are located in the engine bay for accessibility. Common locations include:
- Mounted on or near the intake manifold
- Attached to the firewall or fender well
- Connected to the throttle body area
What to Examine:
- Electrical connector security and corrosion
- Vacuum line connections (should be tight and undamaged)
- Valve mounting (check for cracks in plastic housing)
- Surrounding area for fuel staining or odors
EVAP Line Inspection: Follow visible vacuum lines and hard plastic tubes throughout the engine bay:
- Look for obvious cracks, especially where lines bend or connect
- Check for disconnected lines (common after other service work)
- Examine areas where lines pass near heat sources
- Feel along lines for soft spots or deterioration
Undercar Accessible Components: While a full undercar inspection requires lifting the vehicle, you can check some components:
- Look for obviously damaged lines near the fuel tank area
- Check for fuel staining or strong odors that might indicate larger leaks
- Examine any visible EVAP components for physical damage
Step 3: Basic Component Testing
Purge Valve Function Test: Required Tools: None (basic airflow test) Safety Note: Use a clean shop rag or paper towel as a barrier – never put your mouth directly on automotive components
- Locate and Access: Find your purge valve and disconnect the electrical connector
- Airflow Test: With the valve unpowered, attempt to blow through it (through a clean barrier)
- Expected Result: You should NOT be able to blow air through an unpowered purge valve
- Reconnection: Reconnect the electrical connector when testing is complete
If the valve allows airflow when unpowered, it’s likely failed and needs replacement.
Electrical Connection Assessment: Check all accessible electrical connections for:
- Corrosion (green or white deposits)
- Loose connections that can be wiggled by hand
- Damaged wire insulation
- Proper connector seating
DIY Repair Capabilities and Limitations
Suitable for DIY:
- Fuel cap replacement (simple and inexpensive)
- Basic hose replacement if damage is obvious and accessible
- Purge valve replacement (moderate difficulty, usually accessible)
- Electrical connection cleaning and tightening
Professional Help Recommended:
- Smoke testing (requires specialized equipment)
- Vent valve replacement (often requires vehicle lifting and complex access)
- Fuel tank or filler neck work (safety and complexity concerns)
- Wiring diagnosis beyond basic connection checks
Cost-Effective Prevention Strategy
Immediate Actions:
- Check and properly tighten fuel cap at every refueling
- Include EVAP lines in monthly under-hood inspection
- Address fuel odors immediately rather than ignoring them
Annual Prevention Budget:
- $15-$40 for preventive fuel cap replacement
- $50-$100 for professional EVAP system inspection (if desired)
- Significantly less than $200-$600 repair costs for failed components
Long-term Value: Preventive maintenance typically costs 20-30% of reactive repairs while providing better reliability and avoiding the inconvenience of unexpected check engine lights or failed emissions tests.
Related Codes and Troubleshooting Context
Understanding codes related to P0442 helps you recognize patterns and prioritize diagnostic efforts when multiple codes appear simultaneously. EVAP system codes often appear in clusters, providing valuable diagnostic information about the nature and location of system problems.
Commonly Associated EVAP Codes
P0440 – EVAP System Malfunction (General) This broad diagnostic code often appears alongside P0442, indicating the ECM has detected EVAP system problems but cannot specify the exact nature or location. When both codes appear together, focus on P0442 diagnosis first, as resolving the specific leak often clears the general malfunction code.
P0441 – EVAP Purge Flow Fault This code indicates problems with vapor flow from the charcoal canister to the engine during purge cycles. When P0441 appears with P0442, suspect purge valve problems that affect both sealing (causing leaks) and flow control (causing purge faults). A single failed purge valve can trigger both codes.
P0446 – EVAP Vent System Fault Focusing on the vent valve circuit, this code often accompanies P0442 when vent valve problems prevent proper system sealing during leak detection tests. The combination suggests vent valve replacement rather than pursuing other leak sources.
P0455 – EVAP System Large Leak When P0455 appears with or progresses from P0442, it indicates leak deterioration – a small leak has become larger over time. This progression emphasizes the importance of addressing P0442 promptly rather than delaying repairs.
P0456 – EVAP System Very Small Leak Some manufacturers use P0456 instead of P0442 for similar-sized leaks. The diagnostic and repair approaches are identical; only the code number differs based on manufacturer preference.
Code Progression Patterns
P1450 → P0442 (Ford Pattern) Ford vehicles commonly display P1450 (Unable to Bleed Up Fuel Tank Vacuum) before progressing to P0442. This pattern typically indicates purge valve degradation – the valve begins failing intermittently (P1450) before developing consistent leakage (P0442).
Multiple Simultaneous EVAP Codes When scan tools reveal several EVAP codes simultaneously, this usually indicates:
- Major component failure affecting multiple system functions
- Electrical problems affecting system control
- Large leaks that disrupt normal system operation
- Need for comprehensive professional diagnosis rather than component-by-component troubleshooting
Manufacturer-Specific Code Behavior
General Motors Vehicles: GM vehicles may display P0442 along with manufacturer-specific codes like P0496 (EVAP Flow During Non-Purge). These combinations often point to vent solenoid problems, particularly in 2011-2013 model years covered by service bulletins.
Toyota/Lexus Vehicles: Toyota vehicles commonly show P0442 with P0441 when filler neck corrosion affects sealing. The combination provides strong indication to inspect filler neck condition rather than focusing solely on cap or valve components.
European Vehicles: BMW, Mercedes, Audi, and other European manufacturers may use different leak size thresholds, causing P0442 to appear for slightly different leak sizes than domestic vehicles. The diagnostic approach remains similar, but leak detection sensitivity may vary.
Diagnostic Strategy for Multiple Codes
Priority Approach:
- Address P0442 first – specific leak codes provide more diagnostic value than general malfunction codes
- Clear all codes after repair – determine if additional codes return independently
- Retest system operation – verify comprehensive repair rather than partial fixes
System Integration Considerations: EVAP codes sometimes appear with unrelated codes due to shared sensors or electrical circuits. For example, fuel tank pressure sensors may affect both EVAP system monitoring and fuel gauge operation.
Professional vs. DIY Decision Framework
Choosing between professional diagnosis and DIY troubleshooting depends on multiple factors beyond just cost considerations. Understanding your specific situation, available resources, and risk tolerance helps optimize your approach to P0442 resolution.
Choose DIY Approach When:
Favorable Conditions Exist:
- You own basic automotive tools and OBD-II scanner
- The vehicle is accessible for safe work (good lighting, level surface)
- You have 2-4 hours available for systematic diagnosis
- Strong fuel odors are NOT present (safety consideration)
- You enjoy automotive troubleshooting and learning
Cost-Benefit Factors:
- Professional diagnostic fees ($100-$150) represent significant portion of your repair budget
- You plan to maintain the vehicle long-term and investment in tools provides future value
- You have successfully completed similar automotive maintenance tasks
Learning Objectives:
- You want to understand your vehicle’s EVAP system operation
- Building automotive diagnostic skills is personally valuable
- You have access to reliable technical information and guidance
Choose Professional Approach When:
Safety Concerns Present:
- Strong fuel odors detected inside or outside vehicle
- Visible fuel leakage of any amount
- Multiple complex diagnostic codes present
- You’re uncomfortable working around fuel system components
Efficiency Considerations:
- Limited time available for diagnostic work
- Professional diagnosis cost is reasonable compared to your hourly value
- Vehicle is needed for daily transportation and downtime must be minimized
- Previous DIY attempts have been unsuccessful
Technical Limitations:
- No access to smoke testing equipment
- Limited automotive experience or tool availability
- Vehicle requires specialized access procedures (lifting, component removal)
- Warranty considerations prefer professional documentation
Hybrid Approach Strategy
Many successful P0442 resolutions use a combined approach that optimizes both cost and efficiency:
Phase 1: DIY Basic Checks (1-2 hours)
- Fuel cap inspection and replacement if necessary
- Basic visual inspection of accessible components
- Code clearing and short-term monitoring
Phase 2: Professional Diagnosis (if Phase 1 unsuccessful)
- Smoke testing for precise leak location
- Component testing with professional equipment
- Repair recommendation with cost estimates
Phase 3: DIY Repair (if appropriate)
- Simple component replacement (cap, accessible hoses)
- Using professional diagnosis to guide parts purchase
- Professional verification if desired
This approach often provides the best cost-effectiveness by eliminating the most common causes through DIY effort while utilizing professional expertise for complex diagnosis.
Risk Assessment Considerations
DIY Risks:
- Time investment without guaranteed success
- Potential for incorrect diagnosis leading to unnecessary parts replacement
- Safety risks if proper precautions aren’t followed
- Possible warranty implications for some vehicles
Professional Service Risks:
- Higher immediate cost even for simple problems
- Potential for over-diagnosis or unnecessary additional work
- Scheduling delays for non-emergency repairs
- Communication challenges in explaining desired repair scope
Decision Tree Framework
- Start with fuel cap check (always appropriate for DIY)
- If cap replacement doesn’t resolve code:
- Strong fuel odors present → Professional immediately
- Multiple codes present → Professional diagnosis recommended
- Single P0442 code → Continue DIY if comfortable
- If basic DIY unsuccessful → Professional diagnosis
- Use professional diagnosis to guide repair decision:
- Simple accessible repairs → DIY acceptable
- Complex or safety-related repairs → Professional completion
This systematic approach maximizes your chance of cost-effective resolution while maintaining appropriate safety margins and realistic expectations for DIY capabilities.
Conclusion and Key Takeaways
Code P0442 represents one of the most manageable diagnostic trouble codes you might encounter, with straightforward diagnostic approaches and often inexpensive solutions. Understanding this code empowers you to respond appropriately without panic while making informed decisions about repair approaches that match your situation, skills, and budget.
Essential Points to Remember
P0442 Indicates Environmental, Not Safety Emergency: This small EVAP system leak primarily affects emissions compliance rather than vehicle safety or immediate drivability. While the issue requires attention, you typically have time to research options, gather tools, and plan your repair approach methodically.
The 60-70% Solution: Most P0442 codes stem from fuel cap issues – either improper installation or seal deterioration. Always start your diagnosis here, as a $15-$40 fuel cap replacement resolves the majority of cases with minimal time investment.
Professional Tools Make Complex Diagnosis Efficient: While DIY approaches work well for common causes, professional smoke testing and bi-directional scan tools provide significant advantages for unusual or complex cases. The $100-$150 diagnostic fee often proves cost-effective compared to prolonged DIY troubleshooting.
Prevention Pays Long-Term Dividends: Proper refueling techniques, regular fuel cap inspection, and prompt attention to fuel odors prevent most EVAP system problems. Preventive maintenance costs significantly less than reactive repairs while avoiding the inconvenience of unexpected check engine lights.
Recommended Action Plan
Immediate Steps:
- Verify the code with OBD-II scanner and check for additional related codes
- Inspect and test fuel cap – tighten properly or replace if damaged
- Clear codes and monitor for 2-3 days of normal driving
- If code returns, proceed with visual inspection of accessible EVAP components
Short-Term Strategy:
- DIY diagnosis if you have basic tools, time, and mechanical comfort
- Professional diagnosis if safety concerns exist or DIY efforts prove unsuccessful
- Address promptly rather than delaying, especially if emissions testing is required
Long-Term Prevention:
- Maintain proper refueling habits (tighten cap until clicking stops)
- Include EVAP system in routine maintenance awareness
- Replace fuel cap preventively every 75,000-100,000 miles
- Address fuel odors immediately rather than ignoring potential problems
Cost Management Success Strategy
Start with the least expensive solution (fuel cap check/replacement) and escalate systematically only if needed. This approach typically resolves P0442 codes for under $40, while still providing a logical path to professional diagnosis if the simple solution doesn’t work.
Budget Planning:
- DIY Budget: $50-$150 (scanner, cap, basic parts)
- Professional Budget: $200-$400 for most P0442 repairs
- Complex Cases: $500-$800 for major component replacement
Environmental and Community Responsibility
Properly functioning EVAP systems significantly reduce hydrocarbon emissions that contribute to air pollution and smog formation. Timely P0442 repair demonstrates environmental stewardship while ensuring your vehicle meets legal emissions requirements.
Community Impact: Your properly maintained EVAP system contributes to better air quality for everyone, particularly important in areas with air quality challenges or high vehicle density.
Final Safety Emphasis
While P0442 typically poses minimal immediate risk, never ignore strong fuel odors or visible fuel leakage. These symptoms may indicate more serious problems requiring immediate professional attention for safety reasons.
Safety Protocol: If you detect strong gasoline odors inside your vehicle or see any liquid fuel leakage, discontinue driving and consult a qualified automotive professional immediately. Safety always takes priority over cost considerations or repair convenience.
Understanding P0442 empowers you to respond confidently and appropriately, whether you choose DIY diagnosis or professional service. Most importantly, you now know this common code typically represents a manageable problem with straightforward solutions rather than a cause for panic or expensive complications.
With proper approach and realistic expectations, resolving P0442 can be both educational and cost-effective, building your automotive knowledge while maintaining your vehicle’s environmental compliance and reliability.
Need additional technical guidance? For comprehensive repair manuals and diagnostic procedures specific to your vehicle make and model, explore our extensive collection of automotive service manuals. Our technical documentation provides detailed step-by-step procedures, wiring diagrams, and manufacturer specifications to support both professional technicians and dedicated DIY enthusiasts.
For more diagnostic code information and troubleshooting guides, visit our Diagnostics & Troubleshooting section, featuring comprehensive coverage of common automotive issues and their solutions.
Disclaimer: This information is provided for educational purposes only. Implement diagnostic and repair procedures at your own risk and responsibility. When in doubt about safety procedures or technical complexity, consult qualified automotive professionals. Always prioritize safety over cost considerations.